Configuring the GL-AR300M16 as a Routed Client
In some cases, the WAN connection for the router may not be provided via ethernet cable and a WWAN connection will need to be performed so the router can get Internet access via an existing wireless network at the installation site.
Configure the Network
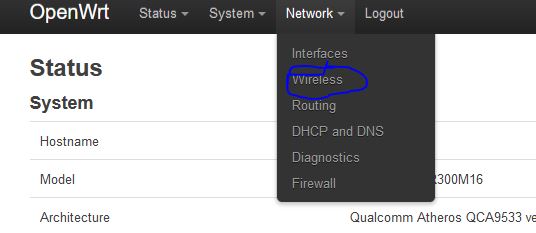
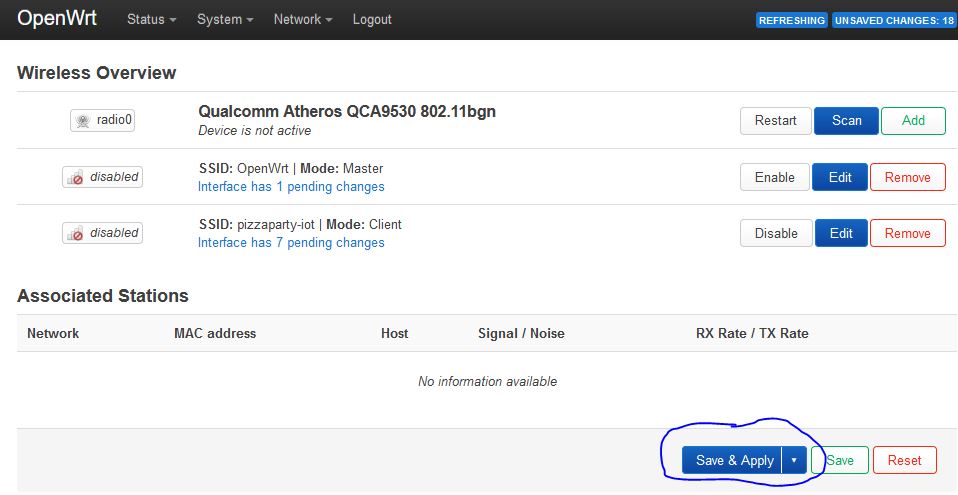
Login to the router at https://192.168.1.1/ and proceed to Network –> Wireless.
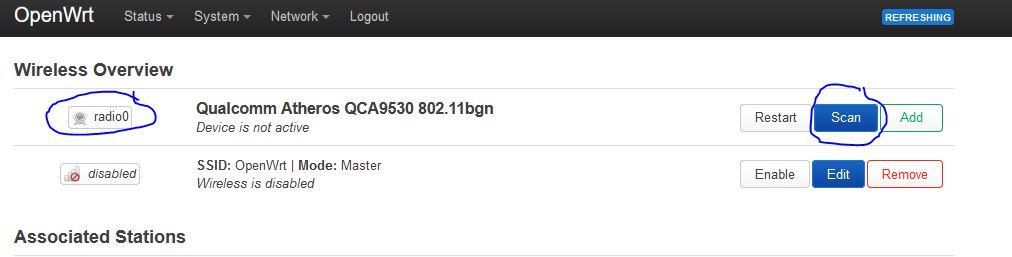
Here you will see an entry for radio0, now press the Scan button to get a list of available wireless networks.
Find the one you would like to use and press the Join Network button next to it.

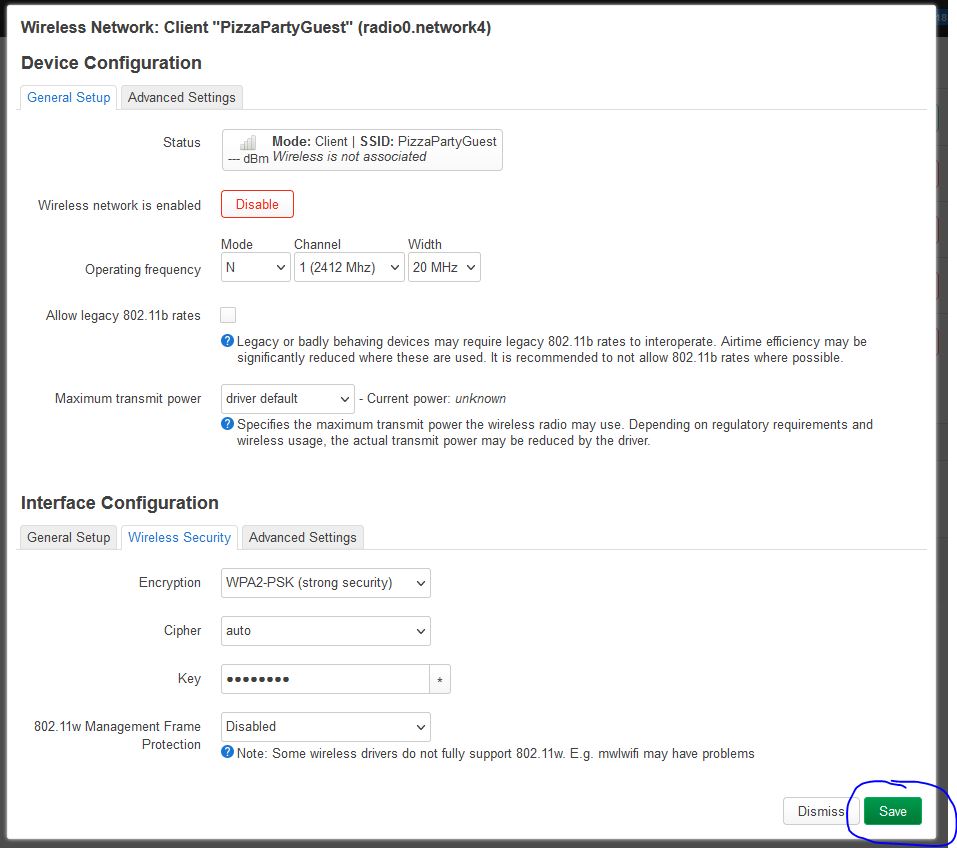
On the Joining Network dialog, check the box for Replace wireless configuration, ensure the network name is wwan and enter the passphrase to access the network. In Create / Assign firewall-zone, be sure that the wan zone is selected before pressing the Submit button.

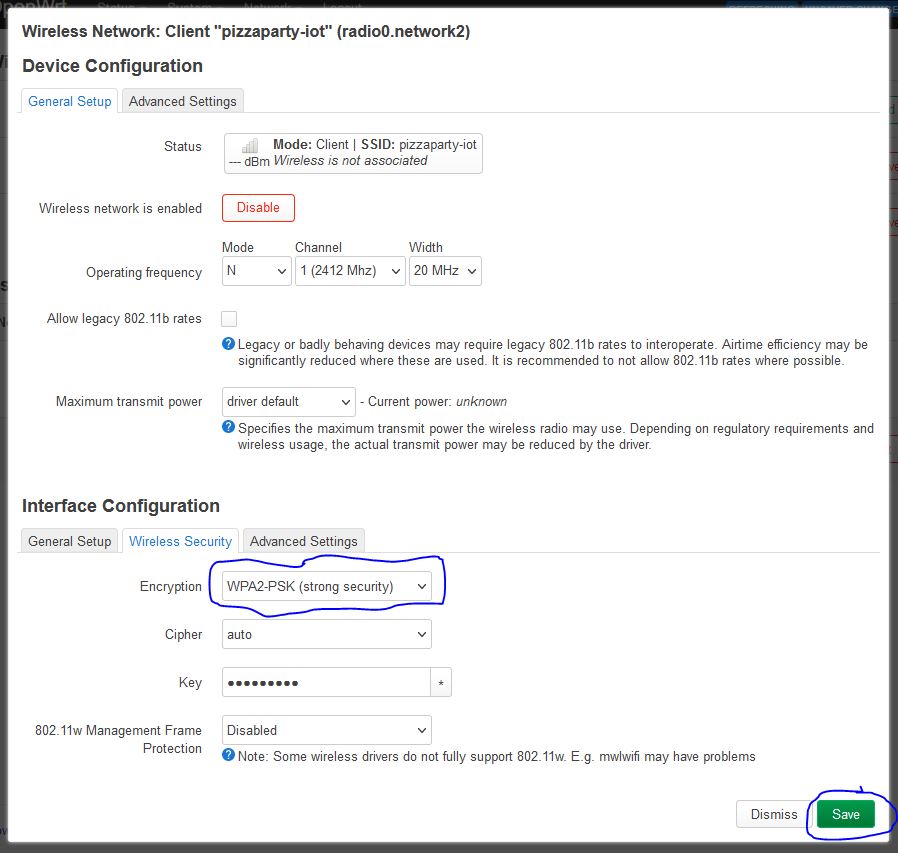
On the following dialog the defaults should be enough to establish connection, so press the Save button. In some cases you may need to edit the Wireless Security section to ensure the proper encryption is set.
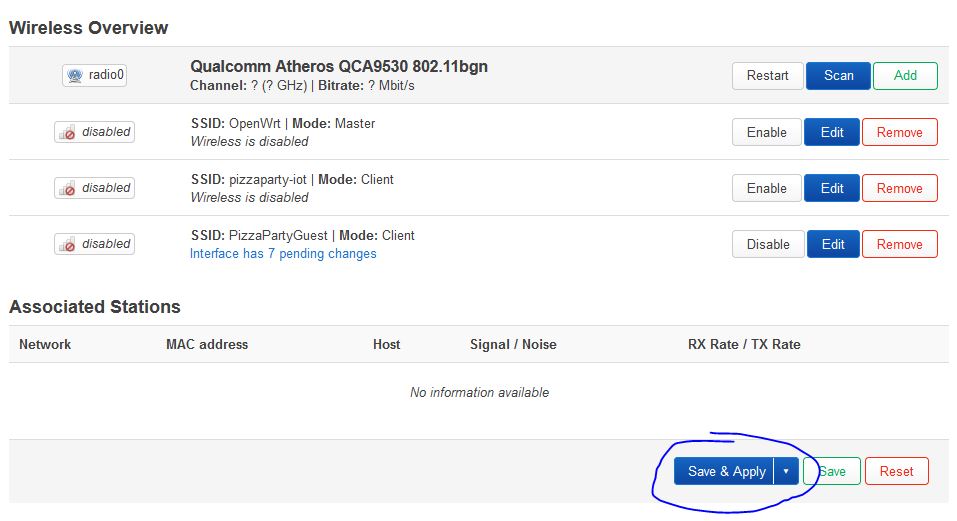
After the dialog closes, press the Save & Apply button and after a few seconds of waiting the router should connect to the network and display connection status in the Associated Stations section of the page.
Add a Second Network
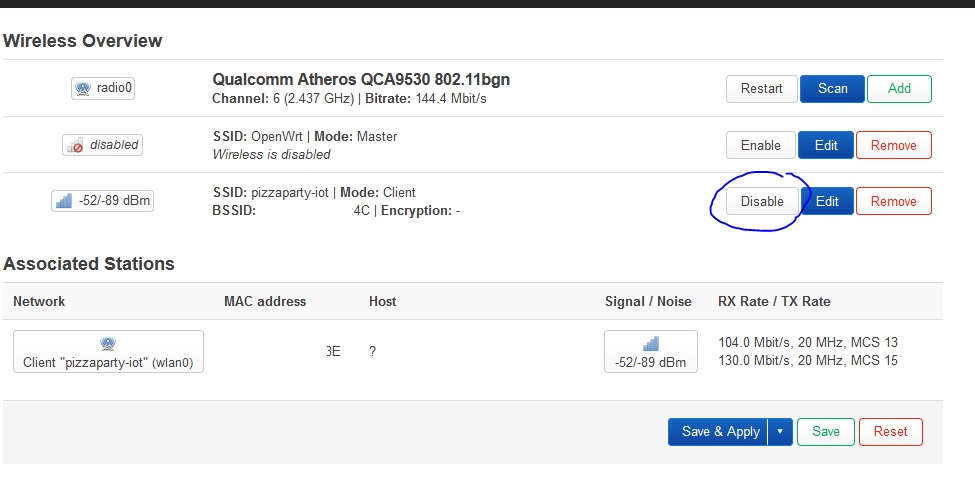
If you want to have multiple WWAN networks defined, proceed to Network –> Wireless.
Scroll down to any currently enabled WWAN network and press the Disable button next to it.
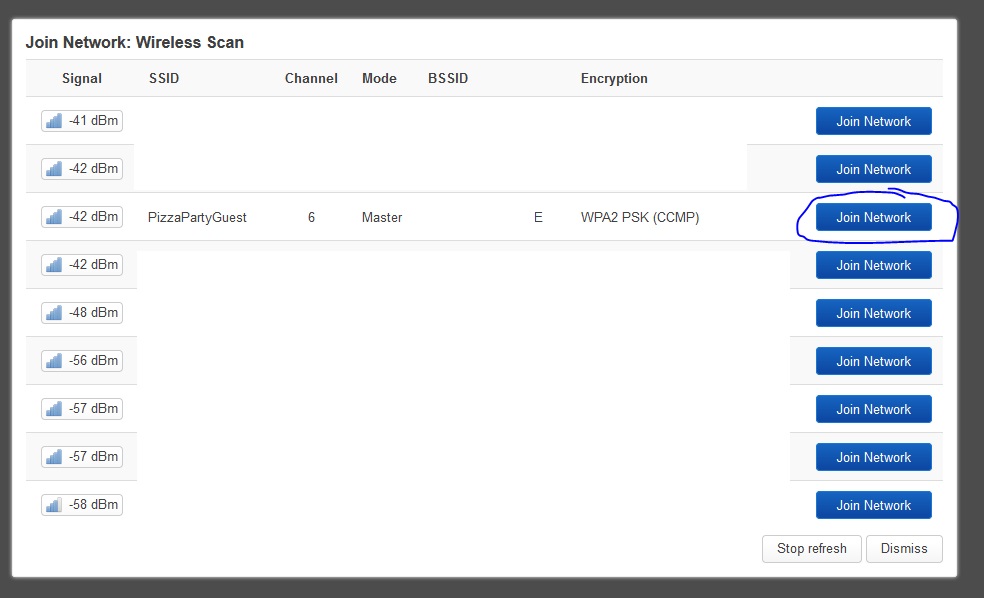
Now press the Scan button next to the entry for radio0.

Find the new wireless network you want to connect to and press the Join Network button to the right of it.
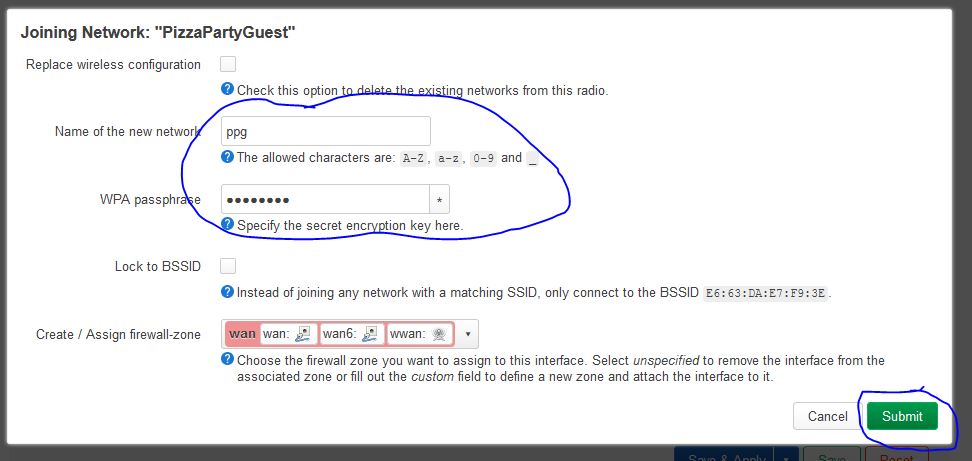
In the resulting dialog, enter a name in the Name of the new network field and enter the network password in the WPA passphrase field before pressing the Submit button.
In the next dialog, press the Save button.
Back on the Wireless Overview page, press the Save & Apply button.
The new network should connect!
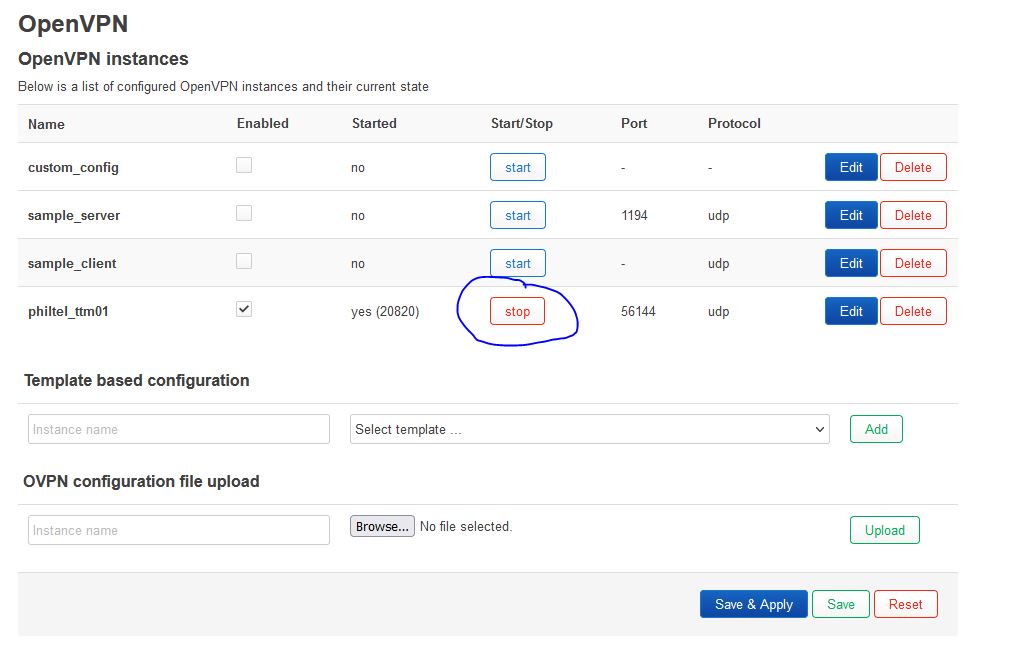
If you already have OpenVPN running during this step, you will want to either power cycle the router, or by stopping and starting the OpenVPN connection. To do the latter, navigate to VPN –> OpenVPN.
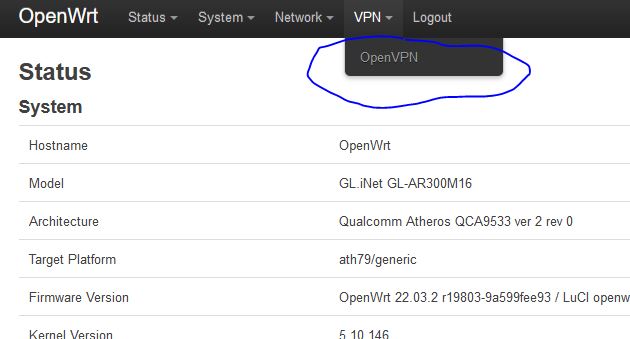
On the OpenVPN page, press the stop button in the row for our OpenVPN instance. After it has stopped, press the start button that will replace it in the same row.