Wall Mounting A Payphone
Installing a payphone on a wall can be a tricky task, and it is worth sharing the process to help others that want to do the same. Here, we are focusing on installing a phone indoors, utilizing a metal or wooden stud. Installing a phone on an exterior wall has additional factors to consider such as a phone enclosure and weatherproofing (and we haven’t done an outdoor install yet). We haven’t installed a payphone on masonry, but if you’re going to attempt that you can likely follow most of this guide and substitute masonry anchors in place of any other anchor type we specify.
To install a payphone on a wall, you will need the following tools and supplies:
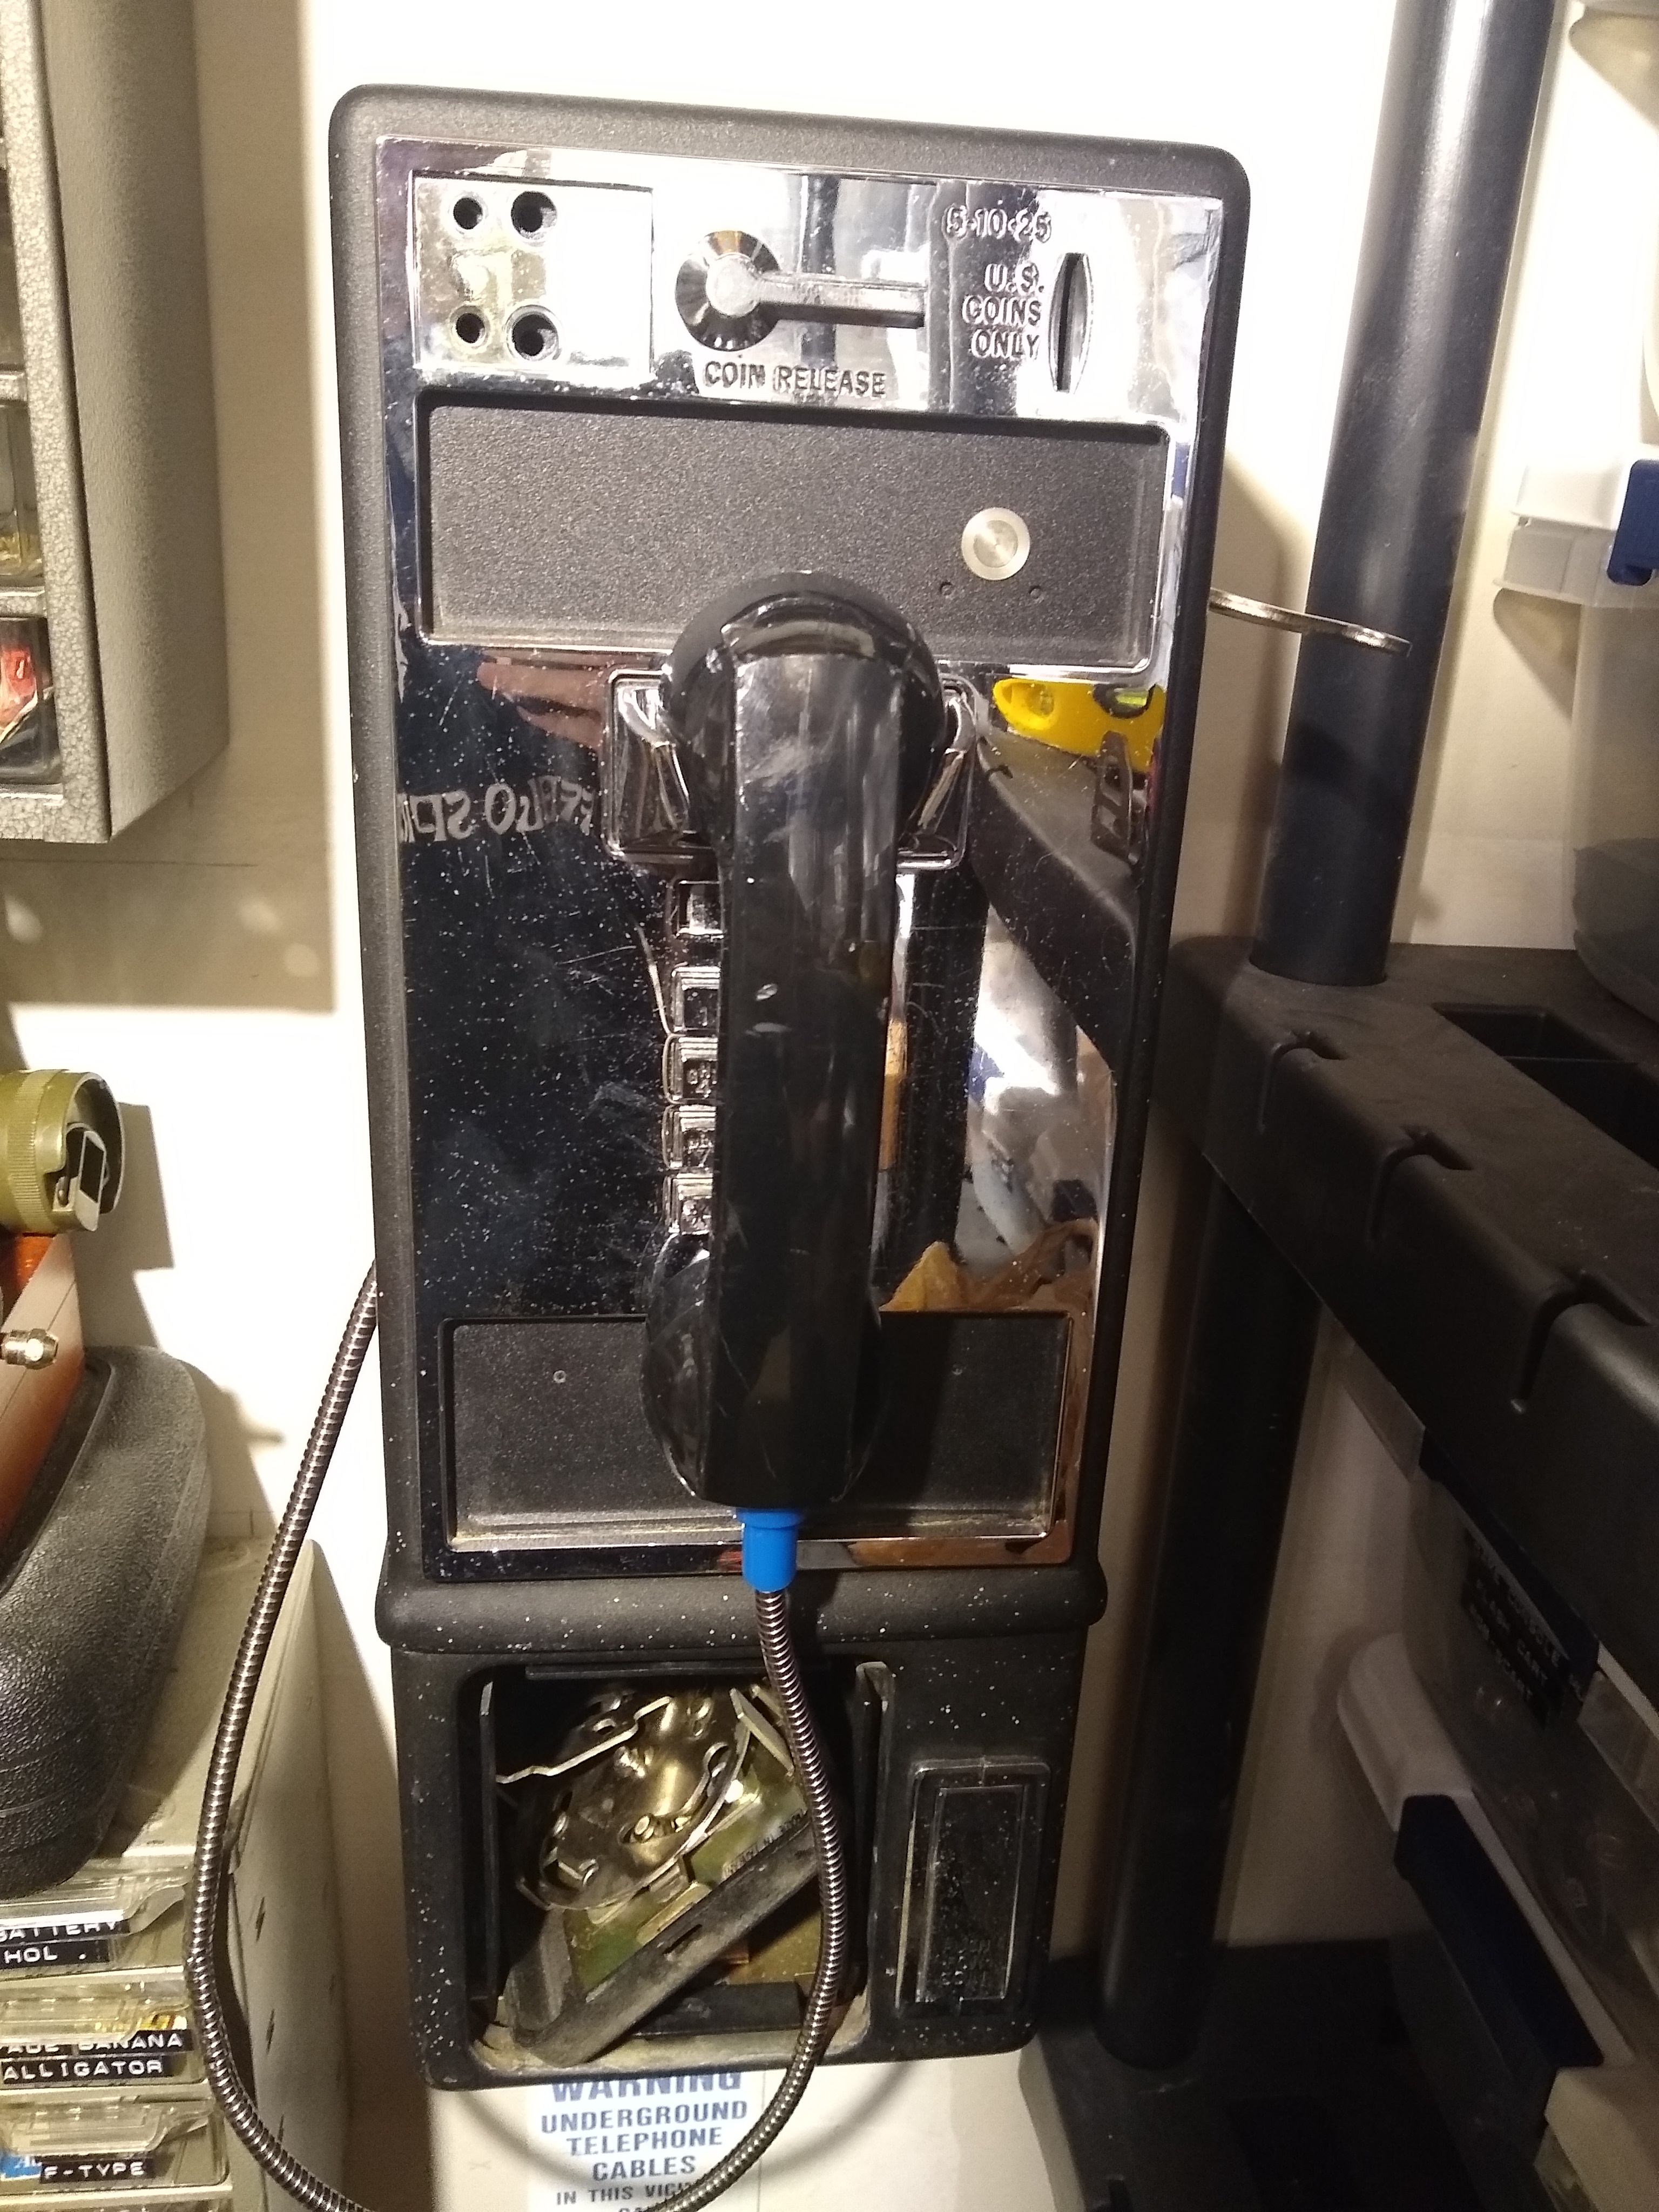
- A payphone, we are focusing on a touch-tone phone which has a fairly standardized installation process. Rotary payphones may have a different installation process.
- A payphone backplate (Selecting the option here for including mounting hardware is less expesnive than ordering the mounting bolts and screws separately)
- Payphone mounting bolts (at least two)
- Payphone mounting screws (four)
- A pencil
- A measuring tape
- A spirit level
- A drill with various bits
- A Phillips screwdriver or impact diver with a Phillips bit (I highly recommend the impact driver)
- A Stud finder
- Flat head wood screws 1/4” x 2 1/2” or 1/4” x 3” (If using a wood stud)
- Toggle bolts with screws (I highly recommend SNAPTOGGLEs 1/4” x 2 1/2” (If using a metal stud)
- Washers 1/4” (one per screw)
- Drywall anchors with screws (Optional)
- Cable raceway (Optional)
The payphone should be installed onto a stud (it does weigh 50-60 pounds after all), so the first thing to do is to locate the nearest stud to where you want to install your payphone. I recommend a basic magnet stud finder as it is inexpensive and doesn’t need batteries. Lightly drag the stud finder along the wall back and forth in a sweeping motion until the magnet stops on a stud screw and gets stuck to the wall. Make a mark here with your pencil and continue the process going lower and lower on the wall until you hit another stud screw and make another mark. If this process works for you, you have a wooden stud. If you notice that your stud finder stops at a point and you can slide it up and down the length of the wall in a straight line, you have a metal stud and can mark it appropriately.

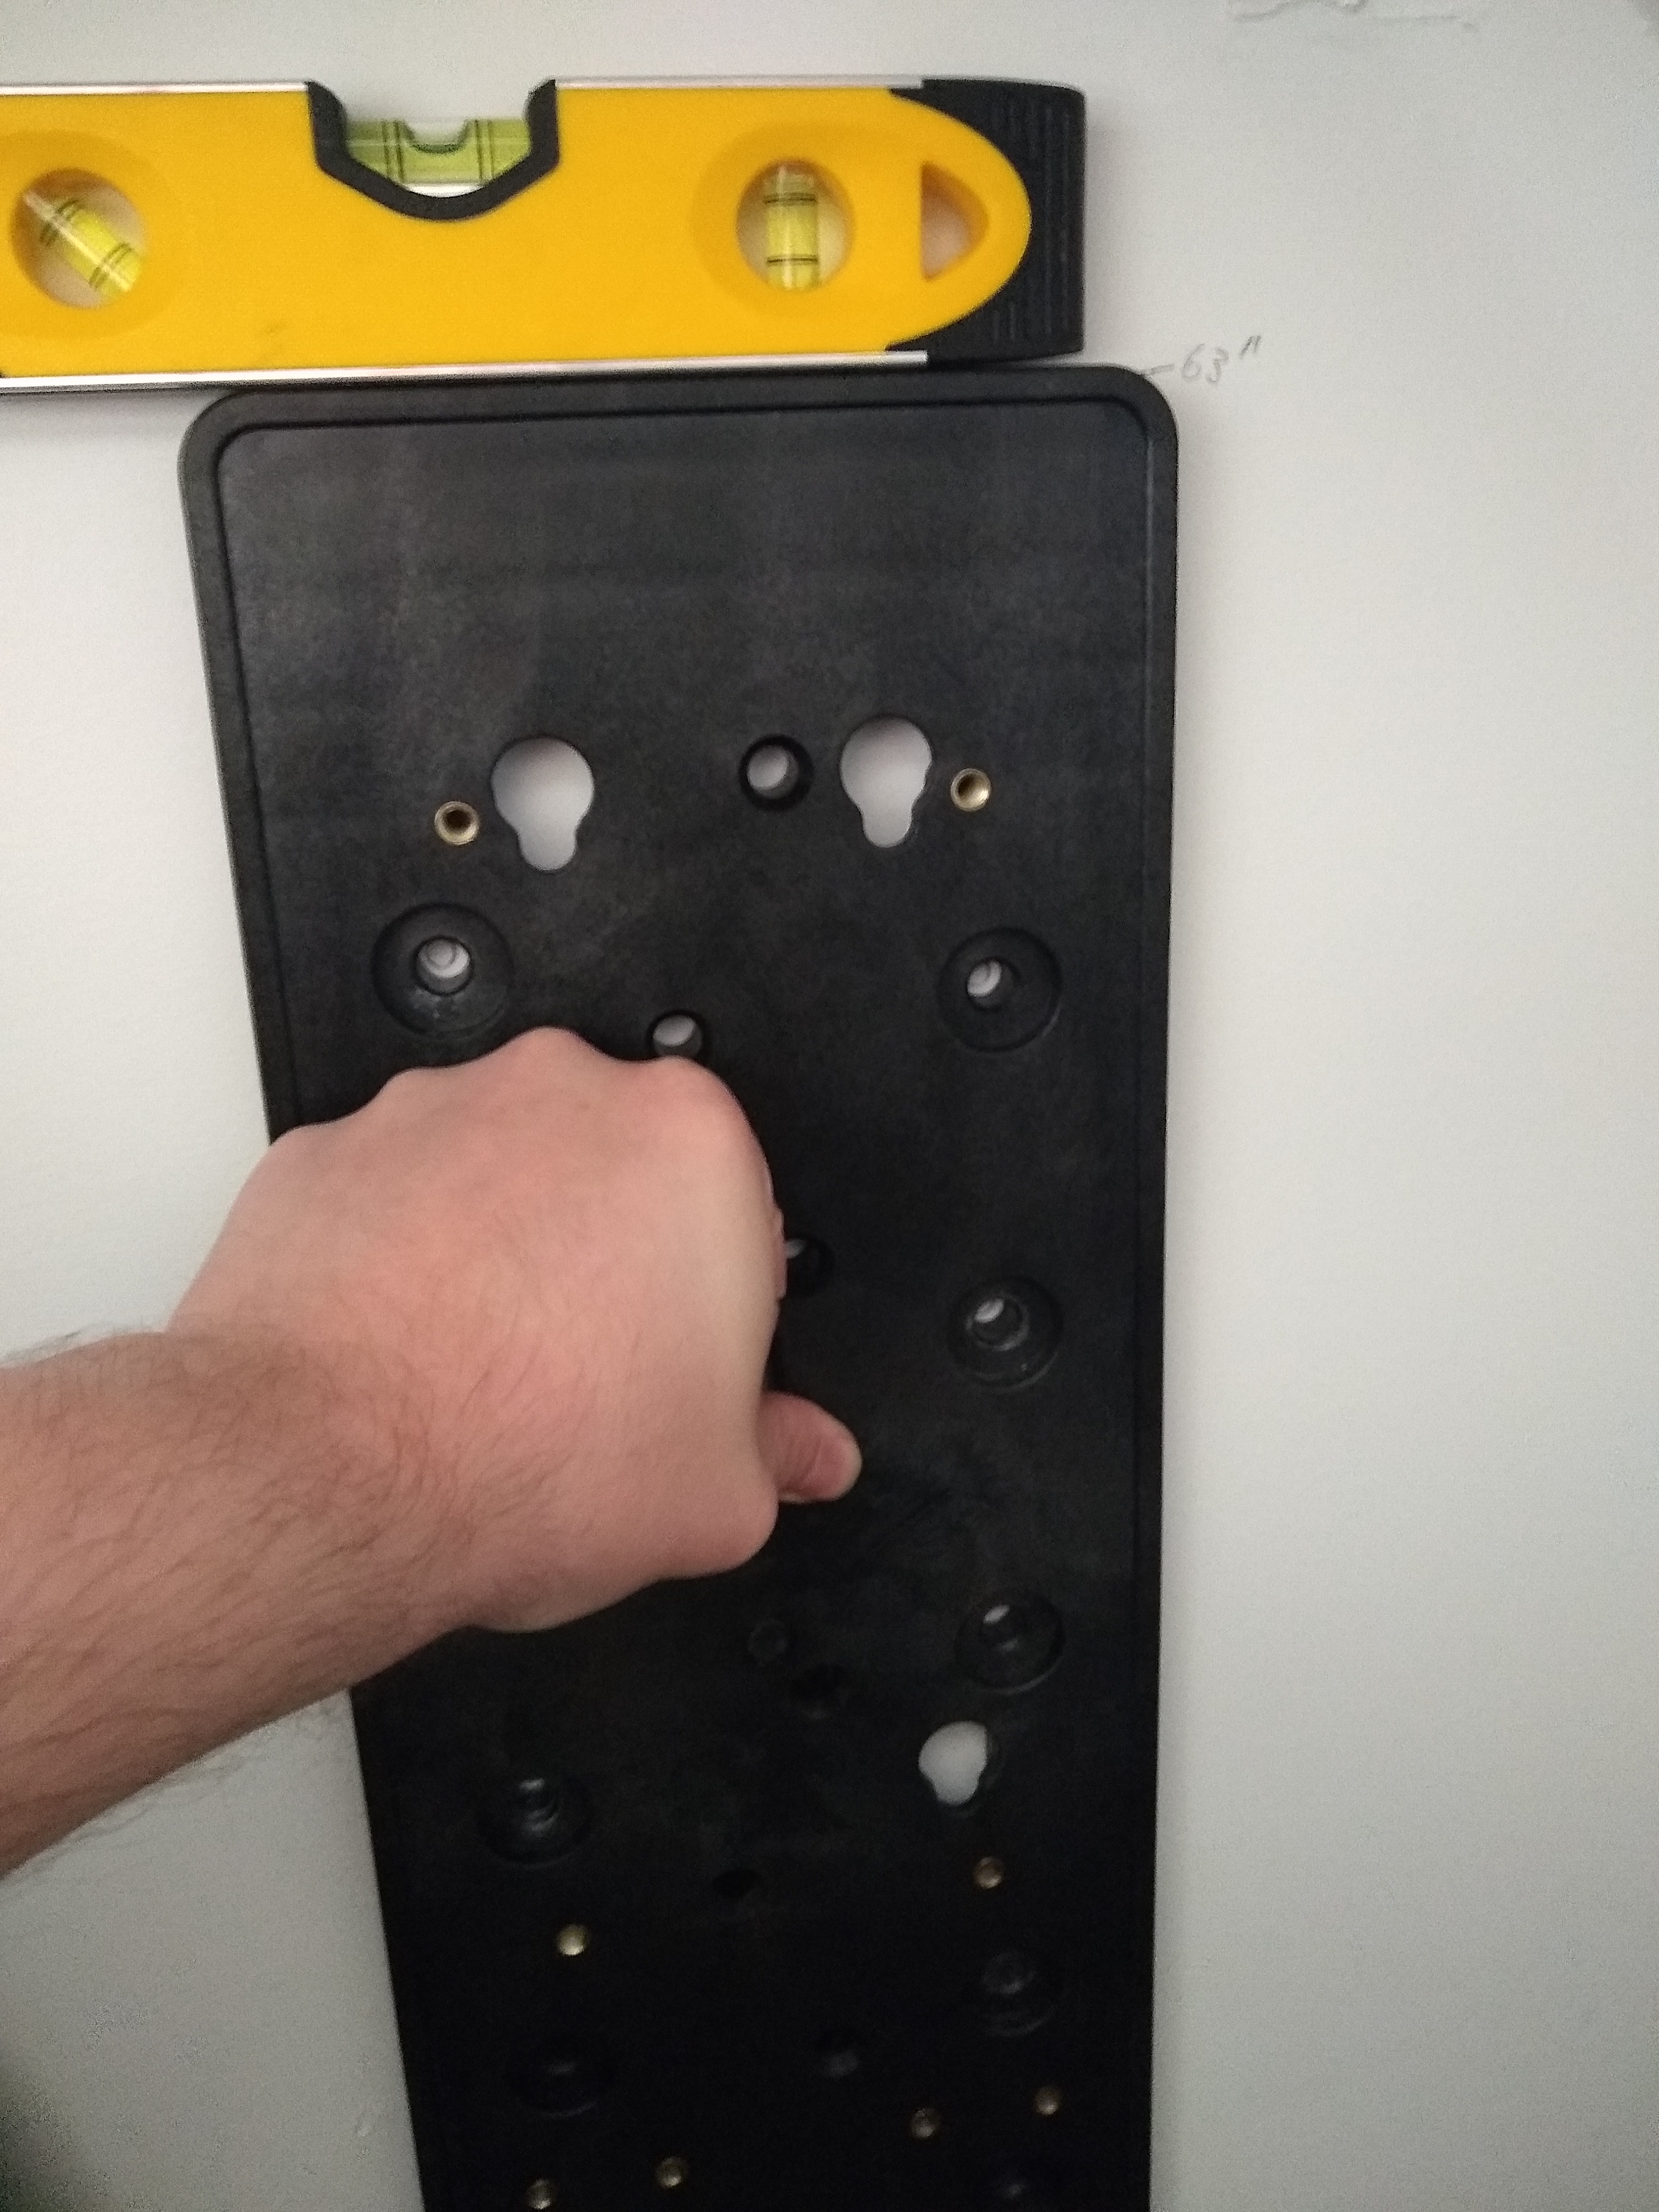
A payphone is usually installed at a height of 63” above the ground (from the top of the payphone). Using a measuring tape and a pencil, make a mark at 63” on the wall that vertically aligns with the marks you made for your stud. Use your level to get a straight edge based off of your stud marks and the height mark and create a vertical line from the 63” mark going down about 24” with your pencil.
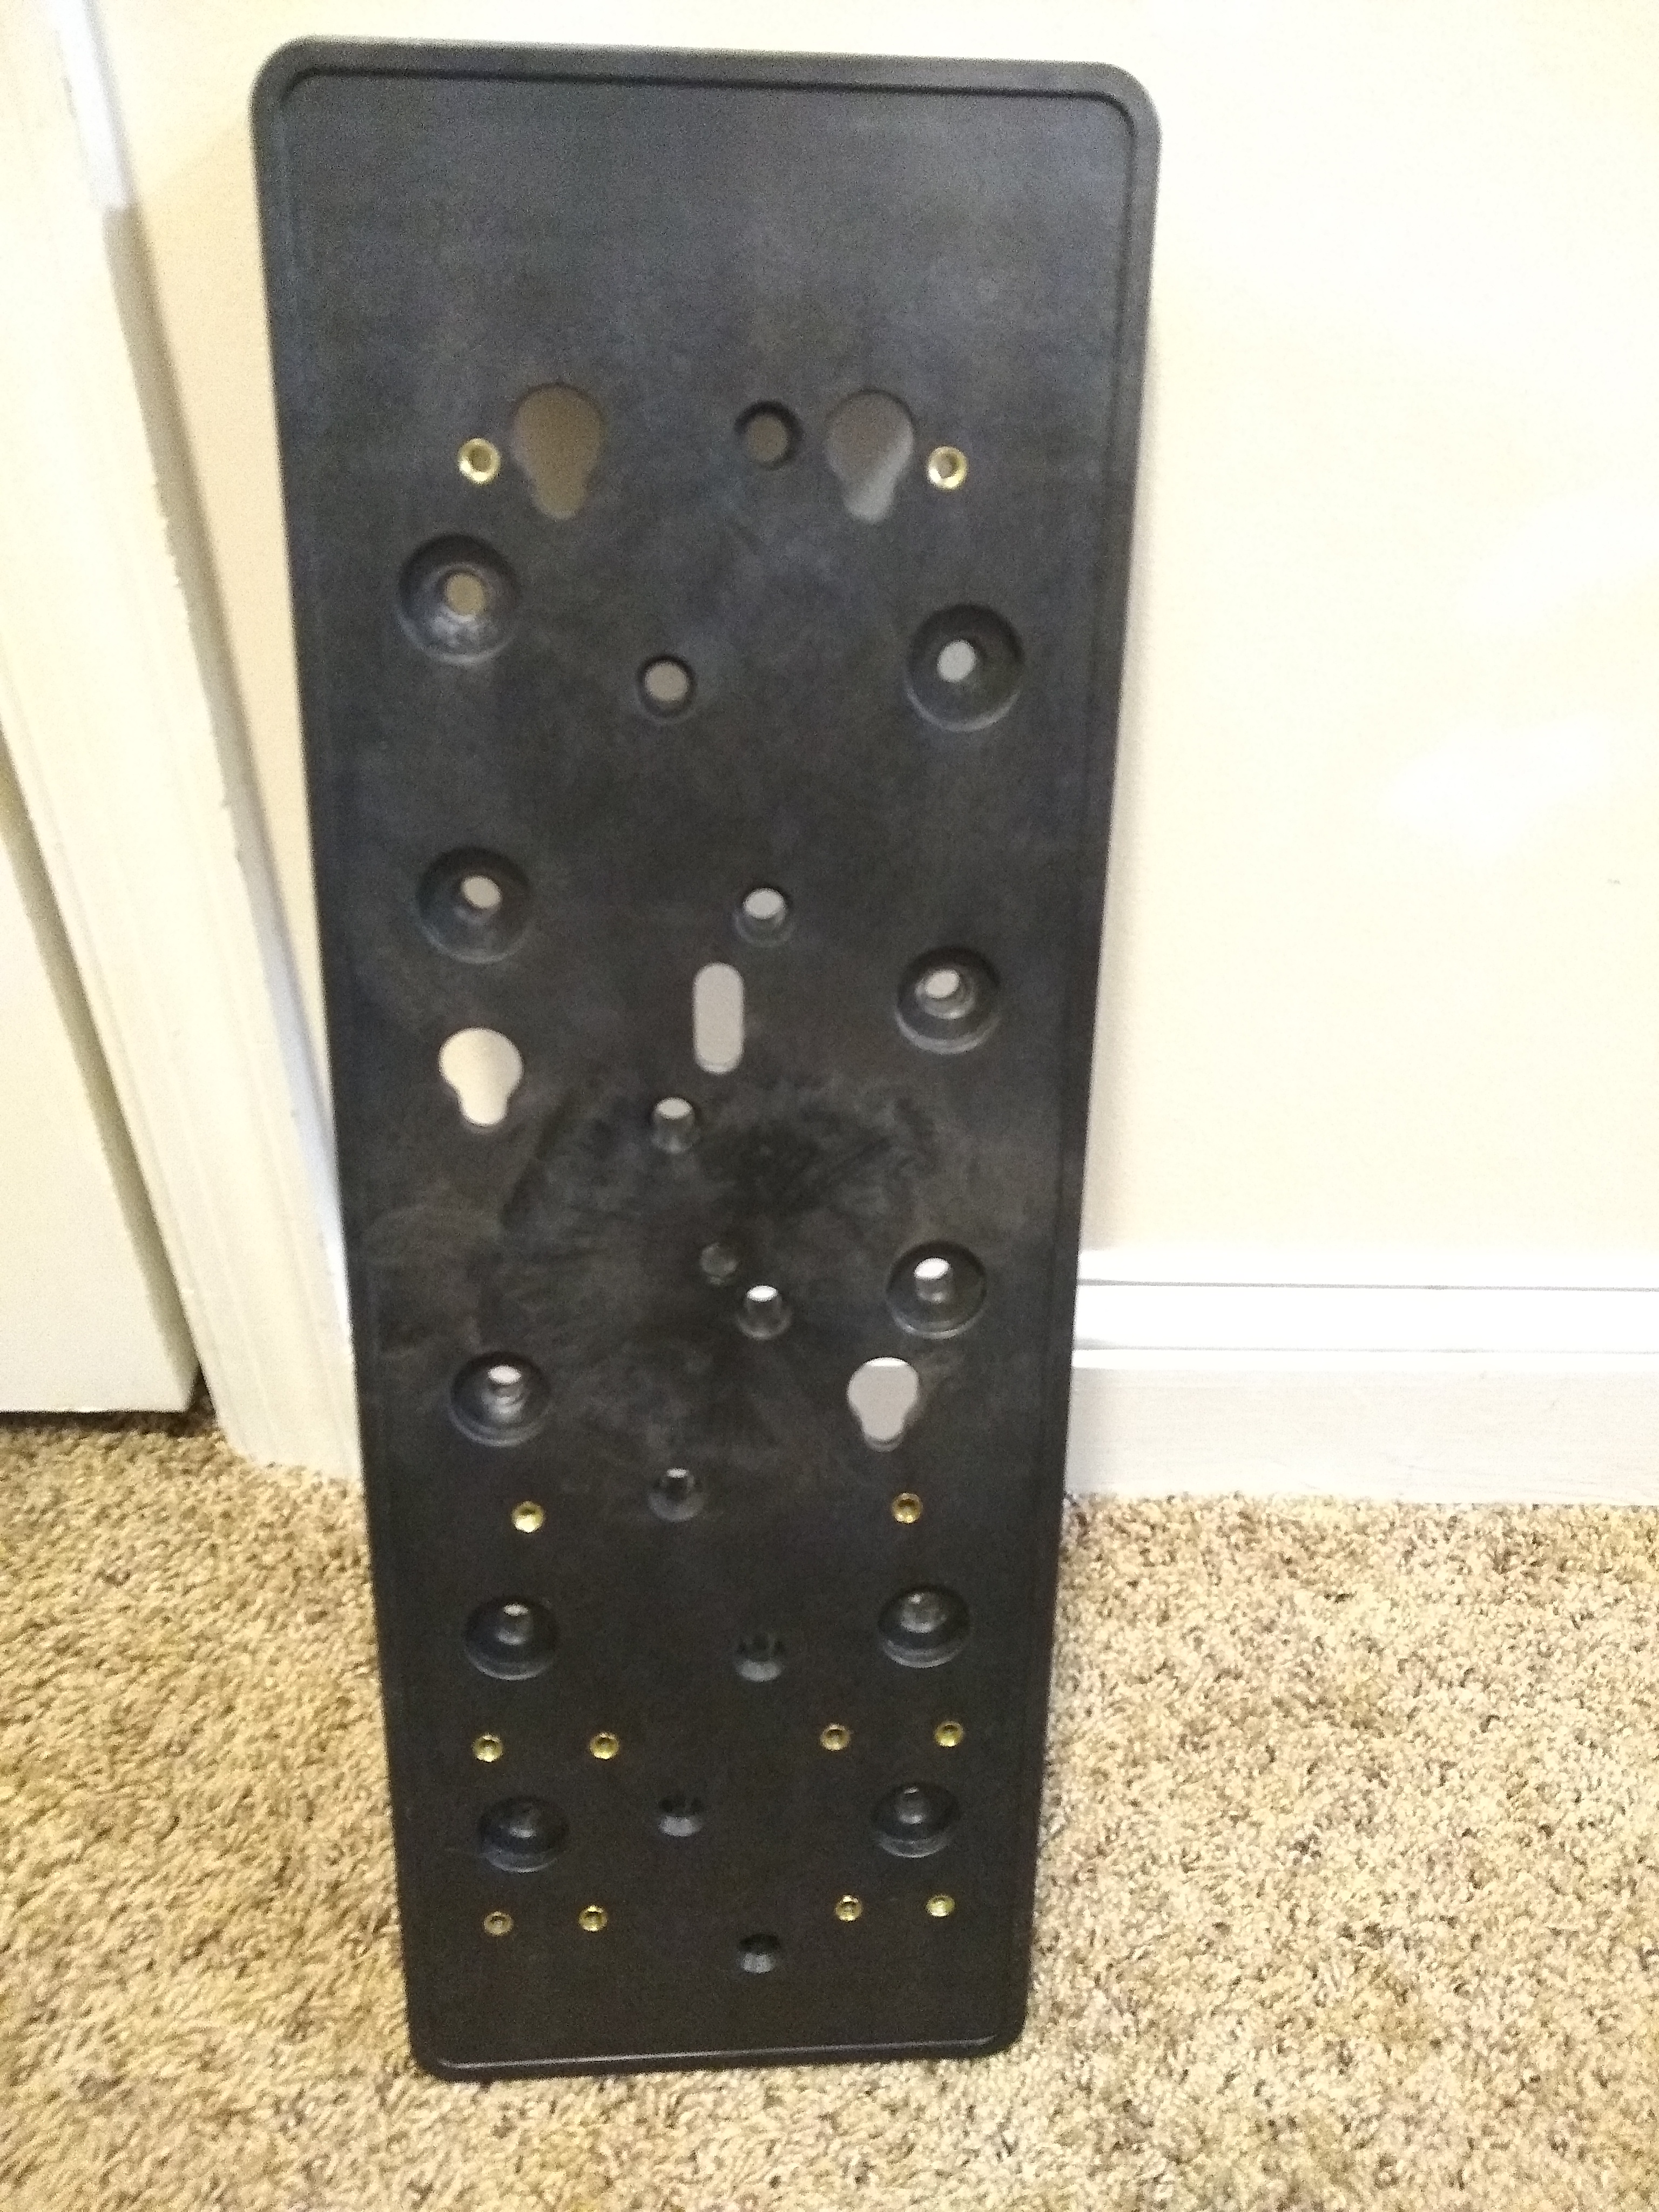
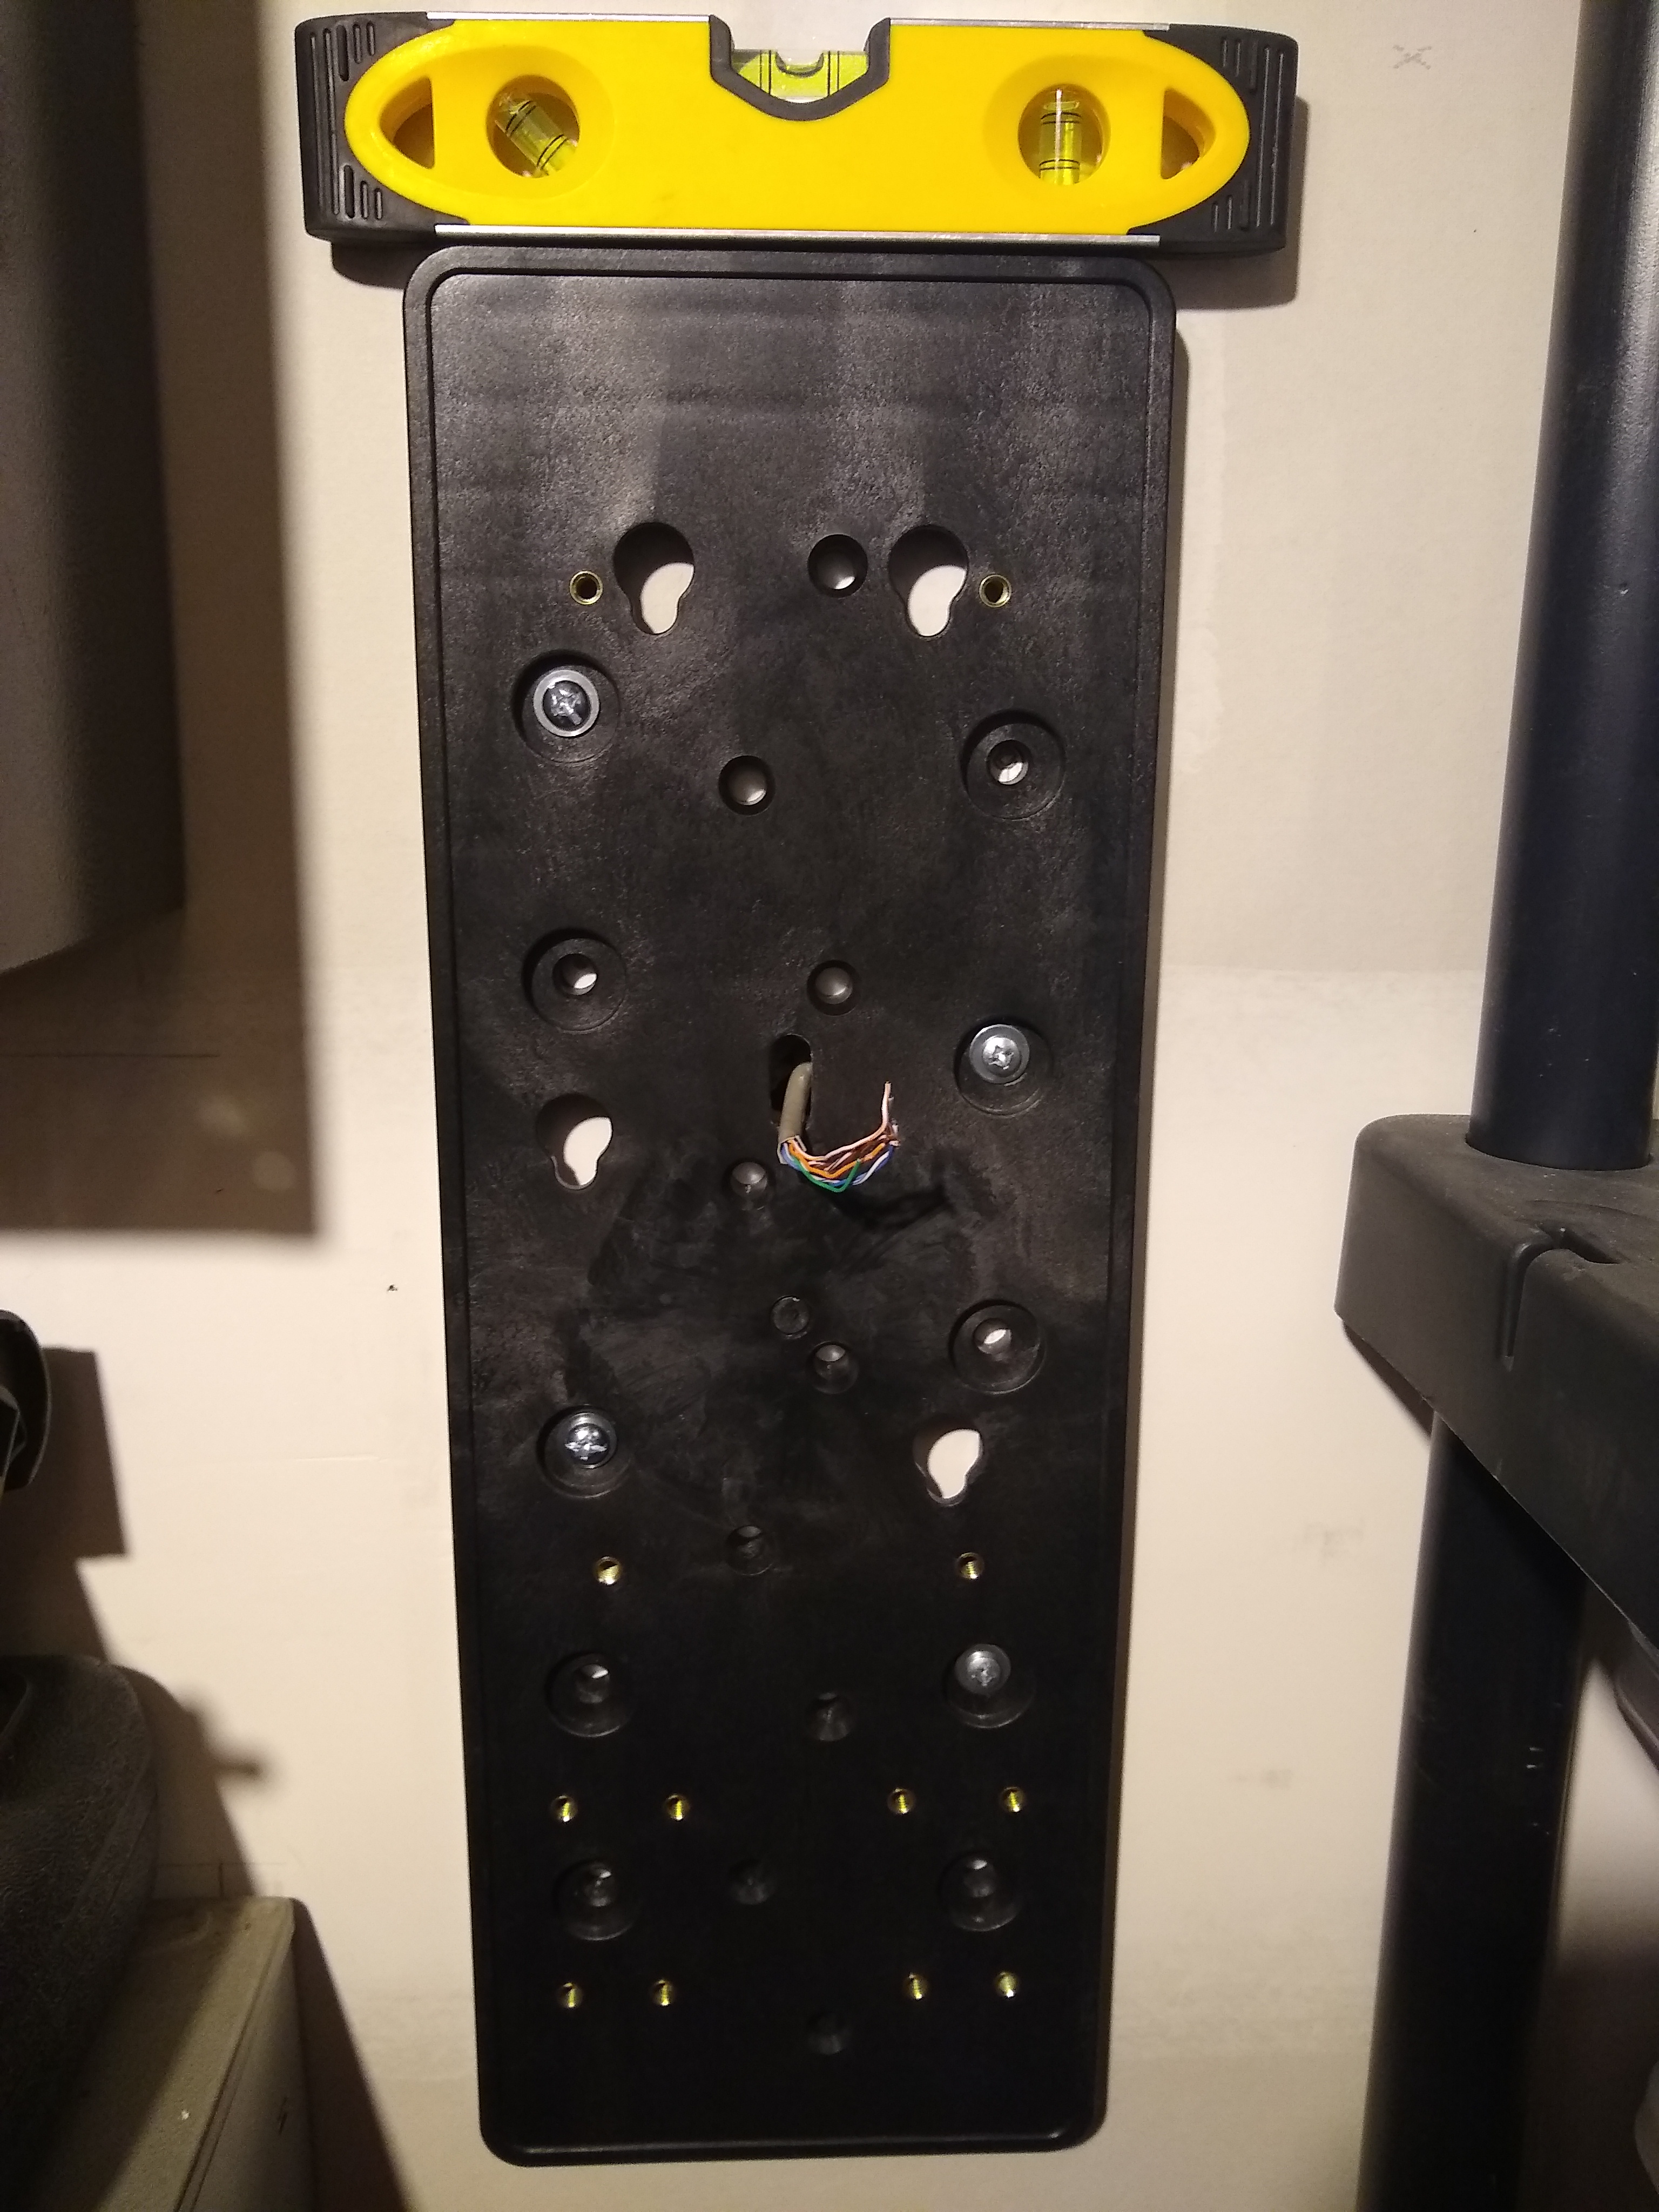
Next, using the backplate (make sure it is right side up) and the level, position the backplate against the wall so that it is level and the vertical line you just drew is centered in one set of screw holes in the backplate. Depending on how you want to position the phone, the left, right, or center screw holes in the backplate can be used for mounting on the stud. Use the pencil to mark at least two vertical screw holes that sit on your vertical line. Additionally, I marked screw holes where I will also be using drywall anchors to make the backplate a little more flush and sturdy. If you are using the left holes for the stud, mark the right holes for drywall anchors, and vice versa. If you are using the center holes for the stud, you may want to use the remaining left and right holes for drywall anchors.
If you are running telephone wire through the wall, now is also a good time to mark the center hole in the backplate on the wall. Running wires in-wall won’t be covered in this guide as there can be a lot of variation and additional work to get the wires routed throughout the building you are working in.
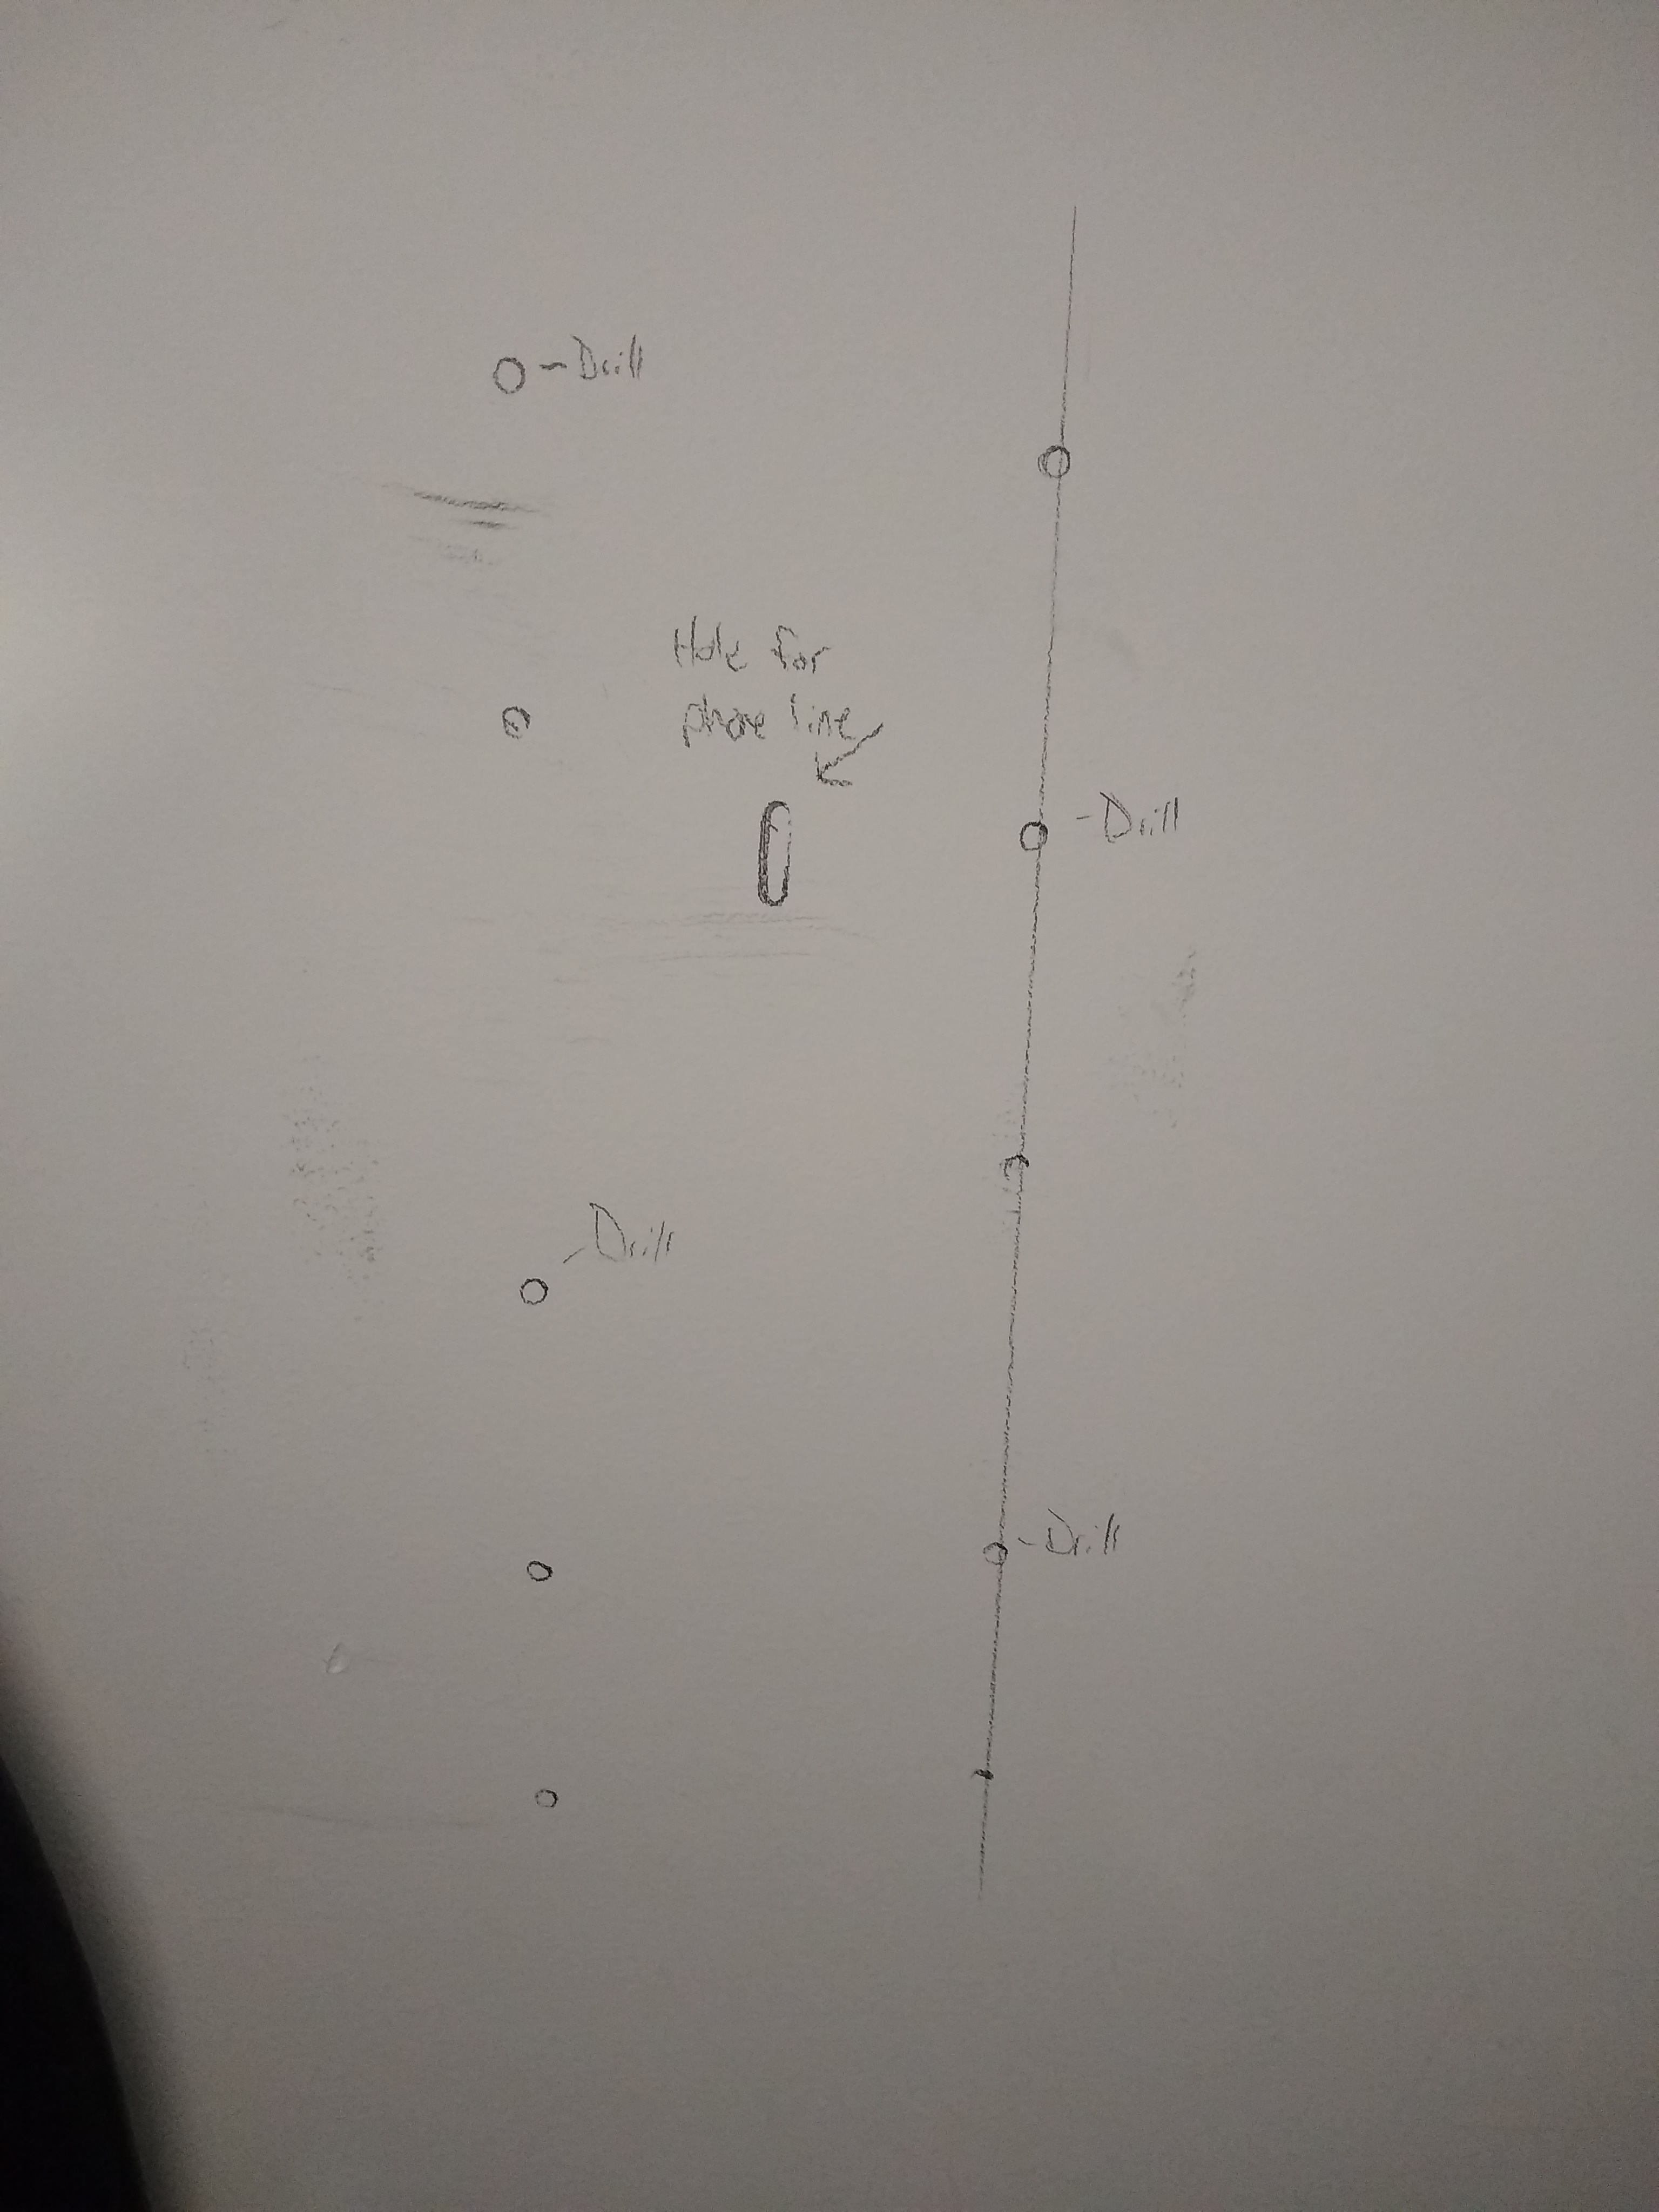
Now it’s time to drill. For drilling into a stud, I always recommend drilling pilot holes first. Start with a small drill bit like 1/8” and drill into the wall at a 90 degree angle. If you are drilling into a metal stud, I recommend widening your initial hole by working your way up in drill bit sizes until you reach the proper hole size to accommodate the toggle bolt (1/2” hole for a 1/4” screw in my case). A natural progression might be 1/8”, 1/4”, 3/8”, 1/2”. The first hole in the metal stud will likely take the longest and be the most difficult, but should still take no more than 30 seconds with a standard drill. If you are using a wooden stud, you likely won’t have to size up your pilot hole as the wood screw will be self-drilling. Drywall anchor holes are usually sized up from the screw you will ultimately be using with the anchor. For example, if the screw is 1/4” your hole may likely be drilled at 3/8” but consult the packaging for your anchors to learn the proper size.
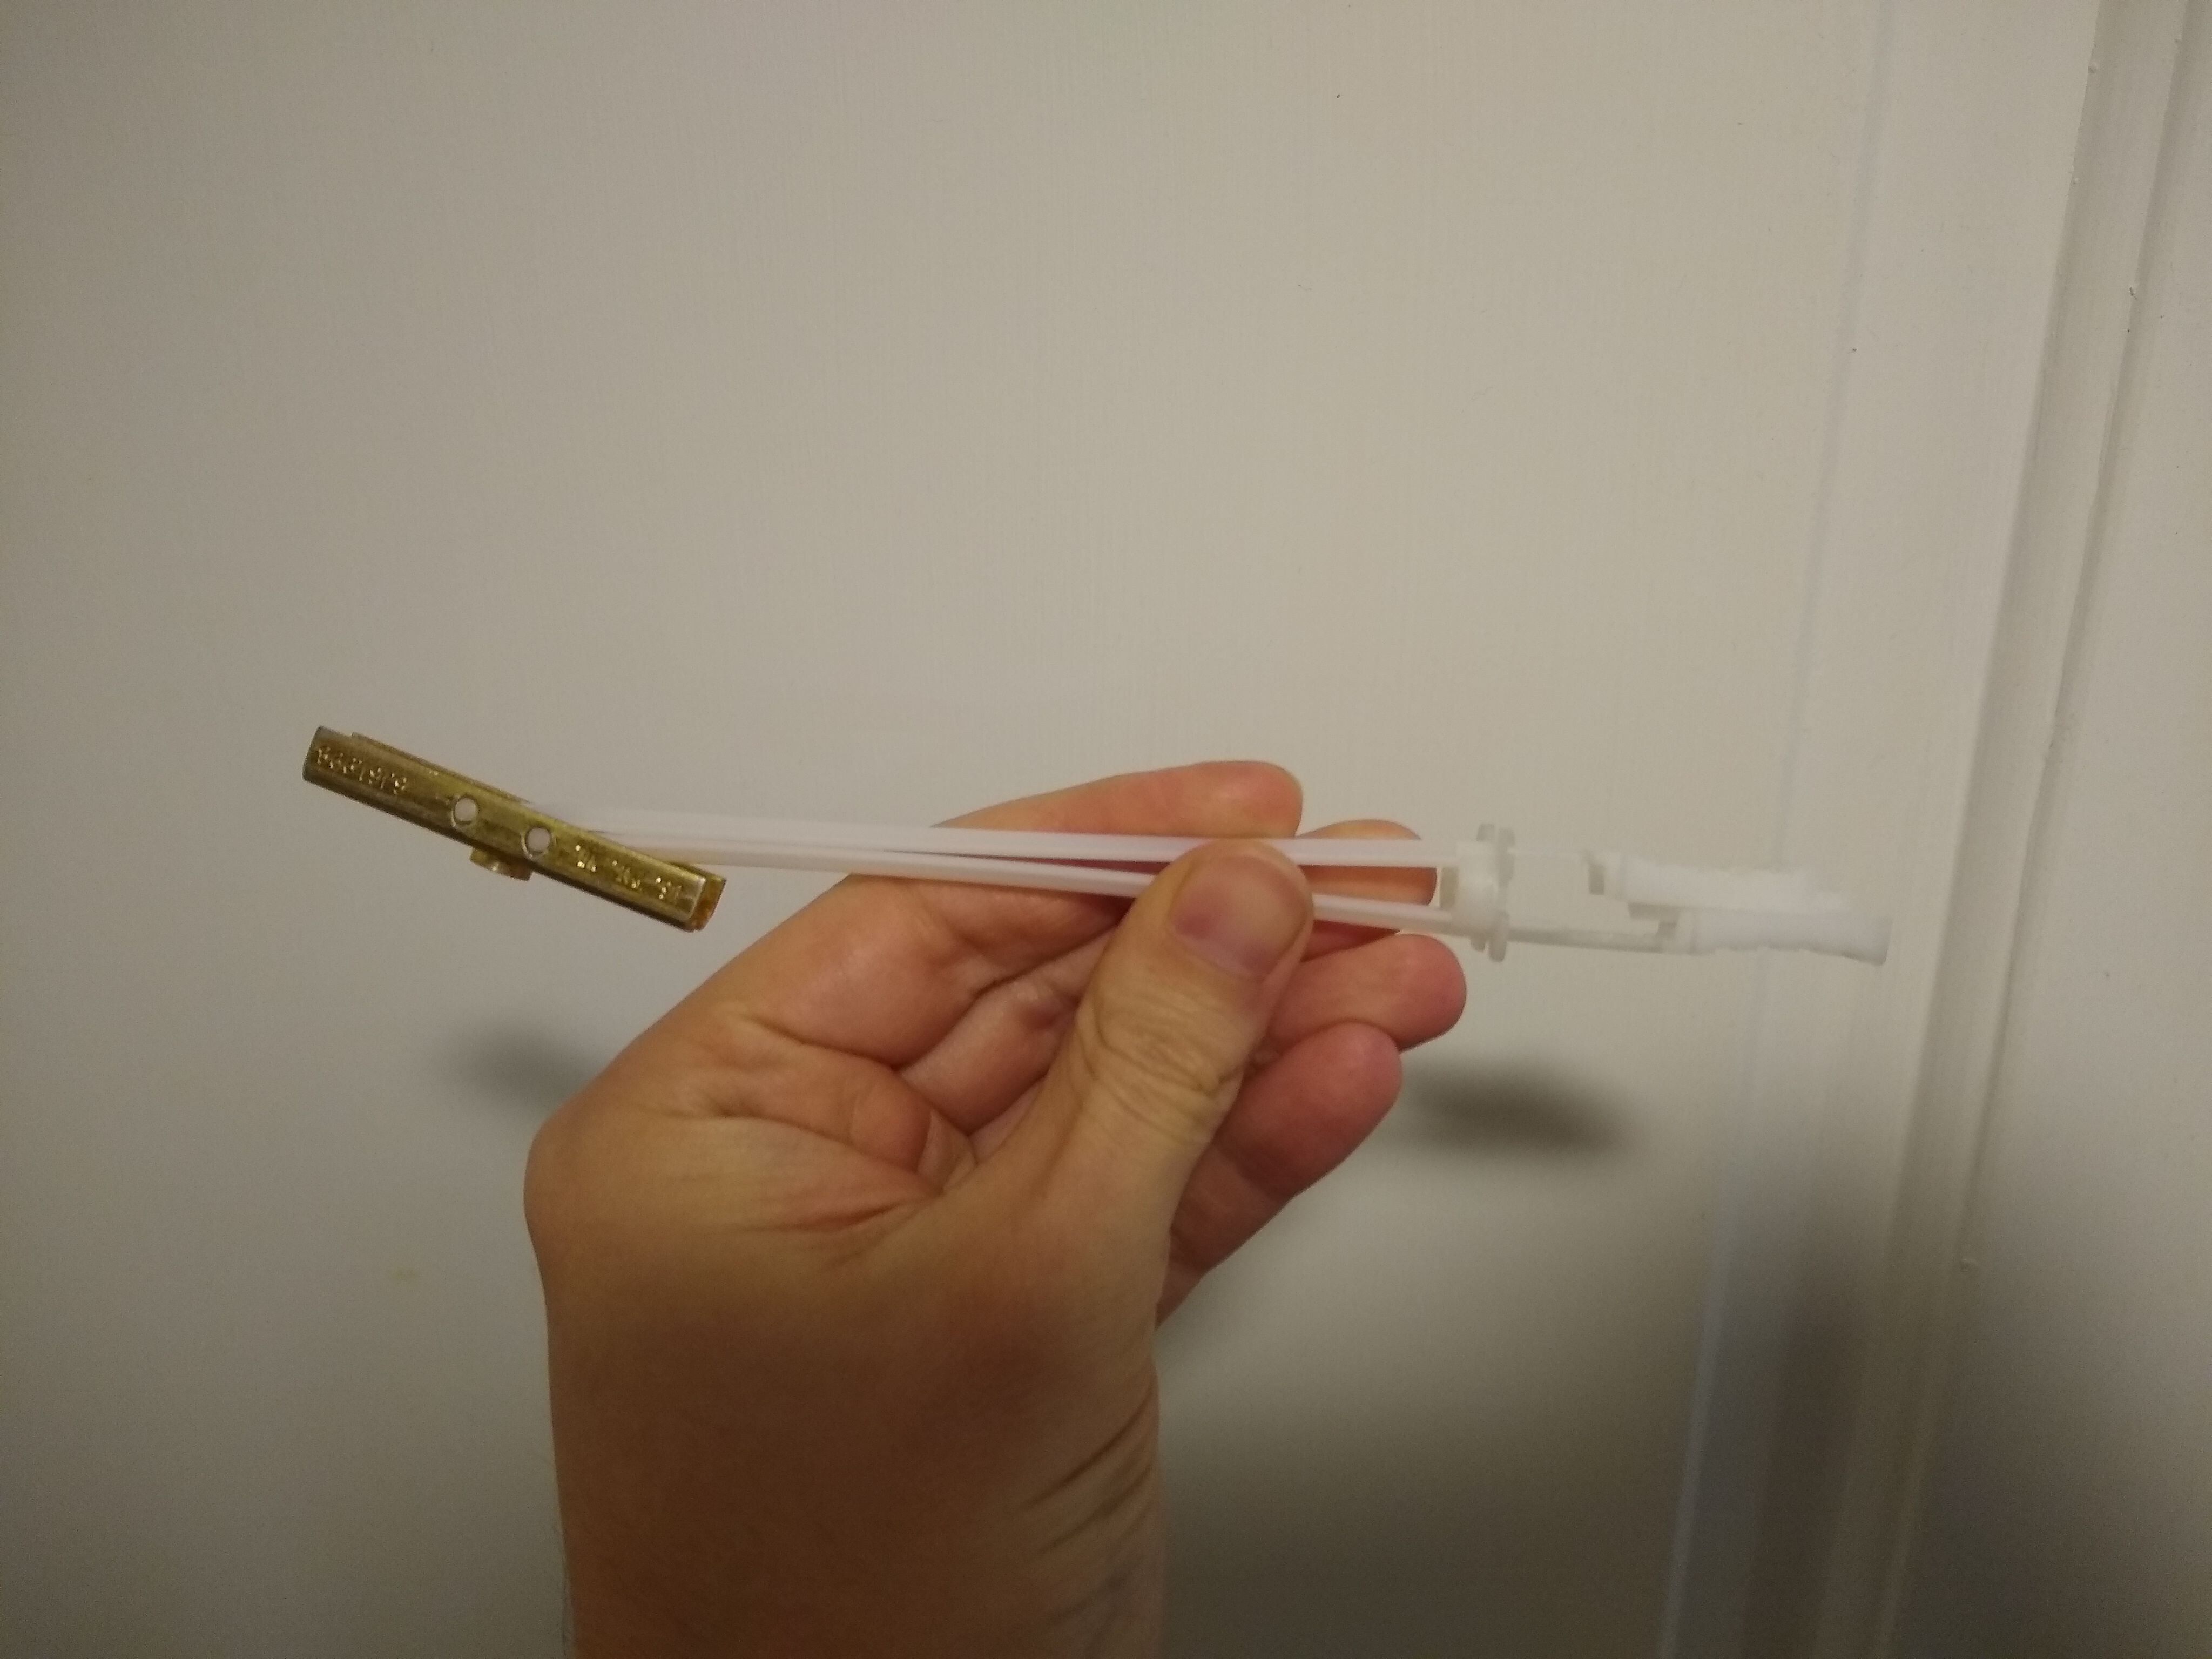
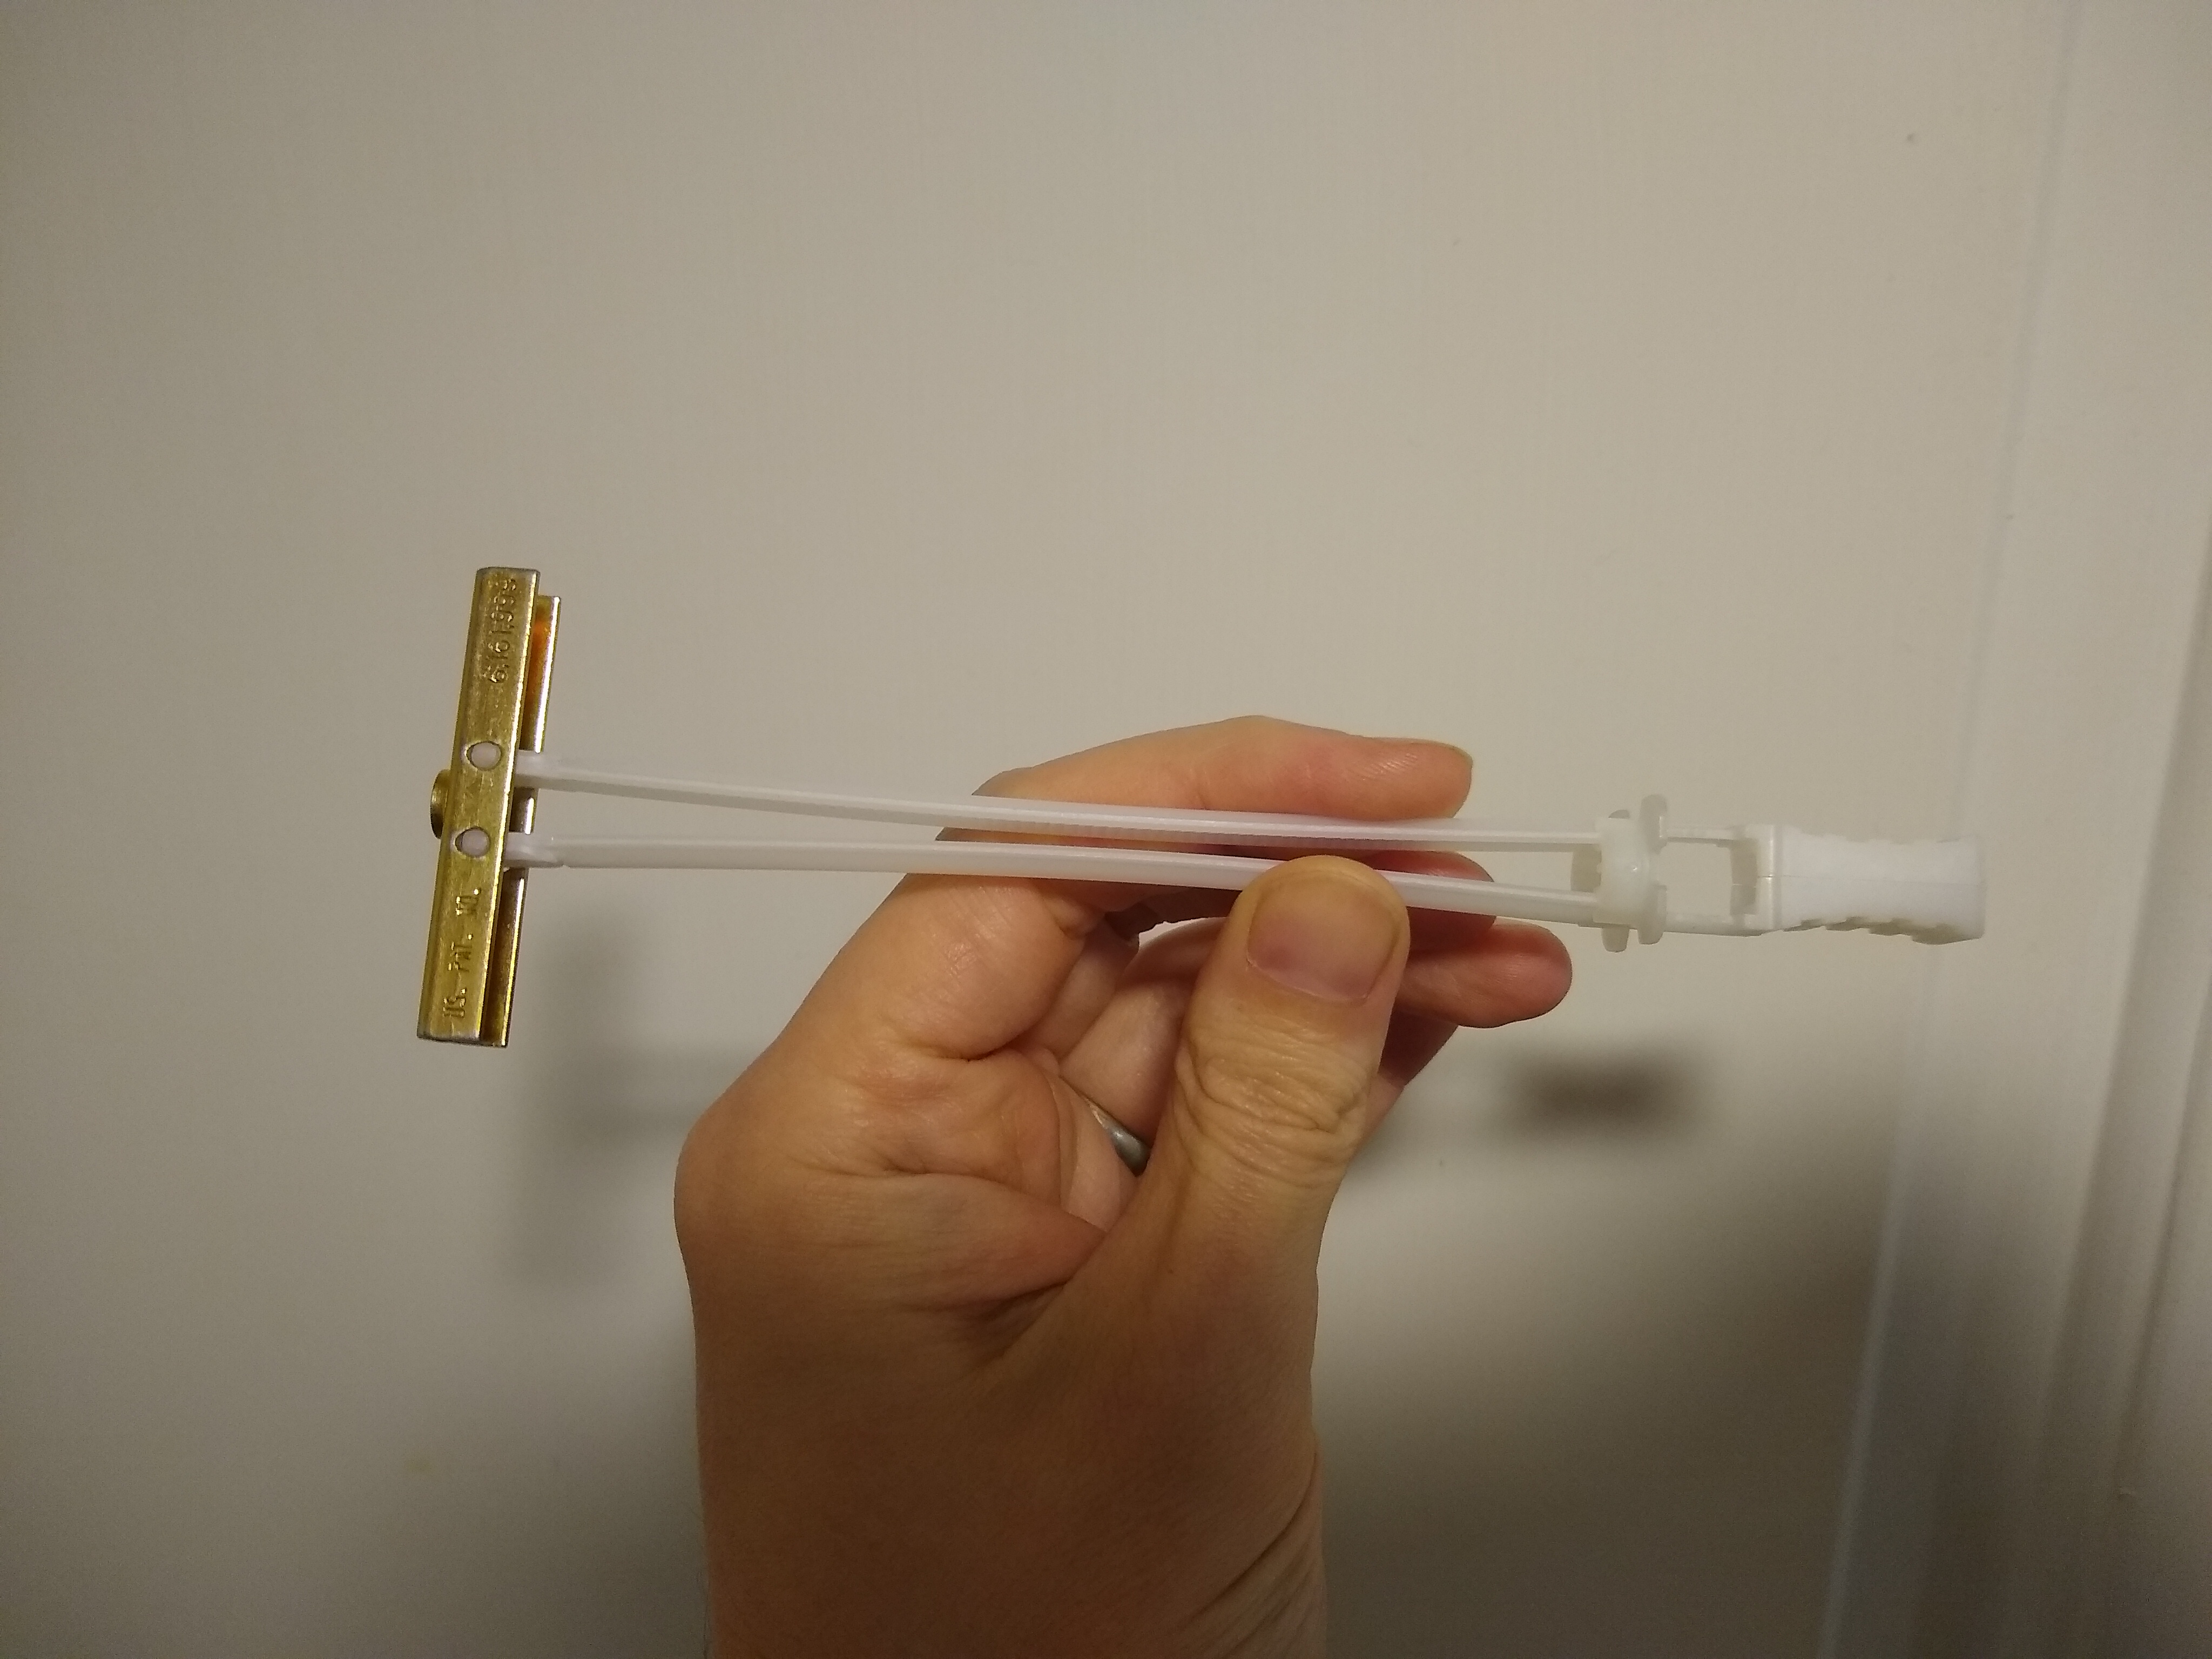
After drilling the holes, you can now put the drywall anchors in the wall. If you have a metal stud, now is also the time to insert your toggle bolts. Make sure the toggle bolts are folded so that the small metal rectangle at the bottom is tucked in flush with the cylindrical plastic body pieces. Push the body into the hole in the stud making sure the metal part is on the bottom the whole time.
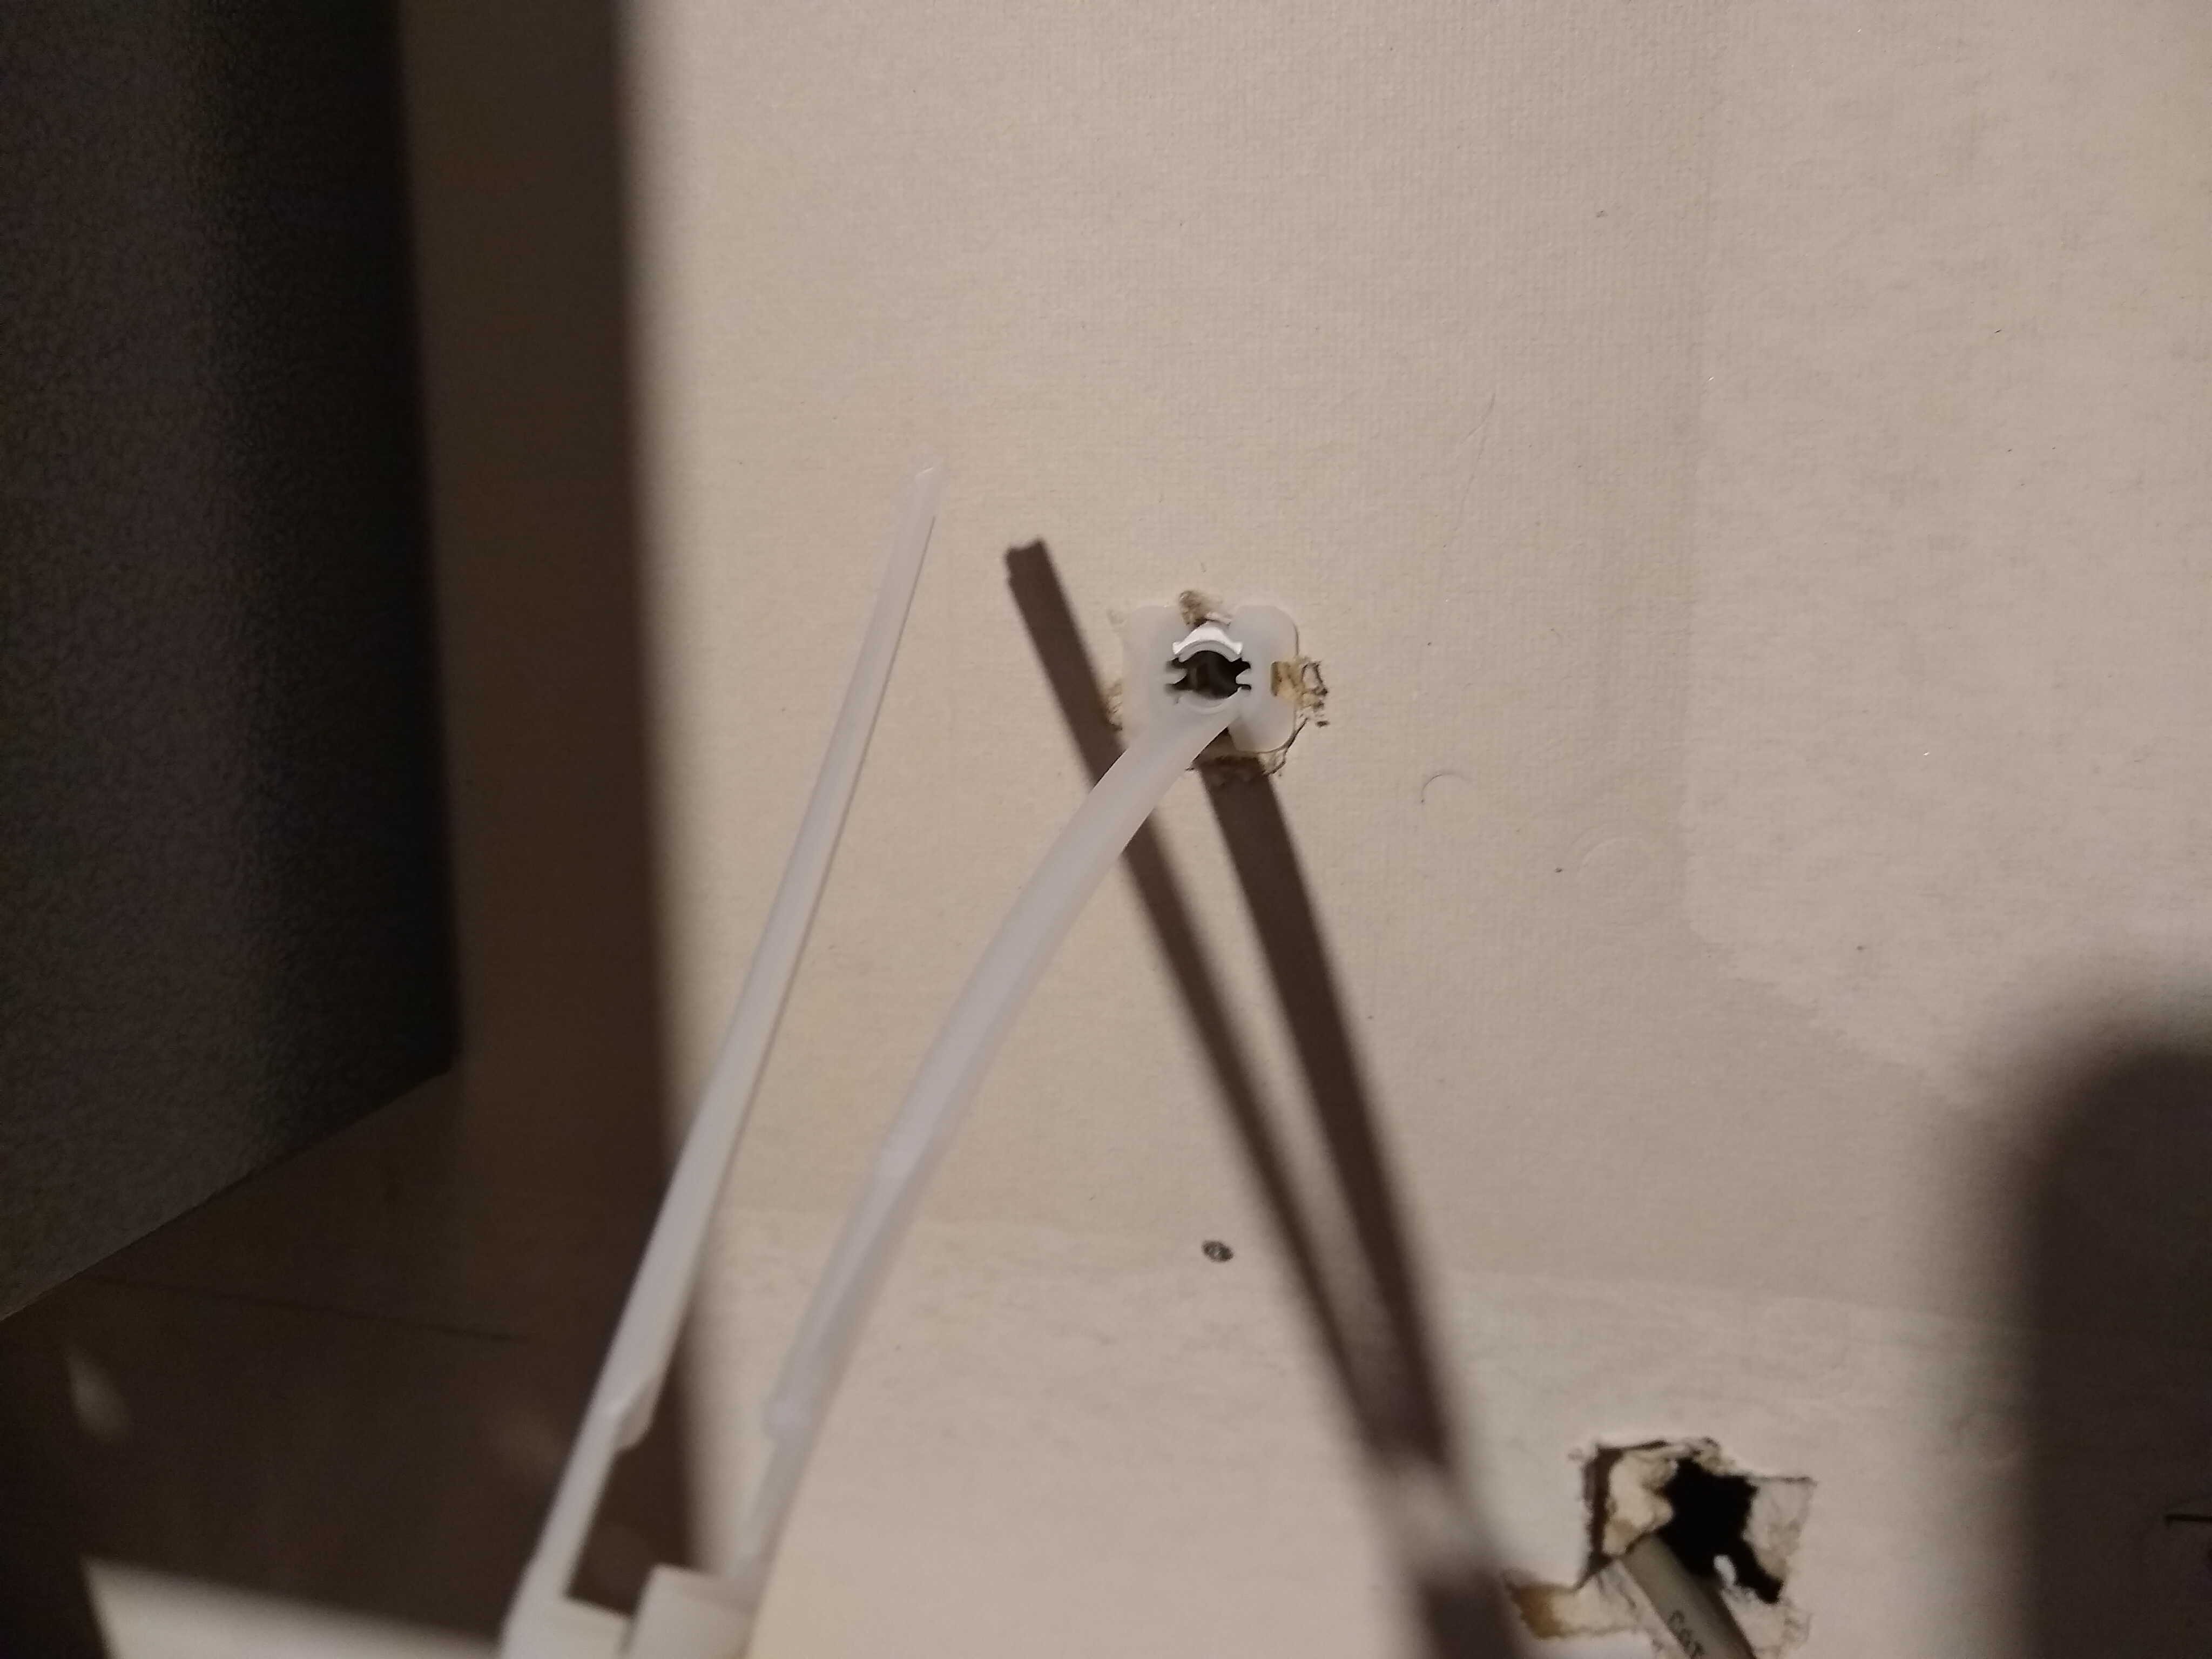
Once the metal bit is pushed through the stud, move pull the top plastic part of the body towards you so the metal portion of the anchor flips up to be perpendicular with the anchor body, and parallel with the stud.
Then, push the collar on the anchor down the plastic into the wall until it is flush. The remaining plastic pieces sticking out of the wall can be wiggled until the break off at the collar, leaving the anchor perfectly seated in the wall.
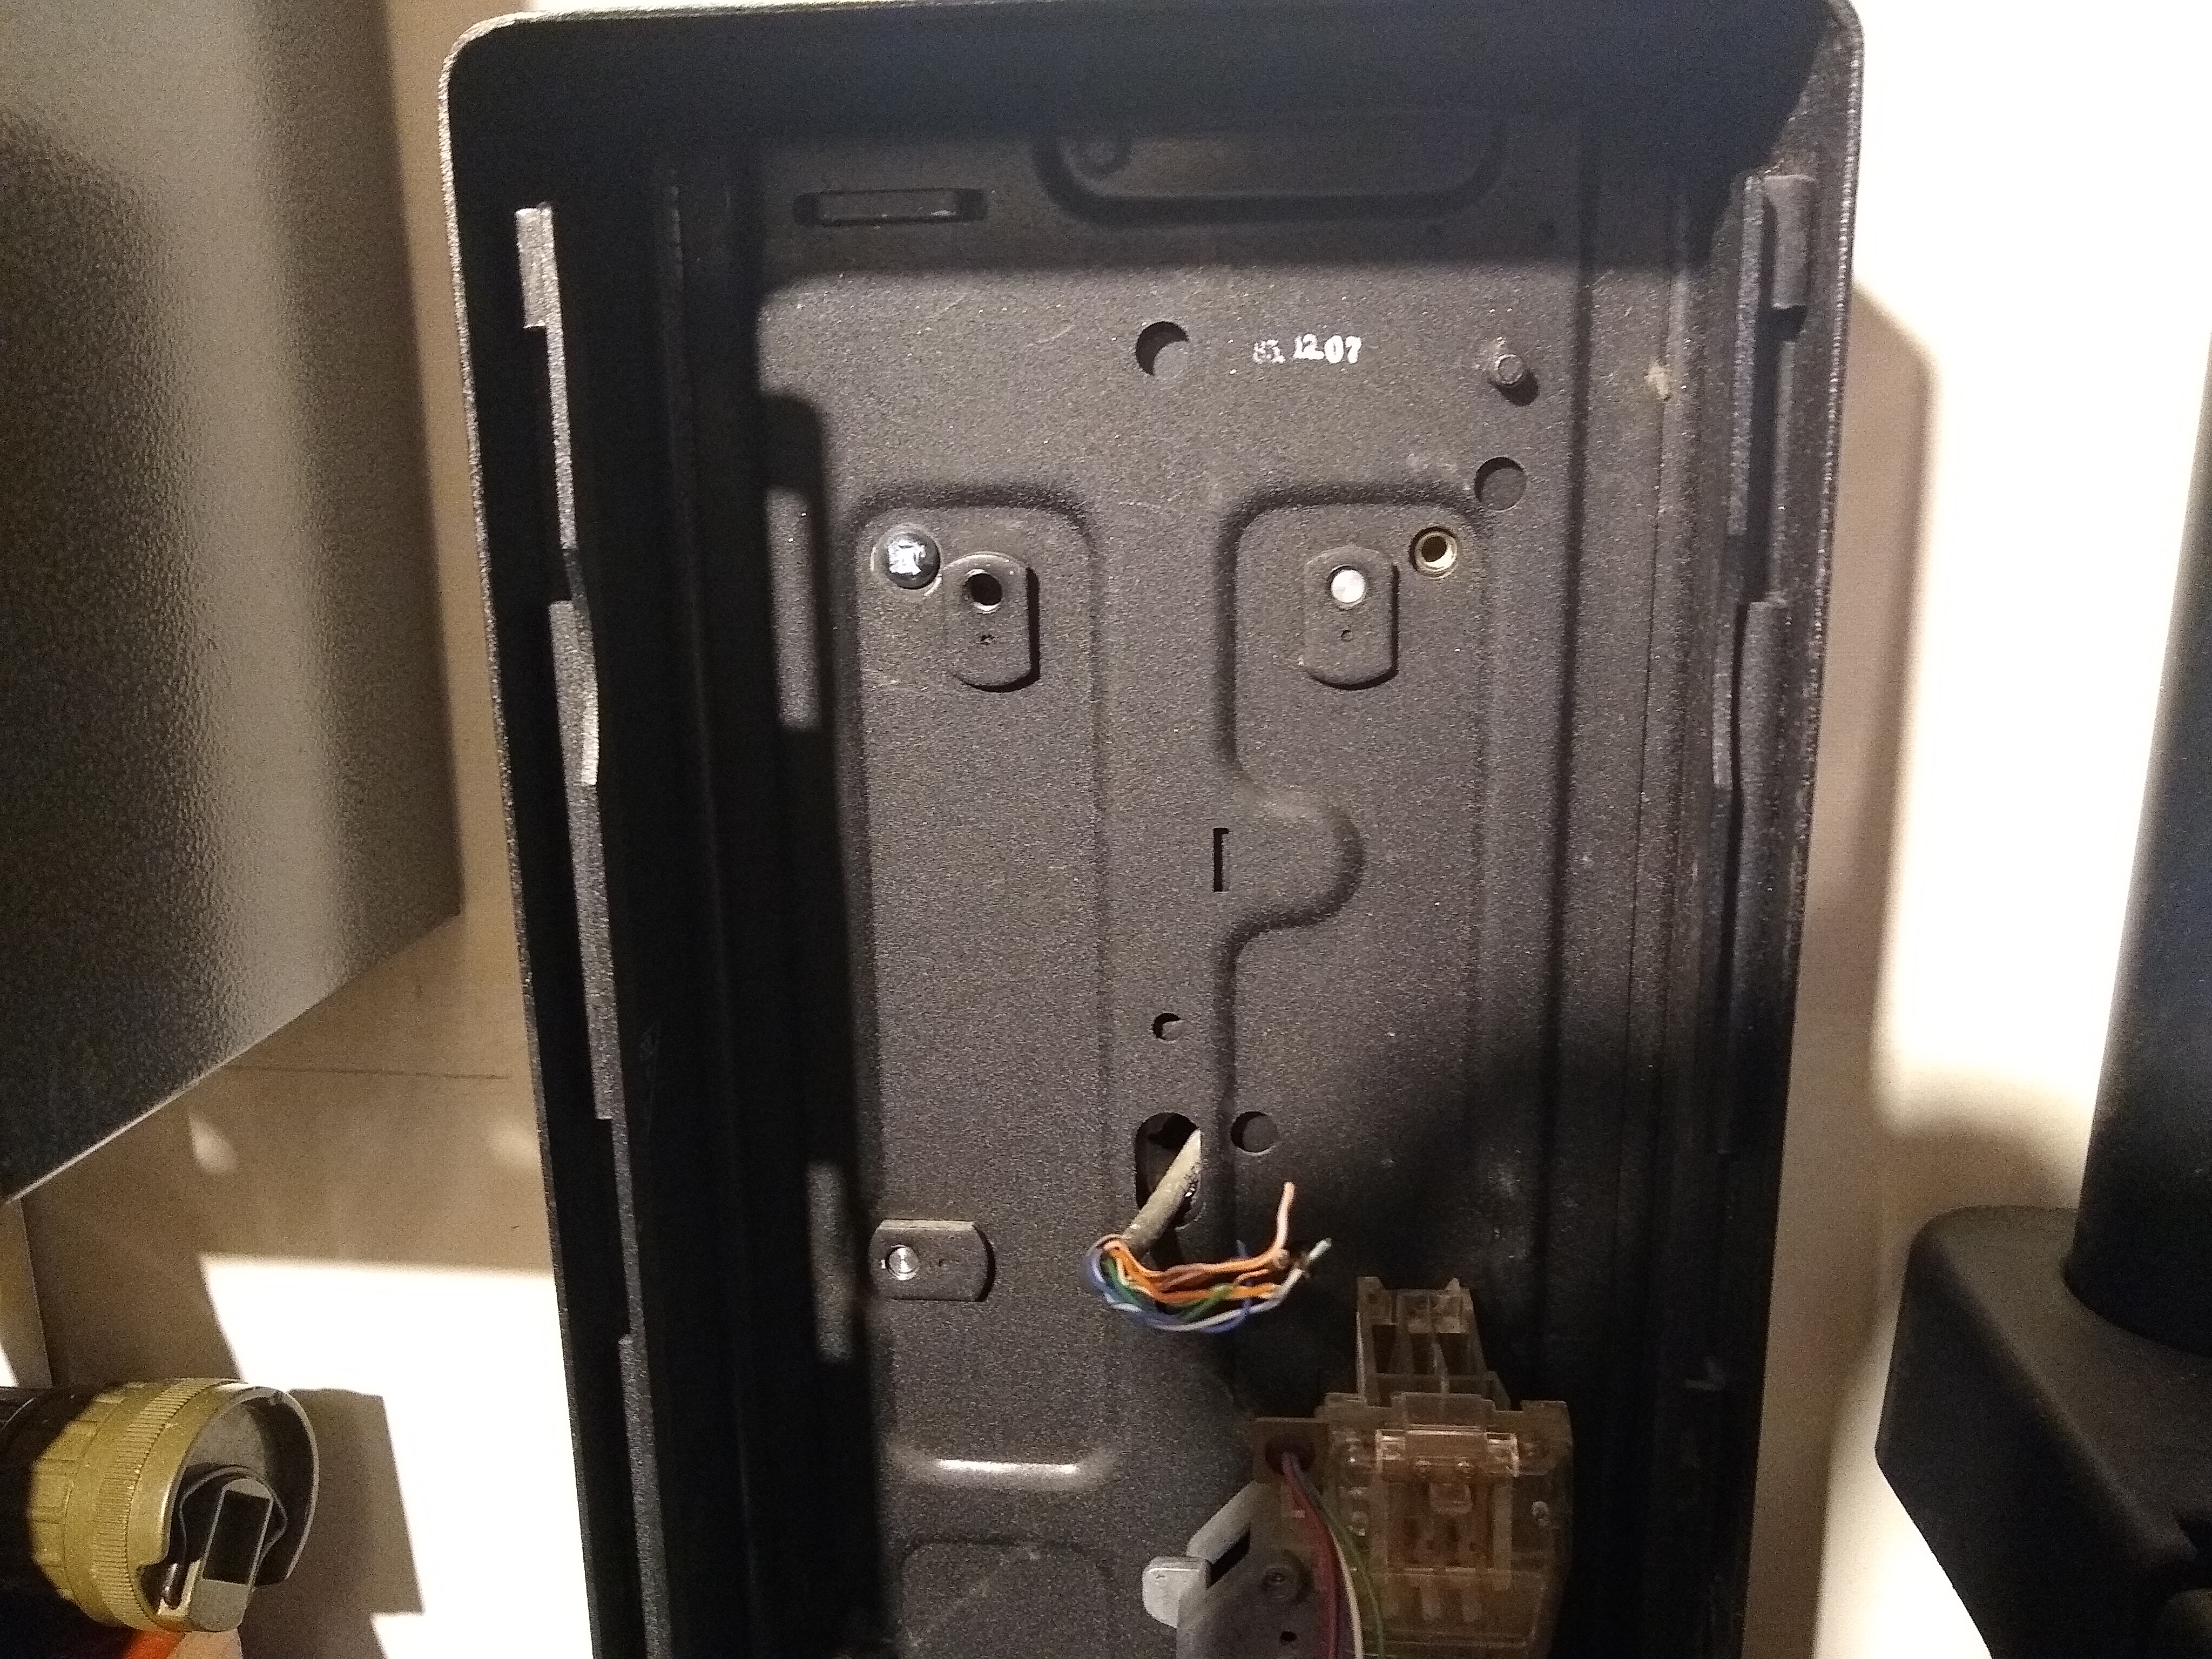
Before we install the backplate, determine how you will want to run the telephone line to the phone. If you are going through-wall, drill a hole in the wall and feed in your cable as needed before installing the backplate. If you are not running your telephone line through-wall, you’ll be able to thread it through the backplate after it is mounted.
Lining up the backplate up with the installed anchors (and pilot holes if screwing into a wooden stud), You can now insert the corresponding screws through the washers and screw them into the backplate to secure it to the wall.
After your backplate is mounted, now is a good time to thread your phone line through the center hole of the board and route it to exit the backplate at either the top or the bottom. After running the phone line, you can conceal it with raceway for a cleaner finish (which usually mounts to the wall with adhesive).
Next, hand screw at least two mounting bolts into the threaded holes in the back of the payphone housing.
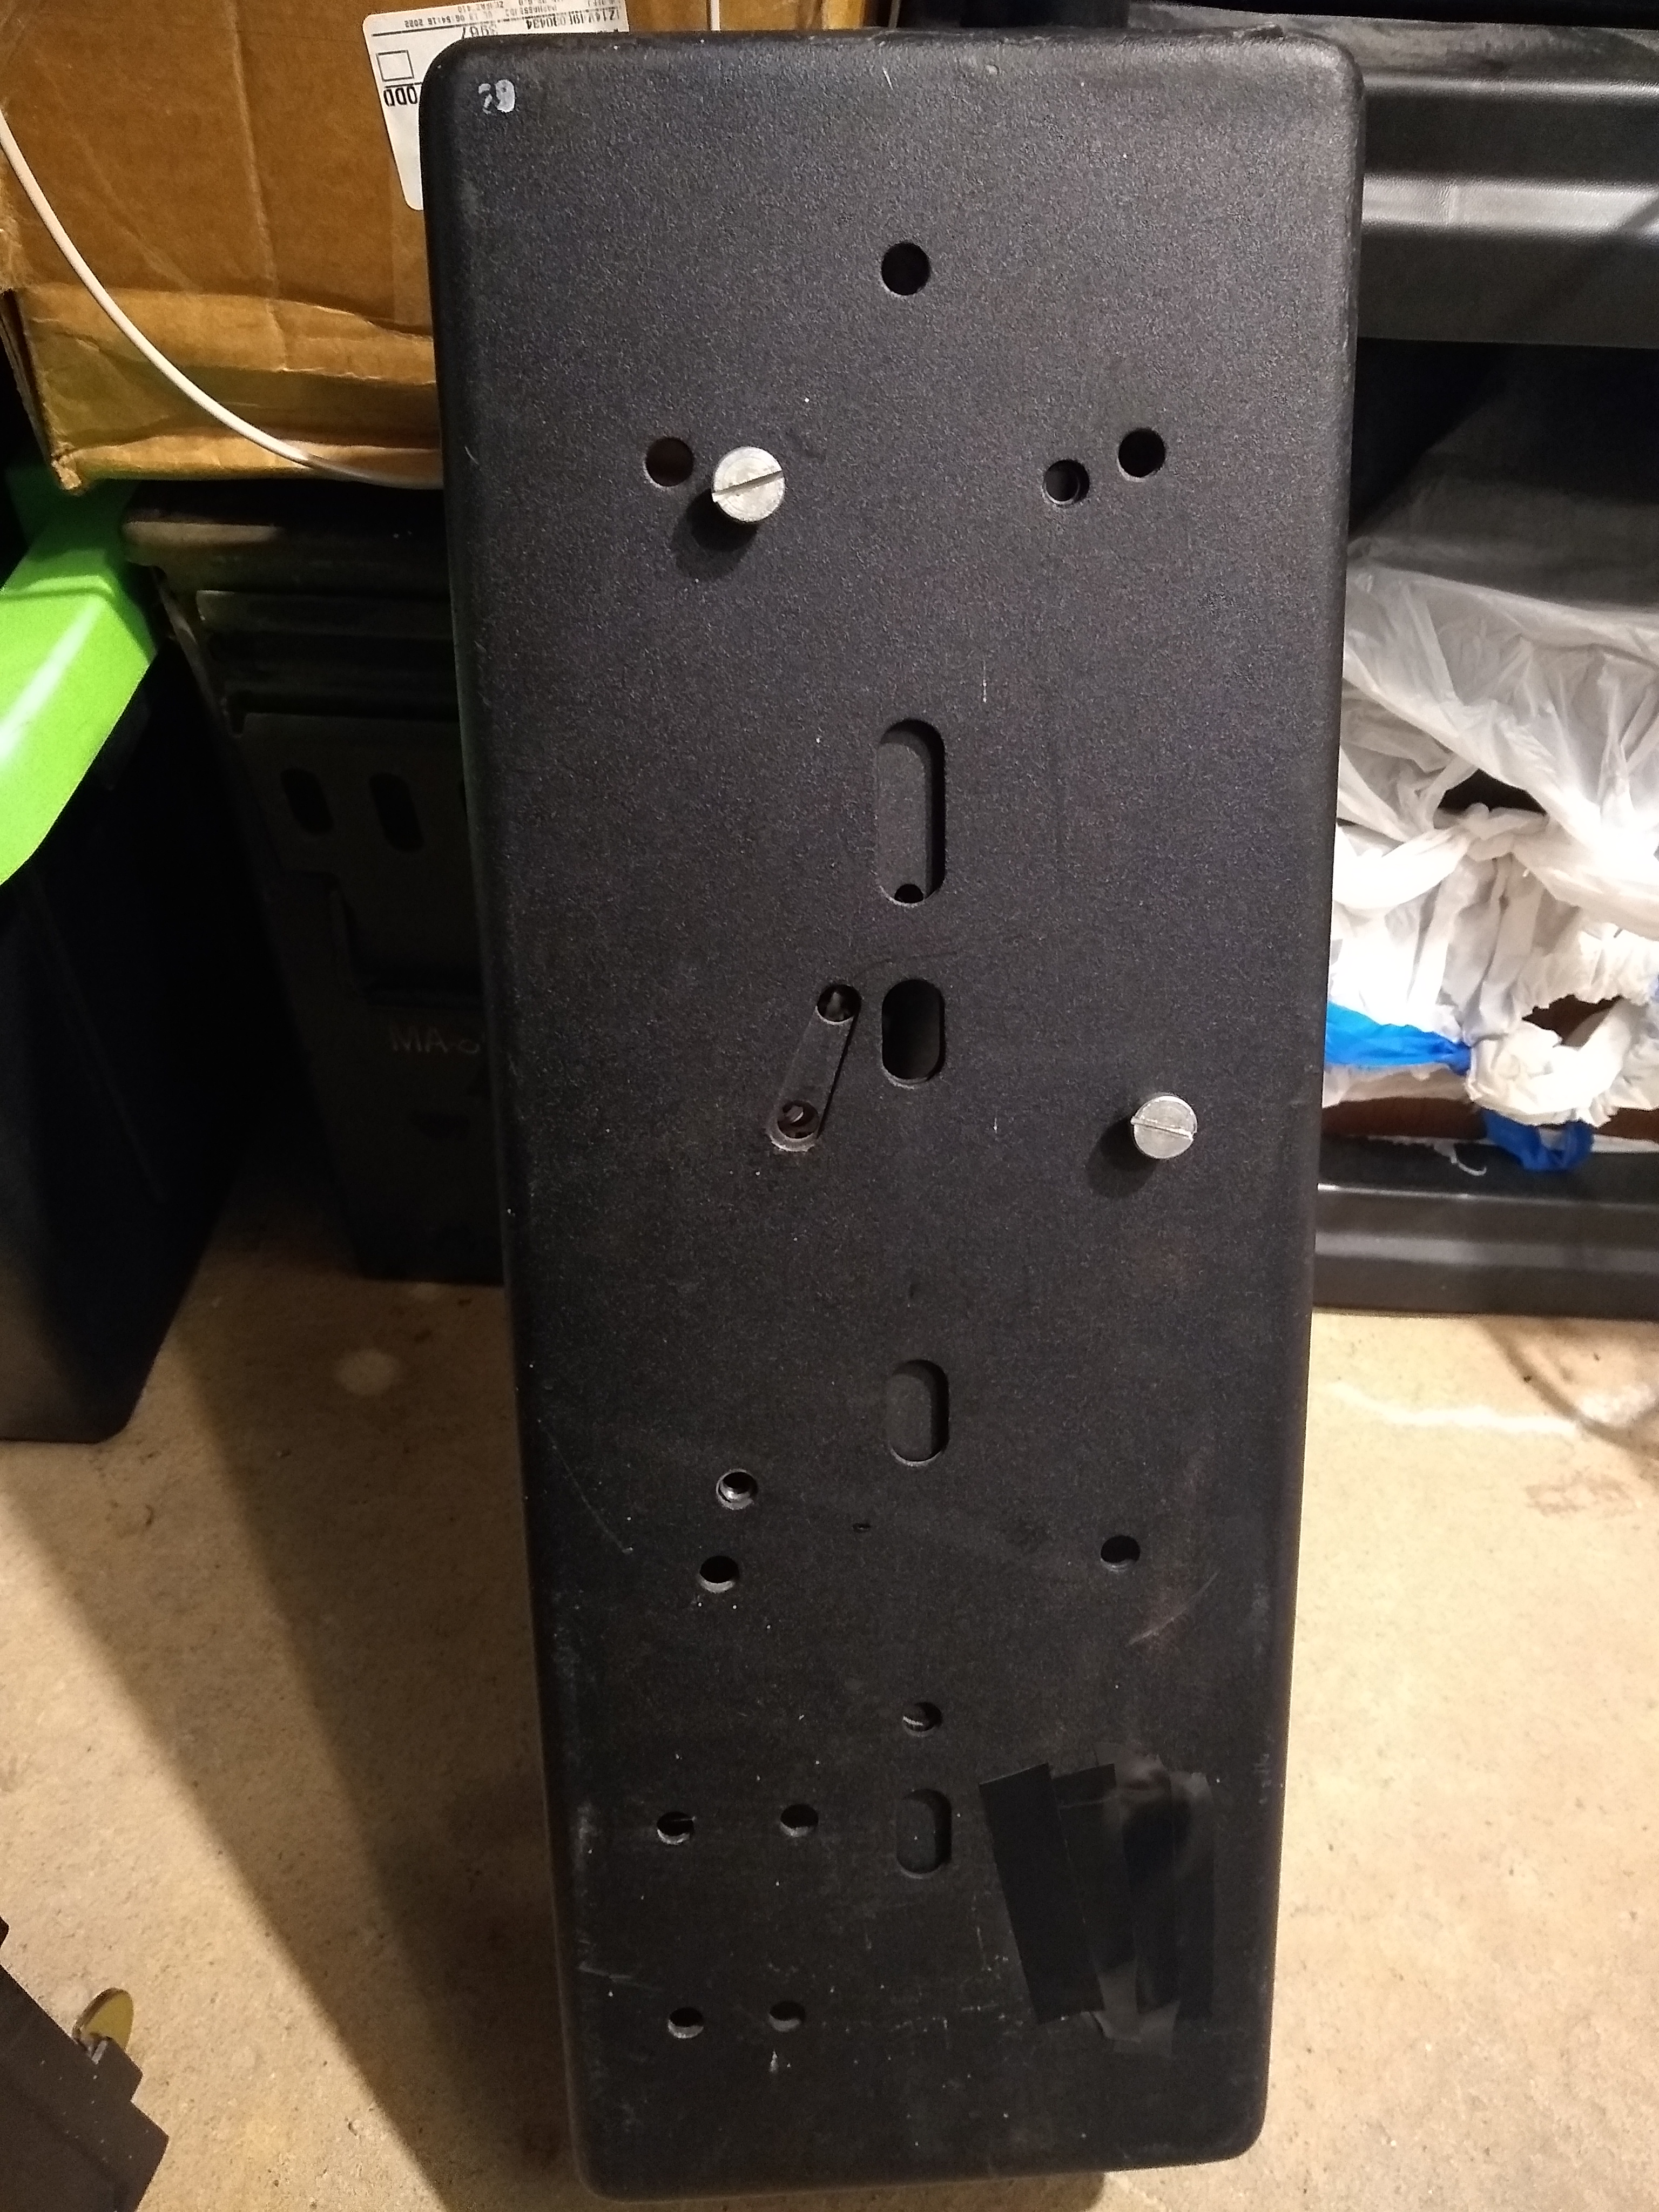
These bolts will slot into the backplate allowing the payphone to sit flush against it Feed your telephone line through the back of the payphone and then approach the backplate with the payphone slightly higher than it will ultimately be installed at and slowly slide the payphone down until the bolts latch into the backplate.
On the inside of the payphone’s housing, use payphone mounting screws to securely fasten the payphone to the backplate. Most installations will have one screw installed within the vault compartment and the rest installed in the upper section of the housing.
Your payphone is now mounted and you can re-assemble and lock the payphone!