Resurrecting A Nortel Millennium
This guide is a work-in-progress and may change over time. Please reach out with any issues! Updated 2026-02-01.
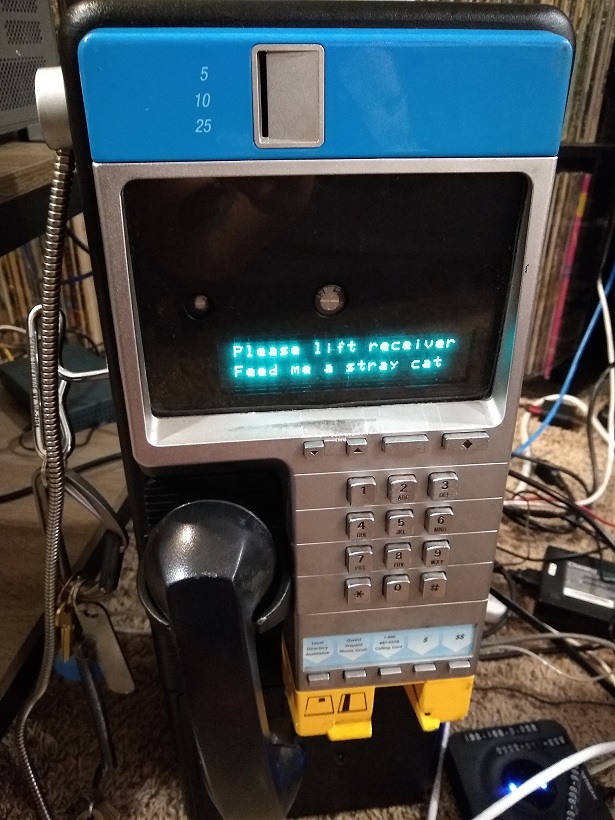
In the mid ’90s Nortel released a new type of payphone, the Millennium, that could accept coins, smart chip cards, and standard credit cards. No longer would the masses need to carry around pocket change! More interestingly, and perhaps a main selling point given the name, was the fact that the phone featured a 2x20 character VFD screen that could display text to the caller. Unfortunately, while these phones were adopted by numerous telephone companies, they never received widespread adoption. Eventually Nortel would exit the hardware business and sell the rights to these phones to QuorTech, who in-turn would later fold and sell the rights to WiMacTel who continues to operate remaining phones today.
Acquiring a Phone
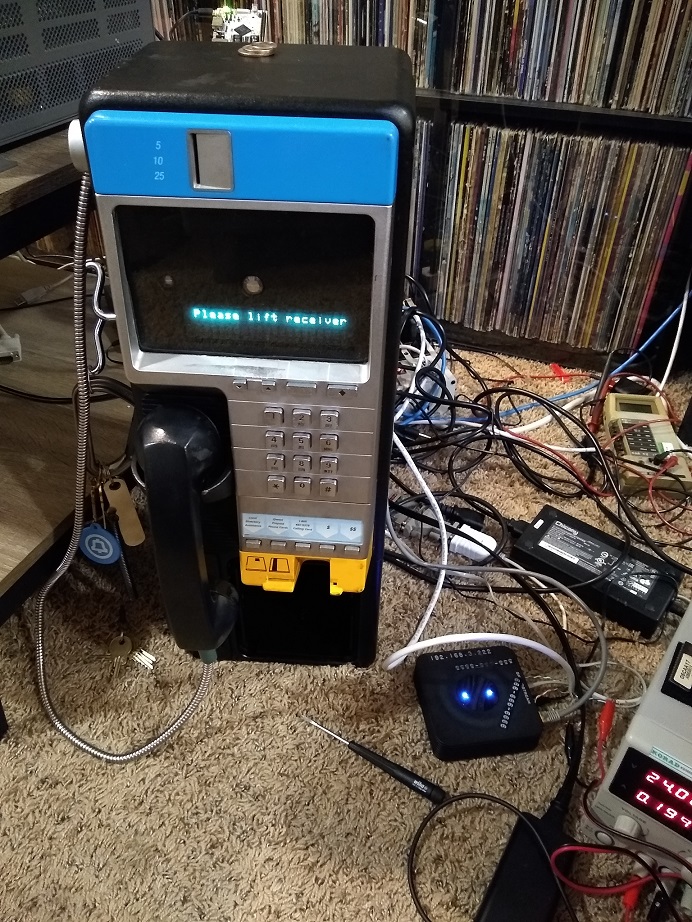
Unsurprisingly there are a lot of Millenniums available on the second-hand market. However, it can be incredibly intimidating to make these phones functional again due to their complicated hardware and proprietary software. We were able to find a listing that with a phone in reasonable condition with both top and coinbox locks removed. The Millennium was designed to be an incredibly secure phone, and we were fairly sure this would extend to the locks as well; they might be more difficult to drill out and that always has risk of damaging the electronics inside. Acquiring a phone without locks or with keys is preferable to one with no legitimate way to open.
Aside from the locks, the phone was also missing the coinbox but otherwise looked complete. The coinbox is a standard type (Western Electric from what we’ve heard) though it isn’t strictly needed. The locks may or may not be standard, we’re not sure yet, but they also aren’t strictly needed either to get the phone functioning. One thing to note is that short of buying a completely separate phone, spare parts for these phones are almost impossible to find. Missing a coinbox (like ours) can easily be remedied, but we wouldn’t consider purchasing one of these phones if other parts were missing.
Wiring the Phone
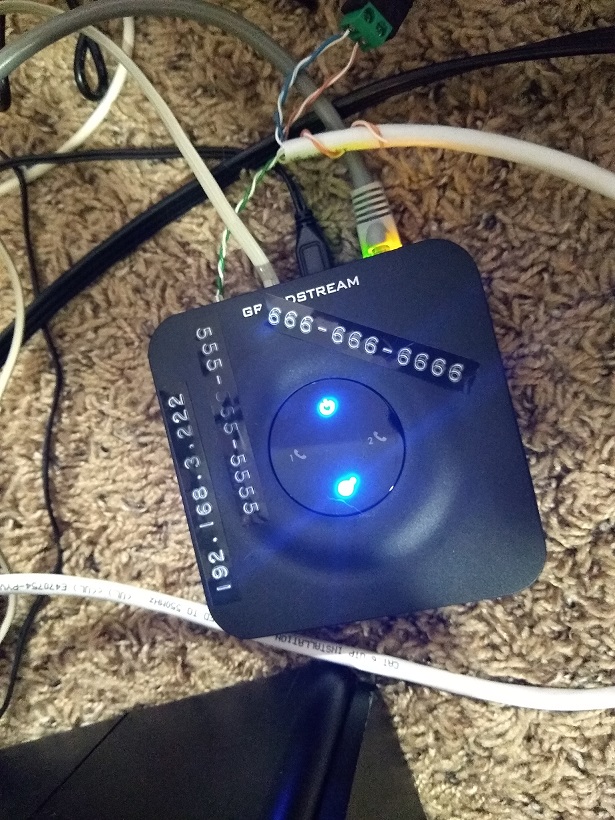
To make the phone work, we’ll first need a phone line of some sort. We’re using a two-line Grandstream HT802 ATA to provide a line for the phone and a second line for a modem (but more on that later). These can be purchased new or on the second-hand market (just make sure not to get one with Sonic or Vonage branding). Unlike most payphones, the Millennium also needs its own external power. While the manual suggests the phone requires 24VDC at 5A, it actually seems to be more like 24VDC at 500mA. Lower voltages may work, but we didn’t experiment with this. For power we picked up an inexpensive adapter that matched the specs and had a plug with screw terminals that would make wiring the phone easier. Some people recommend the Nortel A0727810 power supply, but it didn’t work in our testing as it only produced 16VDC when plugged into a standard 120V outlet. Strangely this adapter is rated for 220V despite having a NEMA 1-15 style connector, and using it with 120V mains power is the cause for the voltage drop.
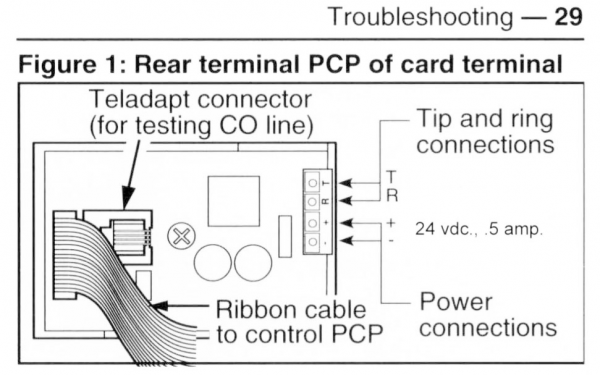
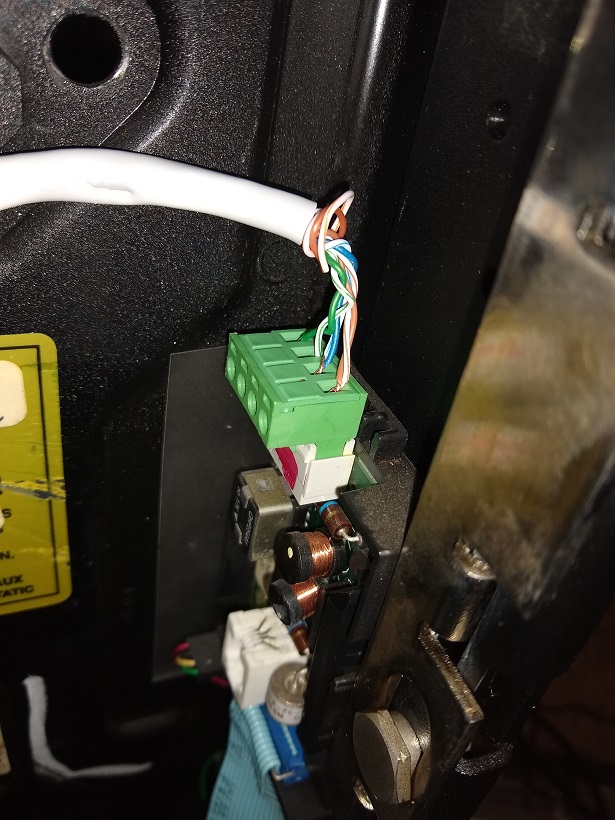
We’ll be carrying telephone wiring and power to the phone via a short length of Cat6 cable so that we only have to run one cable into the phone. We used one twisted pair for ring/tip of the phone line, another twisted pair for 24V+, and a third twisted pair for 24V- (This means doubling up individual wires in the Cat6 cable for power. There are likely some best practices to determine which colored wires fit standards for carrying power over Ethernet, but as this is an unusual application so we simply picked pairs at random as it doesn’t make much difference as long as the wiring is consistent done on both ends.
To connect phone and power up to the Millennium we need a 4-pin plug-in screw terminal block connector (this link is for a pack of 10). After properly wiring the connector (see below), it can be plugged into the PCB on the back inside of the upper housing.
Setting Up Millennium Manager
NOTE: Since this guide was written, the Millennium Demo Firmware Customizer has been created which means you can do some customization (including rates and announcements) without needing to run or use mm_manager at all. This simplifies setups for people who don’t want the external dependency but still would like some customization. Note that you will still have to burn an EPROM and walk through the setup process in the phone (though with this firmware you will not be prompted for the phone number of a machine running mm_manager) so while I endorse this customizer tool I advise you still read the below.
To program the Millennium we will use a utility from Howard Harte called Millennium Manager or mm_manager. mm_manager runs on Linux, MacOs, or Windows, but I will be showing how to use it via a Linux machine running Debian.
Installation is fairly easy:
$ sudo apt install git cmake make
$ git clone https://github.com/hharte/mm_manager.git
$ cd mm_manager
mm_manager$ cmake .
mm_manager$ make
mm_manager$ ./mm_manager -h
mm_manager v0.8 [dev] - (c) 2020-2023, Howard M. Harte

usage: mm_manager [-vhmq] [-f <filename>] [-i "modem init string"] [-l <logfile>] [-p <pcapfile>] [-a <access_code>] [-k <key_code>] [-n <ncc_number>] [-d <default_table_dir] [-t <term_table_dir>] [-u <port>]
        -a <access_code> - Craft 7-digit access code (default: CRASERV)
        -b <baudrate> - Modem baud rate, in bps.  Defaults to 19200.
        -c - Always download complete table set.
        -d <default_table_dir> - default table directory.
        -e <error_inject_type> - Inject error on SIGBRK.
        -f <filename> modem device or file
        -h this help.
        -i "modem init string" - Modem initialization string.
        -k <key_code> - Desk Terminal 10-digit key card code (default: 4012888888)
        -l <logfile> - log bytes transmitted to and received from the terminal.  Useful for debugging.
        -m use serial modem (specify device with -f)
        -n <Primary NCC Number> [-n <Secondary NCC Number>] - specify primary and optionally secondary NCC number.
        -p <pcapfile> - Save packets in a .pcap file.
        -q - Don't display sign-on banner.
        -r - Rating test mode: Amount charged determined by last 4 digits of dialed number.
        -s - Download only minimum required tables to terminal.
        -t <term_table_dir> - terminal-specific table directory.
        -u <port> - Send packets as UDP to <port>.
        -v verbose (multiple v's increase verbosity.
        -w - don't monitor the modem for carrier loss.
To communicate with the phone we will need a modem connected to a phone line the Millennium can reach. Exactly how to have the phone and modem communicate is out of scope for this guide, but using the previously-linked Grandstream HT802, it is possible to configure direct calling between the phone ports without the need for a PBX or anything else sitting in-between. This is great for configuration, but note that is not an idea setup for making calls as the phone can only communicate with the modem in this setup. Due to latency between the phone and modem over a PBX, programming the phone using direct FXS port calling is highly recommended.
The modem that we are using is a Dell Conexant USB Modem. This modem is available for around $15 from second-hand sources and may also be branded by other companies like Lenovo. The modem should be plugged into both the Linux machine and ATA using a USB port and FXS phone port respectively.
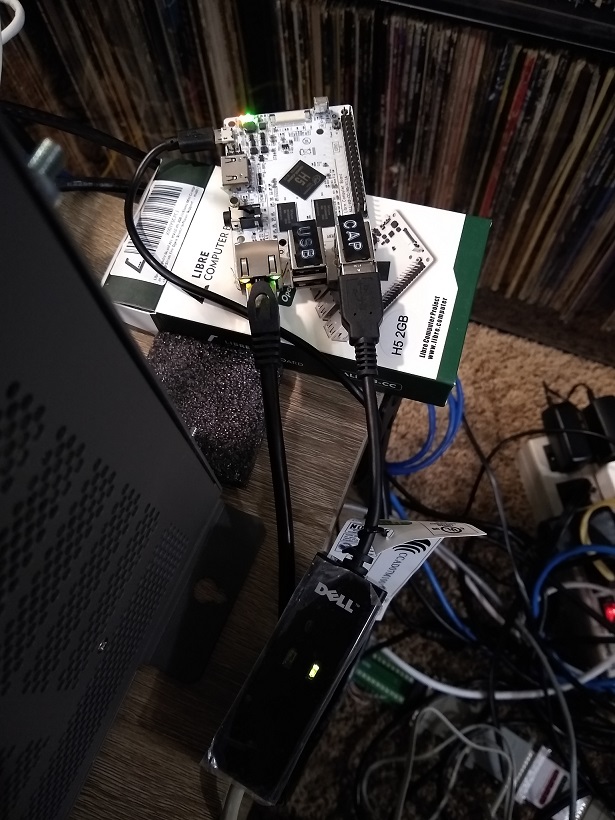
The Millennium requires Polarity Reversal to be set to Yes on our ATA, so make sure this is added in on the line for our phone. Further, since we are dealing with modems, the following settings should also be set for each line of the ATA:
- Disable Line Echo Canceller (LEC):
Yes - Disable Network Echo Suppressor:
Yes - Jitter Buffer Type:
Fixed - Jitter Buffer Length:
Low(orMedium, we may need to play with this).
Upgrading the Firmware
After speaking with Howard Harte, firmware version 1.20 is the most self-sufficient firmware as it allows the phone to handle call rates itself without phoning back to mm_manager.
Looking at the phone in our possession, we luckily have an older Rev 1 model that makes use of through-hole DIP EPROMS on the control board. The firmware EPROM sits in location U5 near the middle-left edge of the board, and ours has a label reading 06CAA17 that signifies it is using firmware version 1.0. Some phones sold have been reprogrammed with demo firmware that will allow for free calls, but cannot be customized. While a phone running demo firmware may be usable as-is for making calls, it can also be reflashed with production firmware to restore full functionality and allow customizations.
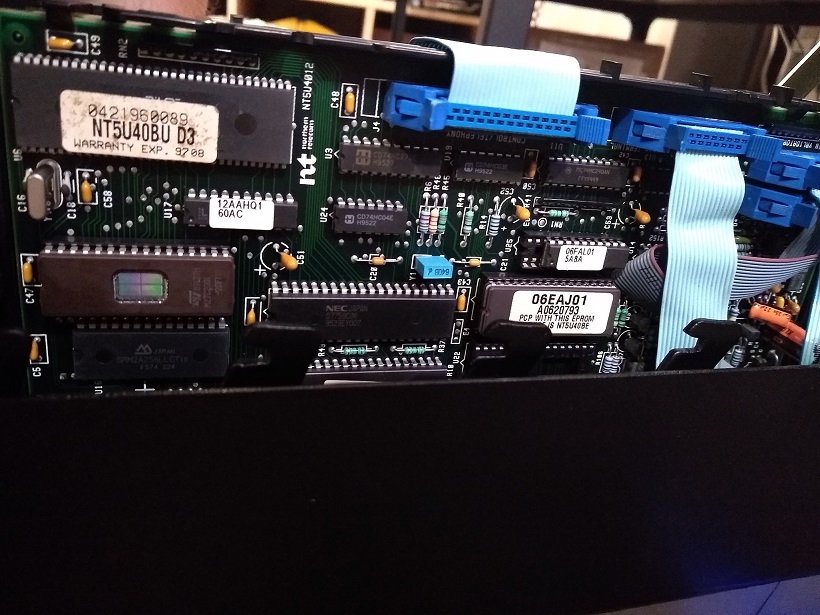
To upgrade the firmware on our phone, we can use a new EPROM with the proper v1.20 firmware burned on it. Instead of using the original EPROM, we decided to buy another one and keep the original firmware EPROM in storage, though we could just erase and reburn our original EPROM if desired. Our original chip is an ST M27C2001-15F6 and we replaced it with a slightly-slower ST M27C2001-20F1. If you don’t want a UV-erasable EPROM, Howard recommends the SST39SF020 as a compatible multi-purpose flash chip.
From here, we downloaded and burned the v1.20 firmware using a MiniPro II programmer with its accompanying software. Afterwards, with the phone un-powered, we simply swapped out the chips and restarted the phone. There won’t be any evidence that the firmware is different until the phone is programmed. After programming, the phone will display the date and time while idle.
Updating the Rate Table
By default, the programming from mm_manager will associate costs with any call made through the phone. Paying for a call is easily spoofed as mm_manager aims to duplicate the normal payphone experience. A non-expired credit card can be inserted into the phone, the phone contacts mm_manager to authorize the transaction, and mm_manager blindly accepts the card as valid allowing the call to go through (but not actually charging the card) provided the card isn’t expired. Funny enough, some gift cards will actually work for this. A Dunkin’ Donuts gift card will validate just fine though a Starbucks gift card will not work at all.
While this is a fun feature, it would be more user friendly to make all the calls free without the need to insert a card. Through a bit of trial and error, we’ve discovered that the rate table can be edited so that all calls can have unlimited duration and require $0.00. NOTE: We discovered that our internal PhreakNet dialing via 1-400-NXX-XXXX is still prompting for payment. This is likely due to the NPA (400) not being configured since it is unused in the North American Numbering Plan (NANP) and the phone does not know how to handle the call. We still need to work on a fix for this, but it will likely be accomplished by generating NPA/LCD tables.
To make the changes, we can edit mm_table_49.bin. mm_manager contains a utility mm_rate to check the rate table and display the contents. Below we see the default rate table:
mm_manager$ ./mm_rate tables/default/mm_table_49.bin
Nortel Millennium DLOG_MT_RATE_TABLE Table 73 (0x49) Dump

Date: 1990-01-01 00:00:00
Telco ID: 0x00 (0)
Spare bytes:

        000: 00, 00, 00, 00, 00, 00, 00, 00, 00, 00, 00, 00, 00, 00, 00, 00, ................
        016: 00, 00, 00, 00, 00, 00, 00, 00, 00, 00, 00, 00, 00, 00, 00, 00, ................

+------------+-------------------------+----------------+--------------+-------------------+-----------------+
| Index      | Type                    | Initial Period | Initial Rate | Additional Period | Additional Rate |
+------------+-------------------------+----------------+--------------+-------------------+-----------------+
|   0 (0x00) | 0x02 fixed_charge_local |      Unlimited |         0.50 |         Unlimited |            0.00 |
|   1 (0x01) | 0x06 toll_inter_lata    |           240s |         1.00 |               60s |            0.25 |
|   2 (0x02) | 0x05 toll_intra_lata    |           240s |         1.00 |               60s |            0.25 |
|   3 (0x03) | 0x04 invalid_npa_nxx    |             0s |         0.00 |                0s |            0.00 |
|   4 (0x04) | 0x06 toll_inter_lata    |           240s |         1.00 |               60s |            0.25 |
|   5 (0x05) | 0x05 toll_intra_lata    |           240s |         1.00 |               60s |            0.25 |
|   6 (0x06) | 0x0a       ?0a?         |      Unlimited |         0.50 |         Unlimited |            0.00 |
|   7 (0x07) | 0x02 fixed_charge_local |      Unlimited |         0.75 |         Unlimited |            0.00 |
|   8 (0x08) | 0x06 toll_inter_lata    |      Unlimited |         0.75 |         Unlimited |            0.00 |
|   9 (0x09) | 0x06 toll_inter_lata    |           240s |         1.00 |               60s |            0.25 |
|  10 (0x0a) | 0x02 fixed_charge_local |      Unlimited |         0.00 |         Unlimited |            0.00 |
|  11 (0x0b) | 0x03 not_available      |      Unlimited |         0.00 |         Unlimited |            0.00 |
|  12 (0x0c) | 0x02 fixed_charge_local |      Unlimited |         0.50 |         Unlimited |            0.00 |
|  13 (0x0d) | 0x02 fixed_charge_local |           240s |         5.00 |               60s |            1.00 |
|  14 (0x0e) | 0x0c       ?0c?         |      Unlimited |         0.05 |         Unlimited |            0.00 |
|  16 (0x10) | 0x03 not_available      |      Unlimited |         0.00 |         Unlimited |            0.00 |
|  17 (0x11) | 0x05 toll_intra_lata    |           240s |         1.00 |               60s |            0.25 |
|  18 (0x12) | 0x06 toll_inter_lata    |           240s |         1.00 |               60s |            0.25 |
|  19 (0x13) | 0x09 international      |            60s |         1.00 |               60s |            1.00 |
|  20 (0x14) | 0x09 international      |           120s |         1.00 |              120s |            1.00 |
|  21 (0x15) | 0x09 international      |           180s |         1.00 |              180s |            1.00 |
|  22 (0x16) | 0x09 international      |           240s |         1.00 |              240s |            1.00 |
|  24 (0x18) | 0x02 fixed_charge_local |      Unlimited |         0.05 |         Unlimited |            0.00 |
|  31 (0x1f) | 0x03 not_available      |      Unlimited |         0.00 |         Unlimited |            0.00 |
|  32 (0x20) | 0x09 international      |            60s |         1.00 |               60s |            1.00 |
|  33 (0x21) | 0x09 international      |           120s |         1.00 |              120s |            1.00 |
|  34 (0x22) | 0x09 international      |           180s |         1.00 |              180s |            1.00 |
|  35 (0x23) | 0x09 international      |           240s |         1.00 |              240s |            1.00 |
|  36 (0x24) | 0x09 international      |           300s |         1.00 |              300s |            1.00 |
|  37 (0x25) | 0x09 international      |           360s |         1.00 |              360s |            1.00 |
|  38 (0x26) | 0x09 international      |           420s |         1.00 |              420s |            1.00 |
|  39 (0x27) | 0x09 international      |           480s |         1.00 |              480s |            1.00 |
|  52 (0x34) | 0x09 international      |            60s |         0.25 |               60s |            1.00 |
|  53 (0x35) | 0x09 international      |            60s |         0.25 |              120s |            1.00 |
|  54 (0x36) | 0x09 international      |            60s |         0.25 |              180s |            1.00 |
|  55 (0x37) | 0x09 international      |            60s |         0.25 |              240s |            1.00 |
|  56 (0x38) | 0x09 international      |            60s |         0.25 |              300s |            1.00 |
|  57 (0x39) | 0x09 international      |            60s |         0.25 |              360s |            1.00 |
|  58 (0x3a) | 0x09 international      |            60s |         0.25 |              420s |            1.00 |
|  59 (0x3b) | 0x09 international      |            60s |         0.25 |              480s |            1.00 |
|  60 (0x3c) | 0x09 international      |            60s |         0.25 |              540s |            1.00 |
|  61 (0x3d) | 0x09 international      |            60s |         0.25 |              600s |            1.00 |
+------------------------------------------------------------------------------------------------------------+
In the Type column we can see a hex byte reference to the setting. We also see columns for periods and rates for the different call types.
Using bytes FF for unlimited time and 00 for no cost, we can modify this table to make calls free.
Note the old table contents:
mm_manager$ hexdump -C tables/default/mm_table_49.bin
00000000  5a 01 01 00 00 00 00 00  00 00 00 00 00 00 00 00  |Z...............|
00000010  00 00 00 00 00 00 00 00  00 00 00 00 00 00 00 00  |................|
00000020  00 00 00 00 00 00 00 02  ff ff 32 00 ff ff 00 00  |..........2.....|
00000030  06 f0 00 64 00 3c 00 19  00 05 f0 00 64 00 3c 00  |...d.<......d.<.|
00000040  19 00 04 00 00 00 00 00  00 00 00 06 f0 00 64 00  |..............d.|
00000050  3c 00 19 00 05 f0 00 64  00 3c 00 19 00 0a ff ff  |<......d.<......|
00000060  32 00 ff ff 00 00 02 ff  ff 4b 00 ff ff 00 00 06  |2........K......|
00000070  ff ff 4b 00 ff ff 00 00  06 f0 00 64 00 3c 00 19  |..K........d.<..|
00000080  00 02 ff ff 00 00 ff ff  00 00 03 ff ff 00 00 ff  |................|
00000090  ff 00 00 02 ff ff 32 00  ff ff 00 00 02 f0 00 f4  |......2.........|
000000a0  01 3c 00 64 00 0c ff ff  05 00 ff ff 00 00 00 00  |.<.d............|
000000b0  00 00 00 00 00 00 00 03  ff ff 00 00 ff ff 00 00  |................|
000000c0  05 f0 00 64 00 3c 00 19  00 06 f0 00 64 00 3c 00  |...d.<......d.<.|
000000d0  19 00 09 3c 00 64 00 3c  00 64 00 09 78 00 64 00  |...<.d.<.d..x.d.|
000000e0  78 00 64 00 09 b4 00 64  00 b4 00 64 00 09 f0 00  |x.d....d...d....|
000000f0  64 00 f0 00 64 00 00 00  00 00 00 00 00 00 00 02  |d...d...........|
00000100  ff ff 05 00 ff ff 00 00  00 00 00 00 00 00 00 00  |................|
00000110  00 00 00 00 00 00 00 00  00 00 00 00 00 00 00 00  |................|
*
00000130  00 00 00 00 00 00 00 00  00 00 00 00 00 00 03 ff  |................|
00000140  ff 00 00 ff ff 00 00 09  3c 00 64 00 3c 00 64 00  |........<.d.<.d.|
00000150  09 78 00 64 00 78 00 64  00 09 b4 00 64 00 b4 00  |.x.d.x.d....d...|
00000160  64 00 09 f0 00 64 00 f0  00 64 00 09 2c 01 64 00  |d....d...d..,.d.|
00000170  2c 01 64 00 09 68 01 64  00 68 01 64 00 09 a4 01  |,.d..h.d.h.d....|
00000180  64 00 a4 01 64 00 09 e0  01 64 00 e0 01 64 00 00  |d...d....d...d..|
00000190  00 00 00 00 00 00 00 00  00 00 00 00 00 00 00 00  |................|
*
000001f0  00 00 00 00 00 00 00 00  00 00 00 09 3c 00 19 00  |............<...|
00000200  3c 00 64 00 09 3c 00 19  00 78 00 64 00 09 3c 00  |<.d..<...x.d..<.|
00000210  19 00 b4 00 64 00 09 3c  00 19 00 f0 00 64 00 09  |....d..<.....d..|
00000220  3c 00 19 00 2c 01 64 00  09 3c 00 19 00 68 01 64  |<...,.d..<...h.d|
00000230  00 09 3c 00 19 00 a4 01  64 00 09 3c 00 19 00 e0  |..<.....d..<....|
00000240  01 64 00 09 3c 00 19 00  1c 02 64 00 09 3c 00 19  |.d..<.....d..<..|
00000250  00 58 02 64 00 00 00 00  00 00 00 00 00 00 00 00  |.X.d............|
00000260  00 00 00 00 00 00 00 00  00 00 00 00 00 00 00 00  |................|
*
000004a0  00 00 00 00 00 00 00                              |.......|
000004a7
We will modify a copy of this file, so let’s create the copy by making a subdirectory for our phone in the existing tables subdirectory within the mm_manager root directory:
# Note that 5555555555 is the number of our phone, this new directory will contain custom config
mm_manager$ mkdir tables 5555555555
mm_manager$ cp tables/default/mm_table_49.bin tables/5555555555/mm_table_49.bin
After this, we can update the table using a tool like hexcurse. We can seek out bytes that are referenced in the Type column of the table above and update the bytes following the type to FF FF 00 00 FF FF 00 00. After updating all of these, we have the following file contents:
mm_manager$ hexdump -C tables/5555555555/mm_table_49.bin
00000000  5a 01 01 00 00 00 00 00  00 00 00 00 00 00 00 00  |Z...............|
00000010  00 00 00 00 00 00 00 00  00 00 00 00 00 00 00 00  |................|
00000020  00 00 00 00 00 00 00 02  ff ff 00 00 ff ff 00 00  |................|
00000030  06 ff ff 00 00 ff ff 00  00 05 ff ff 00 00 ff ff  |................|
00000040  00 00 04 ff ff 00 00 ff  ff 00 00 06 ff ff 00 00  |................|
00000050  ff ff 00 00 05 ff ff 00  00 ff ff 00 00 0a ff ff  |................|
00000060  00 00 ff ff 00 00 02 ff  ff 00 00 ff ff 00 00 06  |................|
00000070  ff ff 00 00 ff ff 00 00  06 ff ff 00 00 ff ff 00  |................|
00000080  00 02 ff ff 00 00 ff ff  00 00 03 ff ff 00 00 ff  |................|
00000090  ff 00 00 02 ff ff 00 00  ff ff 00 00 02 ff ff 00  |................|
000000a0  00 ff ff 00 00 0c ff ff  00 00 ff ff 00 00 00 00  |................|
000000b0  00 00 00 00 00 00 00 03  ff ff 00 00 ff ff 00 00  |................|
000000c0  05 ff ff 00 00 ff ff 00  00 06 ff ff 00 00 ff ff  |................|
000000d0  00 00 09 ff ff 00 00 ff  ff 00 00 09 ff ff 00 00  |................|
000000e0  ff ff 00 00 09 ff ff 00  00 ff ff 00 00 09 ff ff  |................|
000000f0  00 00 ff ff 00 00 00 00  00 00 00 00 00 00 00 02  |................|
00000100  ff ff 00 00 ff ff 00 00  00 00 00 00 00 00 00 00  |................|
00000110  00 00 00 00 00 00 00 00  00 00 00 00 00 00 00 00  |................|
*
00000130  00 00 00 00 00 00 00 00  00 00 00 00 00 00 03 ff  |................|
00000140  ff 00 00 ff ff 00 00 09  ff ff 00 00 ff ff 00 00  |................|
00000150  09 ff ff 00 00 ff ff 00  00 09 ff ff 00 00 ff ff  |................|
00000160  00 00 09 ff ff 00 00 ff  ff 00 00 09 ff ff 00 00  |................|
00000170  ff ff 00 00 09 ff ff 00  00 ff ff 00 00 09 ff ff  |................|
00000180  00 00 ff ff 00 00 09 ff  ff 00 00 ff ff 00 00 00  |................|
00000190  00 00 00 00 00 00 00 00  00 00 00 00 00 00 00 00  |................|
*
000001f0  00 00 00 00 00 00 00 00  00 00 00 09 ff ff 00 00  |................|
00000200  ff ff 00 00 09 ff ff 00  00 ff ff 00 00 09 ff ff  |................|
00000210  00 00 ff ff 00 00 09 ff  ff 00 00 ff ff 00 00 09  |................|
00000220  ff ff 00 00 ff ff 00 00  09 ff ff 00 00 ff ff 00  |................|
00000230  00 09 ff ff 00 00 ff ff  00 00 09 ff ff 00 00 ff  |................|
00000240  ff 00 00 09 ff ff 00 00  ff ff 00 00 09 ff ff 00  |................|
00000250  00 ff ff 00 00 00 00 00  00 00 00 00 00 00 00 00  |................|
00000260  00 00 00 00 00 00 00 00  00 00 00 00 00 00 00 00  |................|
*
000004a0  00 00 00 00 00 00 00                              |.......|
000004a7
We can use the rate table utility once more to verify the changes:
mm_manager$ ./mm_rate tables/5555555555/mm_table_49.bin
Nortel Millennium DLOG_MT_RATE_TABLE Table 73 (0x49) Dump

Date: 1990-01-01 00:00:00
Telco ID: 0x00 (0)
Spare bytes:

        000: 00, 00, 00, 00, 00, 00, 00, 00, 00, 00, 00, 00, 00, 00, 00, 00, ................
        016: 00, 00, 00, 00, 00, 00, 00, 00, 00, 00, 00, 00, 00, 00, 00, 00, ................

+------------+-------------------------+----------------+--------------+-------------------+-----------------+
| Index      | Type                    | Initial Period | Initial Rate | Additional Period | Additional Rate |
+------------+-------------------------+----------------+--------------+-------------------+-----------------+
|   0 (0x00) | 0x02 fixed_charge_local |      Unlimited |         0.00 |         Unlimited |            0.00 |
|   1 (0x01) | 0x06 toll_inter_lata    |      Unlimited |         0.00 |         Unlimited |            0.00 |
|   2 (0x02) | 0x05 toll_intra_lata    |      Unlimited |         0.00 |         Unlimited |            0.00 |
|   3 (0x03) | 0x04 invalid_npa_nxx    |      Unlimited |         0.00 |         Unlimited |            0.00 |
|   4 (0x04) | 0x06 toll_inter_lata    |      Unlimited |         0.00 |         Unlimited |            0.00 |
|   5 (0x05) | 0x05 toll_intra_lata    |      Unlimited |         0.00 |         Unlimited |            0.00 |
|   6 (0x06) | 0x0a       ?0a?         |      Unlimited |         0.00 |         Unlimited |            0.00 |
|   7 (0x07) | 0x02 fixed_charge_local |      Unlimited |         0.00 |         Unlimited |            0.00 |
|   8 (0x08) | 0x06 toll_inter_lata    |      Unlimited |         0.00 |         Unlimited |            0.00 |
|   9 (0x09) | 0x06 toll_inter_lata    |      Unlimited |         0.00 |         Unlimited |            0.00 |
|  10 (0x0a) | 0x02 fixed_charge_local |      Unlimited |         0.00 |         Unlimited |            0.00 |
|  11 (0x0b) | 0x03 not_available      |      Unlimited |         0.00 |         Unlimited |            0.00 |
|  12 (0x0c) | 0x02 fixed_charge_local |      Unlimited |         0.00 |         Unlimited |            0.00 |
|  13 (0x0d) | 0x02 fixed_charge_local |      Unlimited |         0.00 |         Unlimited |            0.00 |
|  14 (0x0e) | 0x0c       ?0c?         |      Unlimited |         0.00 |         Unlimited |            0.00 |
|  16 (0x10) | 0x03 not_available      |      Unlimited |         0.00 |         Unlimited |            0.00 |
|  17 (0x11) | 0x05 toll_intra_lata    |      Unlimited |         0.00 |         Unlimited |            0.00 |
|  18 (0x12) | 0x06 toll_inter_lata    |      Unlimited |         0.00 |         Unlimited |            0.00 |
|  19 (0x13) | 0x09 international      |      Unlimited |         0.00 |         Unlimited |            0.00 |
|  20 (0x14) | 0x09 international      |      Unlimited |         0.00 |         Unlimited |            0.00 |
|  21 (0x15) | 0x09 international      |      Unlimited |         0.00 |         Unlimited |            0.00 |
|  22 (0x16) | 0x09 international      |      Unlimited |         0.00 |         Unlimited |            0.00 |
|  24 (0x18) | 0x02 fixed_charge_local |      Unlimited |         0.00 |         Unlimited |            0.00 |
|  31 (0x1f) | 0x03 not_available      |      Unlimited |         0.00 |         Unlimited |            0.00 |
|  32 (0x20) | 0x09 international      |      Unlimited |         0.00 |         Unlimited |            0.00 |
|  33 (0x21) | 0x09 international      |      Unlimited |         0.00 |         Unlimited |            0.00 |
|  34 (0x22) | 0x09 international      |      Unlimited |         0.00 |         Unlimited |            0.00 |
|  35 (0x23) | 0x09 international      |      Unlimited |         0.00 |         Unlimited |            0.00 |
|  36 (0x24) | 0x09 international      |      Unlimited |         0.00 |         Unlimited |            0.00 |
|  37 (0x25) | 0x09 international      |      Unlimited |         0.00 |         Unlimited |            0.00 |
|  38 (0x26) | 0x09 international      |      Unlimited |         0.00 |         Unlimited |            0.00 |
|  39 (0x27) | 0x09 international      |      Unlimited |         0.00 |         Unlimited |            0.00 |
|  52 (0x34) | 0x09 international      |      Unlimited |         0.00 |         Unlimited |            0.00 |
|  53 (0x35) | 0x09 international      |      Unlimited |         0.00 |         Unlimited |            0.00 |
|  54 (0x36) | 0x09 international      |      Unlimited |         0.00 |         Unlimited |            0.00 |
|  55 (0x37) | 0x09 international      |      Unlimited |         0.00 |         Unlimited |            0.00 |
|  56 (0x38) | 0x09 international      |      Unlimited |         0.00 |         Unlimited |            0.00 |
|  57 (0x39) | 0x09 international      |      Unlimited |         0.00 |         Unlimited |            0.00 |
|  58 (0x3a) | 0x09 international      |      Unlimited |         0.00 |         Unlimited |            0.00 |
|  59 (0x3b) | 0x09 international      |      Unlimited |         0.00 |         Unlimited |            0.00 |
|  60 (0x3c) | 0x09 international      |      Unlimited |         0.00 |         Unlimited |            0.00 |
|  61 (0x3d) | 0x09 international      |      Unlimited |         0.00 |         Unlimited |            0.00 |
+------------------------------------------------------------------------------------------------------------+
To save time, this file can be downloaded here.
Updating Advertisements
When the Millennium is running, a series of advertisements are shown on the bottom row of the VFD while the the phone is either idle or handling a call. Customizing these messages is a fairly simple process.
First, we edit the file located at config/advert_prompts.csv with a text editor. The file is a comma-separated-value file, with a total of 20 lines: 10 shown when the phone is at idle and 10 when the phone is handling a call. Each line of this file handles one advert message with the first value corresponding to duration, the second corresponding to display type, and the third being the actual message. NOTE: The messages must be a maximum of 20 characters in size, though if we use fewer than 20 characters for any single advert it will be padded to 20.
Display type can be any of the following numeric values for displaying different behavior:
| Attribute | Numeric Value |
|---|---|
| Permanent | 0 |
| Flashing Same | 1 |
| Flashing Next | 2 |
| Scroll In | 3 |
| Scroll Out | 4 |
| Scroll In and Out | 5 |
| New Prompt | 17 |
| Flashing Same Off | 18 |
| Flashing Next 2nd | 19 |
| Flashing Next 1st off | 20 |
| Flashing Next 2nd off | 21 |
| Blank before | 0x40 |
We have updated our file to the following:
mm_manager$ cat config/advert_prompts.csv
Duration (in ms),Attribute,Message
20000,0,philtel.org
10000,1,All calls free!
10000,3,Feed me a stray cat
0,3,We've been trying to
0,3, reach you
0,3,concerning your
0,3,vehicle's extended
0,3, warranty
0,0,
0,0,
0,5,
0,3,Thank you for using
2000,3,PhilTel for all your
2000,5,calling needs!
0,0,
0,0,
0,0,
0,0,
0,0,
0,0,
After we are happy with our adverts, we can regenerate the advertising prompts binary file using the generate_advert_prompts.py utility, specifying our Millennium’s phone number 5555555555:
mm_manager$ python3 generate_advert_prompts.py --terminal 5555555555
Advert Prompts Table Generator for the Nortel Millennium Payphone
Generating Advert Prompts table
Generated tables/5555555555/mm_table_1d.bin.
Programming the Phone
Starting mm_manager can be done via the following command:
mm_manager$ ./mm_manager -m -n 6666666666 -f /dev/ttyACM0 -vv -l install.dlog -p install.pcap
Note that 6666666666 is the phone number we have assigned to mm_manager (or more appropriately, the modem) and /dev/ttyACM0 is the USB modem device as it appears on the Linux system (though /dev/ttyUSB0 is also common).
Before the phone can be programmed, it must be powered and connected to the phone line. Similarly, the Linux machine should be online with a modem attached (also connected to a phone line).
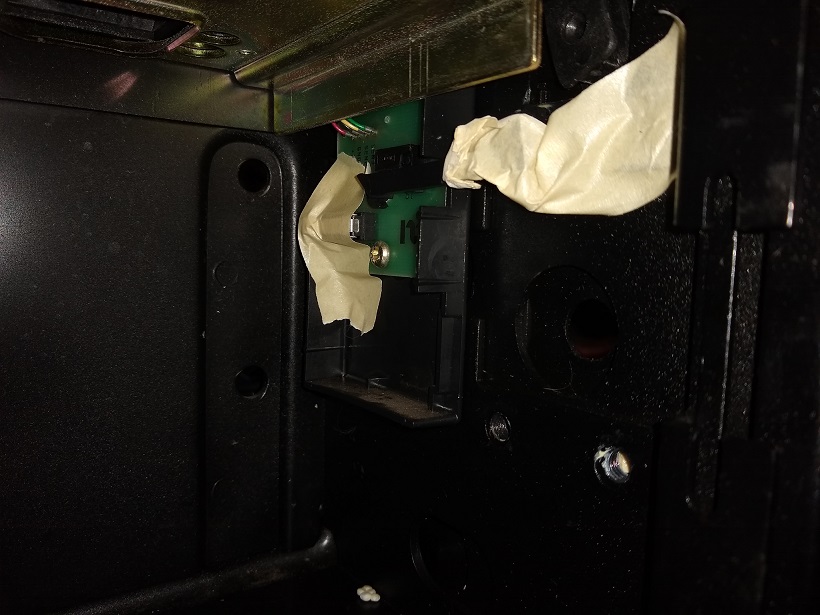
The Millennium has two switches in the vault compartment that would normally be depressed if there was a coinbox inserted and the vault was locked. If you are missing the coinbox and or vault lock, you can simply tape these switches down. Further, make sure that the upper housing is securely locked with a T-Key.
Upon powering up the phone it is likely that * out of service * will display on the screen. This is completely normal.
With the upper housing locked and the handset on the cradle, we key in 2727378 on the keypad to access the craft terminal menu. We will be prompted to enter a pin number. We can choose any 5-digit number starting with 5 such as 55555 and use * to save. We will then be prompted to use the T-Key to unlock the upper housing. Afterwards, we will be prompted to perform an off-hook test and can follow the instructions as prompted.
Now we will need to supply the phone with some information about itself and mm_manager. The phone will prompt us to enter the phone’s number (We are using 555-555-5555). Afterwards, it will request the phone’s serial number (1234567890 works fine). Then, it will ask for the phone number of mm_manager (we’re using 666-666-6666). Next, it will prompt us to perform an answer detect test, which we can complete by following the instructions provided.
Finally, we will be prompted to start the software download. After pressing *, the phone will call mm_manager and begin to pull down all the configuration. Due to using VoIP to facilitate this connection, the phone is prone to disconnecting on error without fully receiving the download. Luckily the phone makes it easy to retry download in this case with on-screen instruction. On occasion it can take up to three attempts before the phone is successfully programmed.
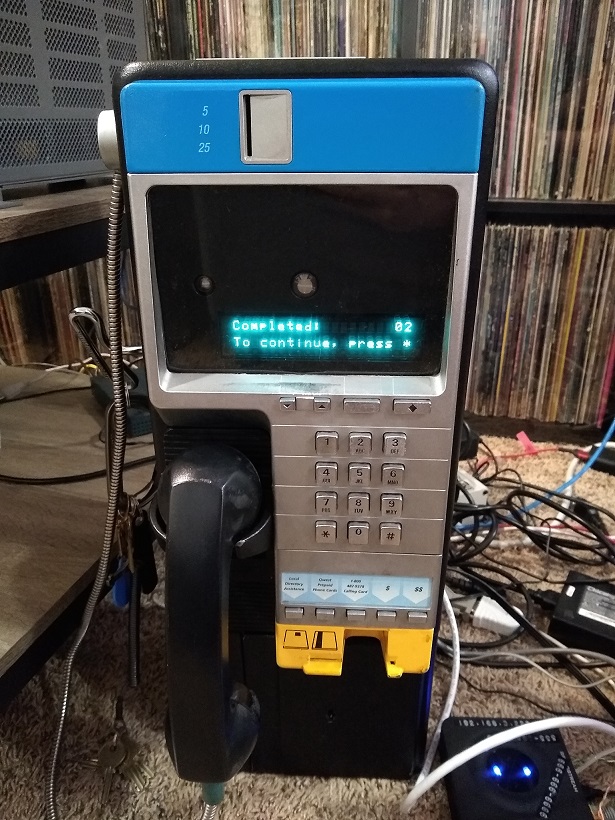
After the phone reports a success message after programming, the upper housing can be locked again with the T-Key and then it will start service with the new configuration!
Updating the Phone
If we want to make updates to the Millennium configuration, this can be done through a menu option on the phone without having to do through the initial installation steps all over again.
With the Millennium powered on and the upper housing locked with the handset on the cradle, we can key in 2727378 on the keypad to access the craft terminal menu. We then enter in our pin number (55555) and use * to save. We will be prompted to unlock the housing, and afterwards we can key in 369 to select Force download from the menu and then 1 to confirm. Then we can press * to start the download and pull down our latest configuration. When the download finished finishes, we can lock the upper housing again and the new configuration is applied!
Conclusion
Hopefully this guide proves useful for configuring and customizing a Nortel Millennium phone. As time goes on we will see what other functionality we can restore via mm_manager to better customize the experience of using the phone!
