Fixing a Protel Payphone Part 2: Installing ExpressNet
This post is a continuation in a series, “Fixing a Protel Payphone.” To view the previous installment, check out Fixing a Protel Payphone Part 1: Getting Dial Tone
Initially, I attempted to program the phone with call cost rates via the keypad according to some programming instructions I found online targeted at the Protel CTR201 series boards. There is a handy programming quick reference distributed by Protel that walks a user through the programming steps as well as an old text file from 2000 written by El Oscuro.
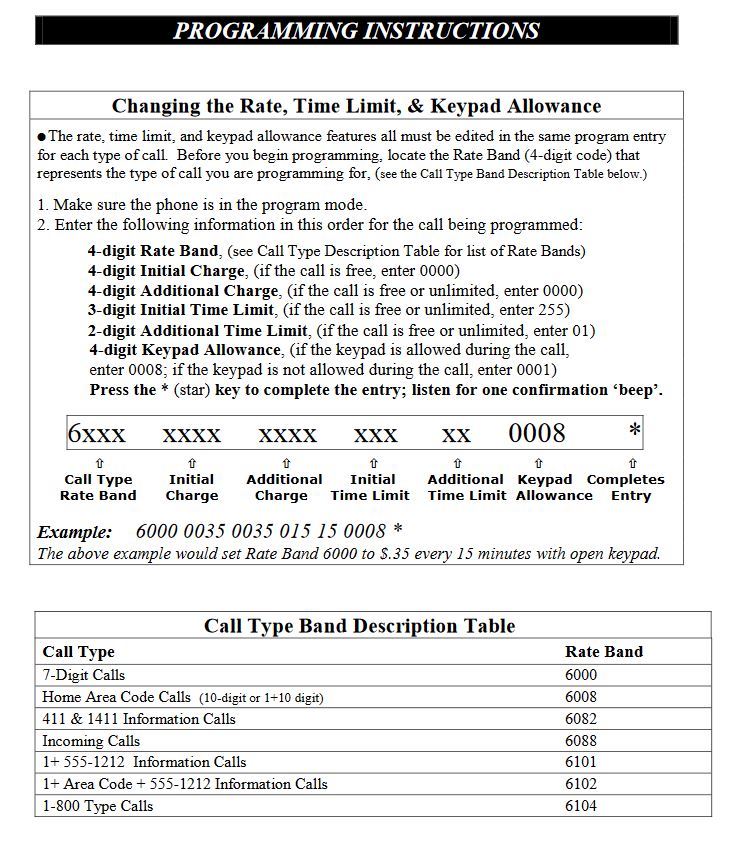
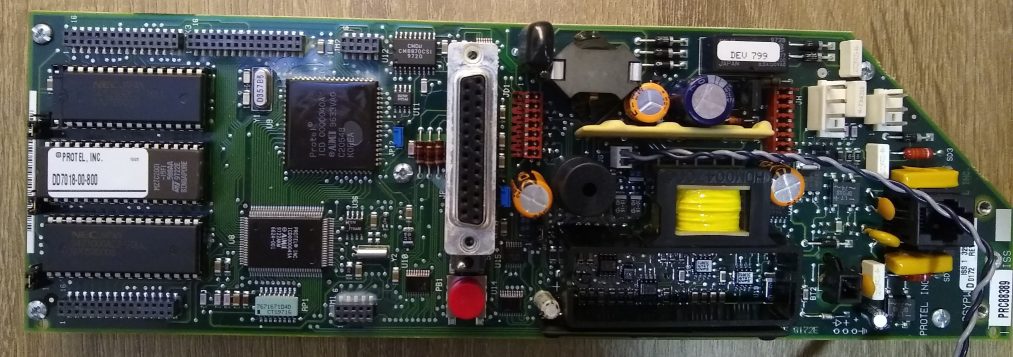
After trying to program my Protel 7000 board using the keypad, I learned that this board doesn’t support programming via this method and that this board would have to be programmed via computer.
Protel boards make use of a configuration and management packaged known as ExpressNet (or simply XNet) that interfaces with the board via a modem connection. ExpressNet is an older piece of software, designed to run on DOS machines, with little support for modern operating systems. After some research, I concluded that I would need some sort of lab machine to host XNet running either DOS or an older Windows 9X release to be sure I could run it properly.
The first logical place to start with this was creating a virtualized environment. I have previously worked fairly extensively with VirtualBox, so I thought it would be a good candidate for this project as to not tie up a physical machine. To keep this as FOSSy as possible, I decided to install FreeDOS into a VM where I could then install XNet.
Luckily, there is installation media for ExpressNet version 1.55 floating around the Internet, so it was readily available. From what I understand, the floppy image for this software was originally released by Protel themselves online as a free upgrade disk from a lesser version, but crackers were quick to discover they could modify a file or two and turn the disk into a full-fledged installer.
I’ll be the first person to say that I’m not well-versed in DOS as my first home computer ran Windows 95 and I only became familiar with the most basic idea of it when running games as a kid. In the years that would pass I became more experienced with CLIs, but I never had the experience of a straight-up DOS machine to work on.
Almost immediately I ran into issues with the XNet installer failing due to not finding share.exe, an executable normally included with MS-DOS to facilitate file locking. I tried to copy over a legitimate share.exe and even a third-party work-alike executable, but I would still get the same failure message.
Reading more about experiences people had with XNet online, I decided to try running Windows 98 instead of FreeDOS, which many people reported to be working perfectly with no issues whatsoever. Instead of digging out my old installation media, I found that there was already a Windows 98 VDI file for VirtualBox available on the Internet Archive, so I decided to use this as the basis of the installation.
While XNet installed just fine, no matter what I did I could not get it to recognize a modem. VirtualBox has a really handy feature that allows you to map a serial port on the host machine to a “virtual” serial port on the VM. This worked just fine as I could access and use the modem via HyperTerminal, but XNet wouldn’t budge.
At this point I decided the best thing to do would be to use bare metal and try running Windows 98 directly on a machine with a real serial port. The choice to stick with Windows 98 was was mostly for familiarity, but also for future compatibility. Other payphone software like Elcotel’s PNM Manager needs a Windows environment to run, so having a machine that can be something of a “swiss army knife” for payphone programming was an attractive idea.
The problem with running Windows 98 on bare metal is that it generally works best on period-appropriate hardware. From some of my other projects, most notably an attempt at a dialup ISP, I knew that running 25-year-old (if not older) hardware was a recipe for unexpected issues like disk crashes or power supplies going poof in the night. Of more concern, a lot of older PCs were very power-hungry and likely to make an impact on my power bill if I decided to run one 24/7. What could I do about a stable, power-efficient machine that could run Windows 98?
The answer was thin clients. For a little while I had heard of people re-purposing thin clients as servers for their home lab and retro gaming machines. The latter use-case was just what I needed, and enthusiasts had already done a lot of leg-work to document a number of thin clients that supported both DOS and Windows 98. These thin clients generally draw low power, run passive cooling, and and have no moving parts like fans or conventional hard disks.
Luckily, there is a great website out there documenting how to repurpose different thin clients, parkytowers.me.uk/thin/ After checking the site, I settled on a Wyse V90LE thin client that was thoroughly documented in its support and easily available on eBay. These thin clients utilize VIA C7 Eden processors, which are native x86 CPUs that can be clocked between 400MHz and 1200MHz in 100MHz increments via the BIOS. They also have a real serial port, which is much harder to find on more modern thin clients. While I could perform hardware upgrades and software installation myself, I found someone selling units with a larger 16GB DOM (disk on module), 1GB RAM, and both Windows 98 and Windows XP installed dual-booted with all drivers. Surprisingly, these units were priced only slightly higher than a wiped unit plus the memory and disk upgrade.
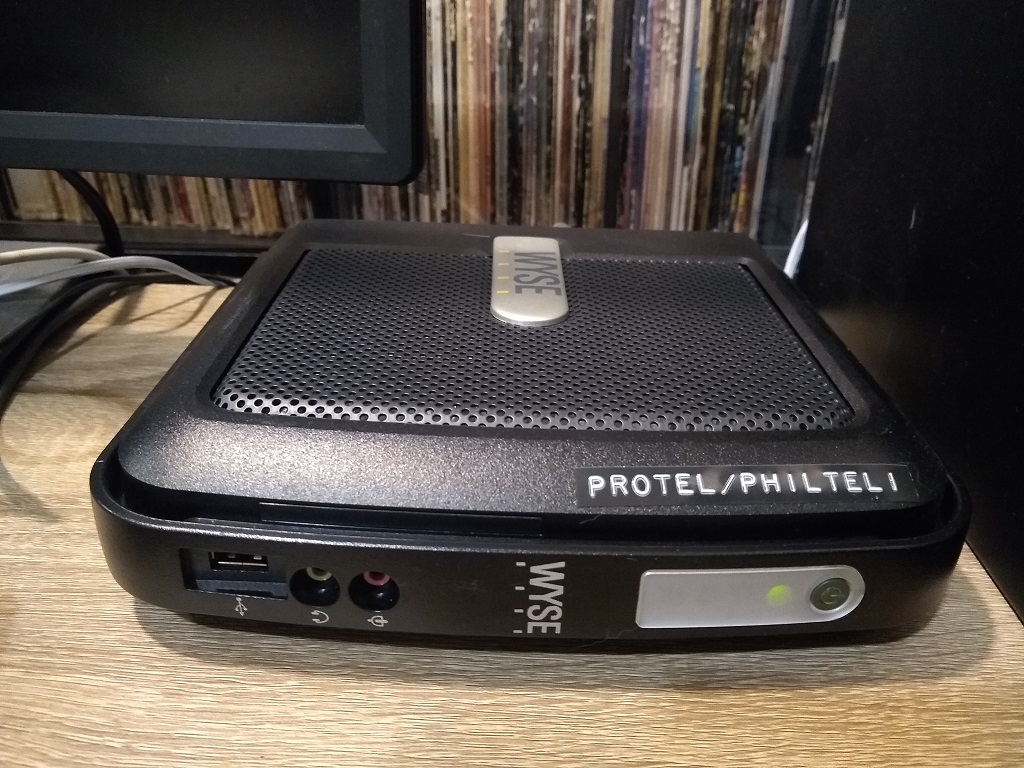
After I received the thin client, the next step was to install XNet. Initially I decided to use a different, older Windows 98 machine with a 3.5” internal floppy drive to write the XNet .ima image file directly to a blank diskette. I have two external floppy drives, but neither seemed to be able to read the floppy on the thin client. I tried a different disk, and tried writing the disk with the external floppy drives on a modern Windows computer but still couldn’t get the disk to read so I’m wondering if there is something strange about the image. The next step was to try to mount the disk image directly on the thin client via Daemon Tools, but I quickly found that the image format wasn’t supported. Then, I tried to extract the image and copy the contents over to the thin client, but running the installer off of the thin client didn’t seem to progress far. What finally ended up working was to dump the contents of the image on a flash drive (luckily the Windows installation already had the mass storage drivers) thin/and then run the installer directly off of the flash drive on the thin client.
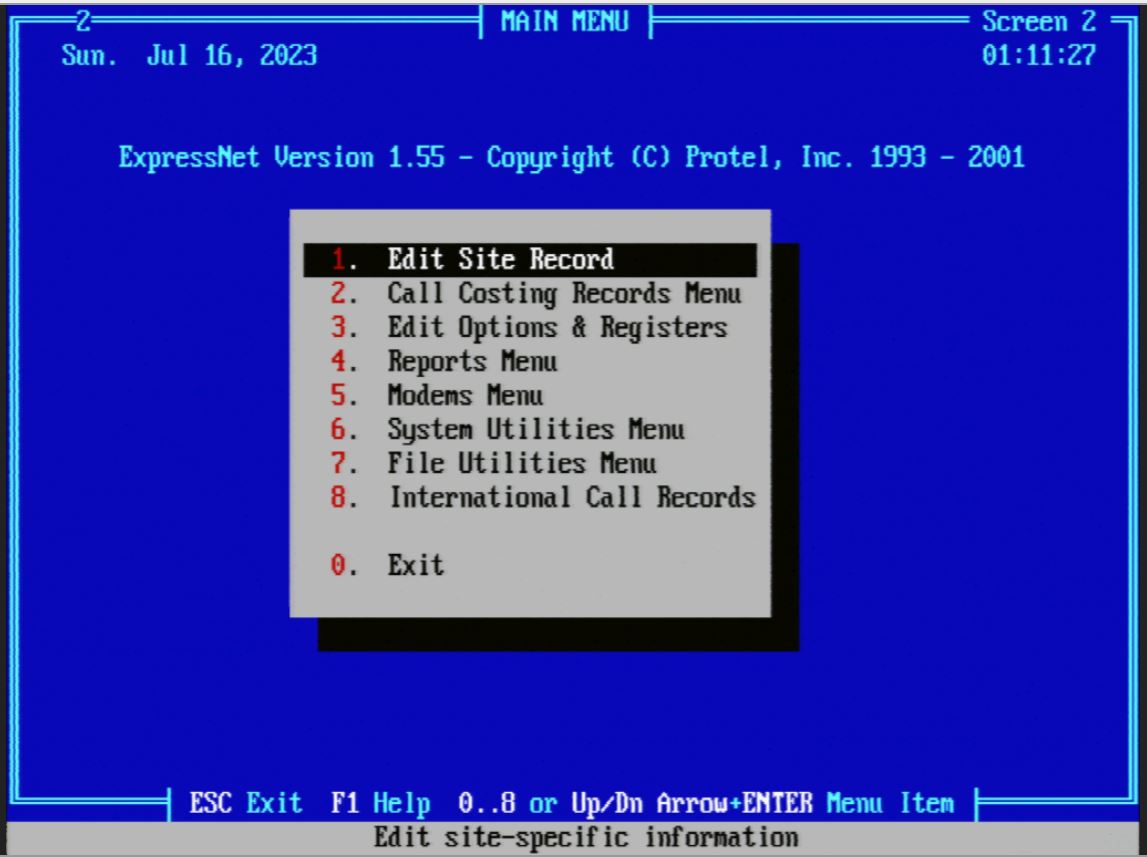
The setup is incredibly straight-forward. Below are some screen-shots documenting the process.
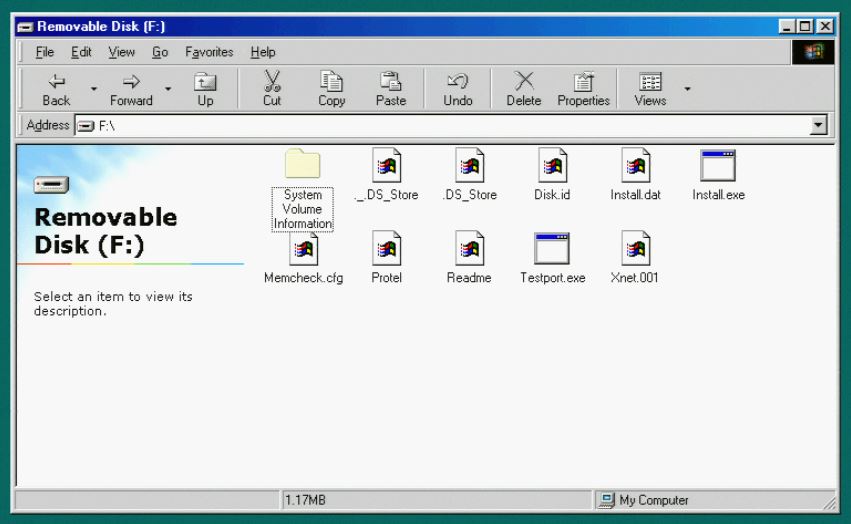
Install.exe can be launched to start installation.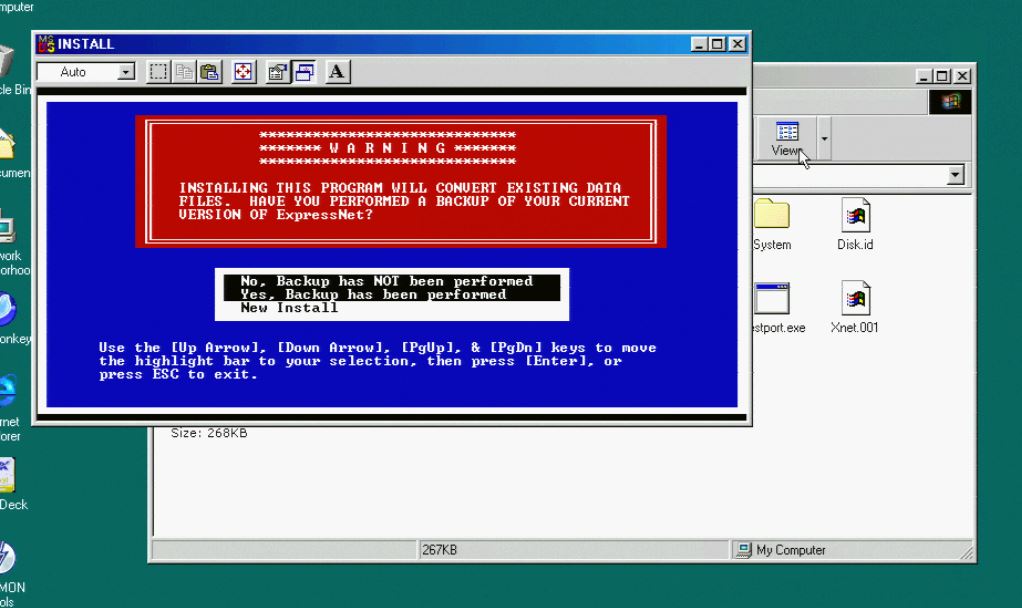
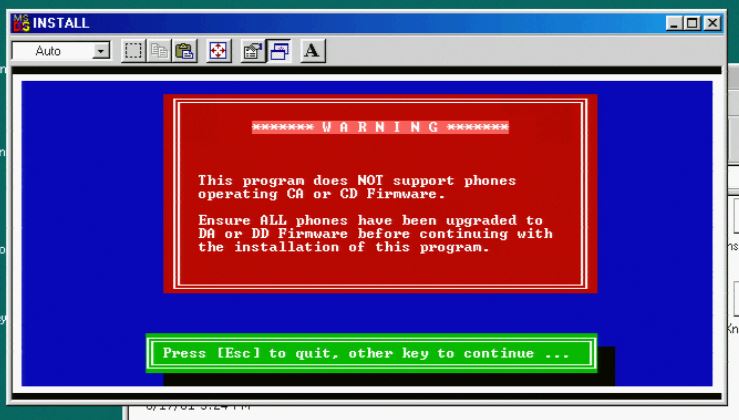
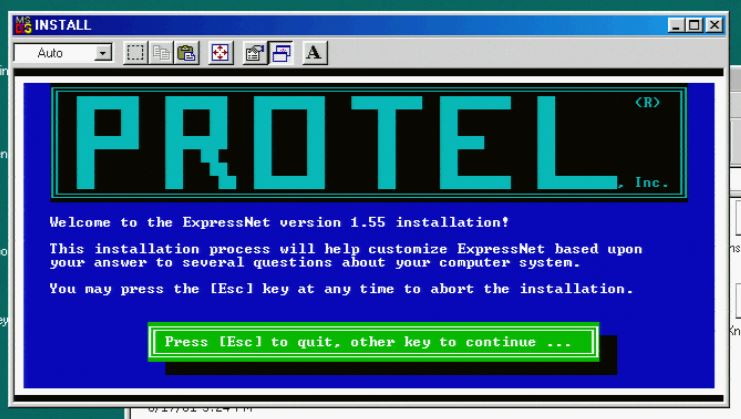
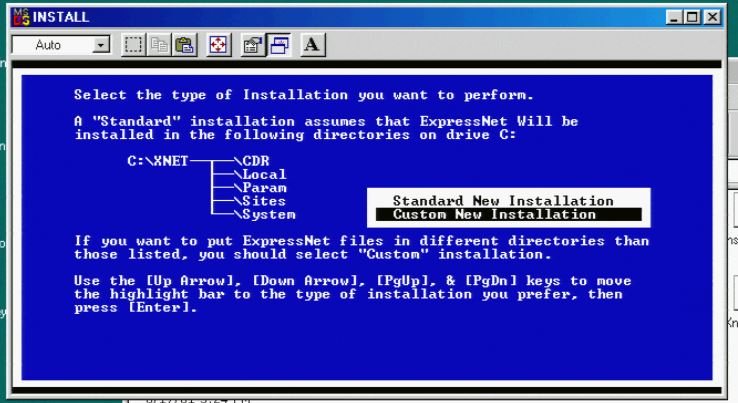
C:\ directory works just fine.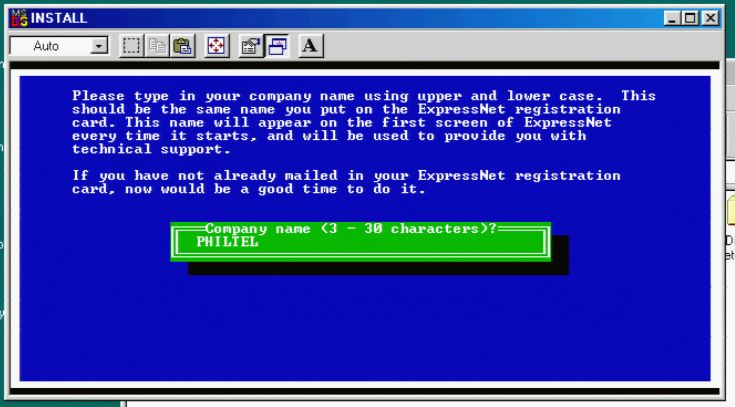

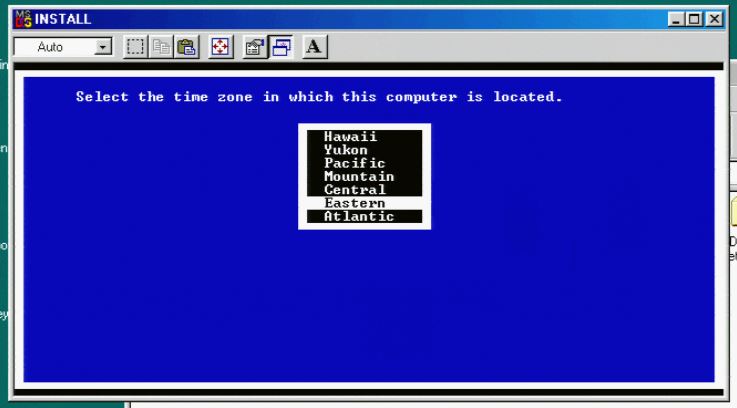
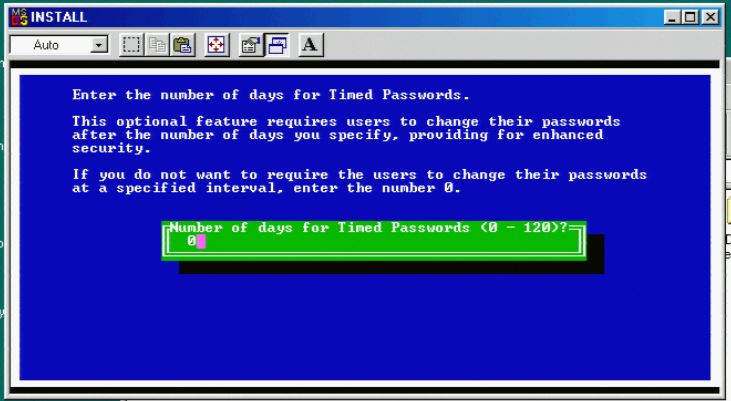
0 as to disable password expiration.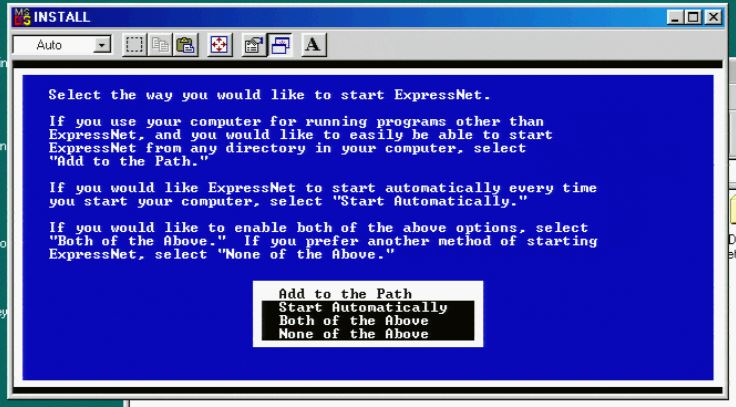
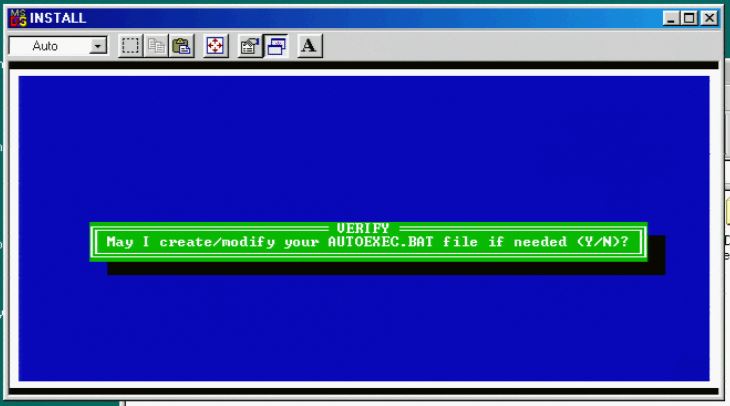
Y to allow XNet to modify AUTOEXEC.BAT.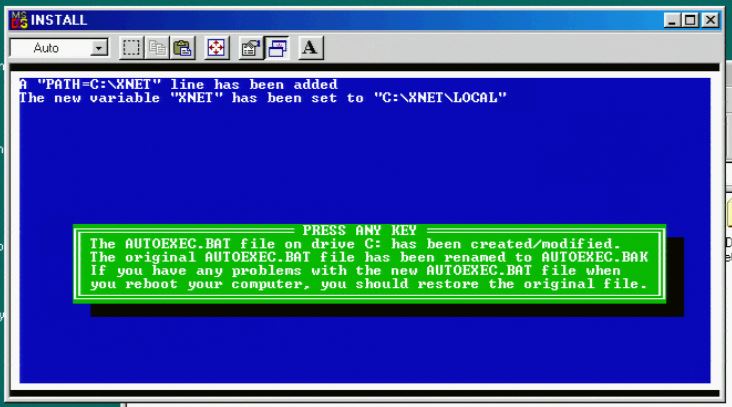
AUTOEXEC.BAT.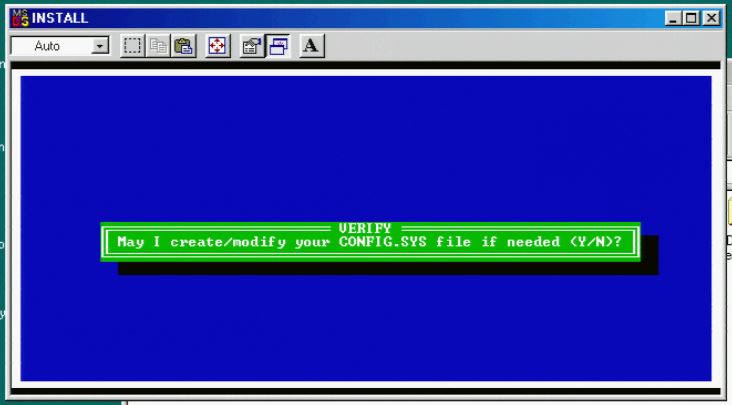
Y to allow XNet to modify CONFIG.SYS.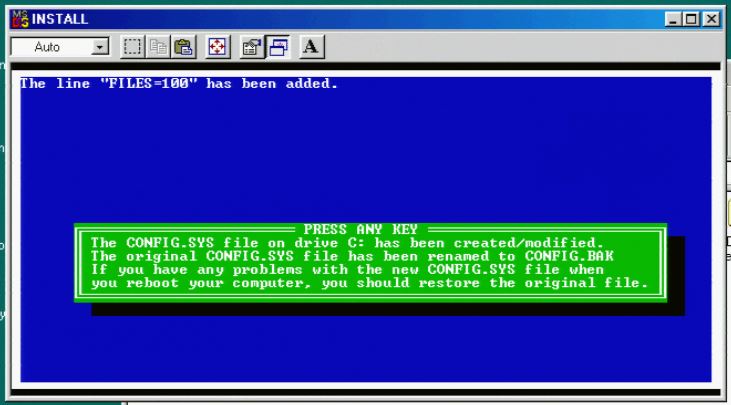
CONFIG.SYS.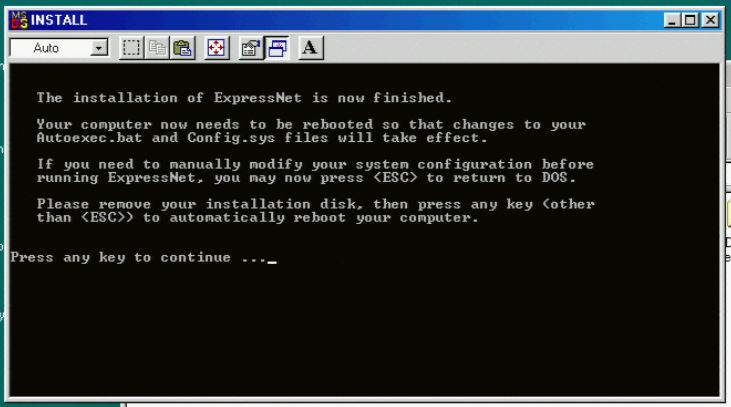
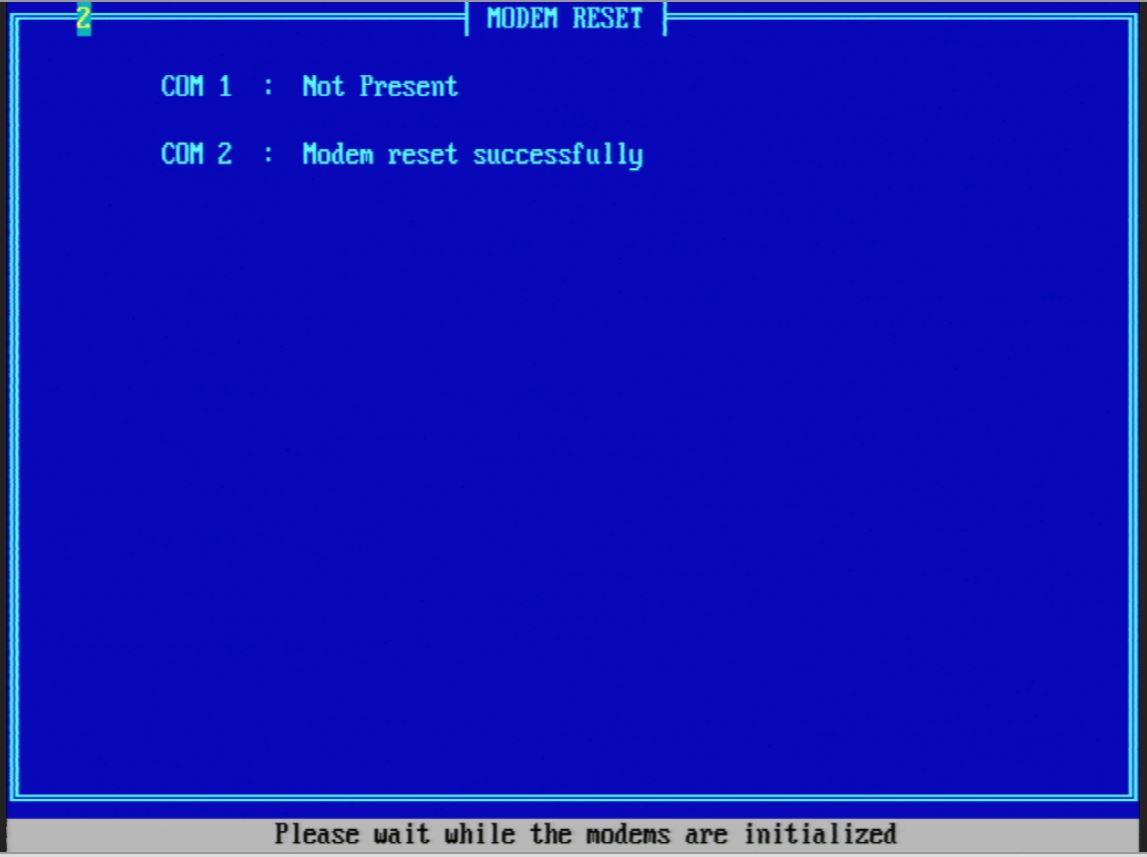
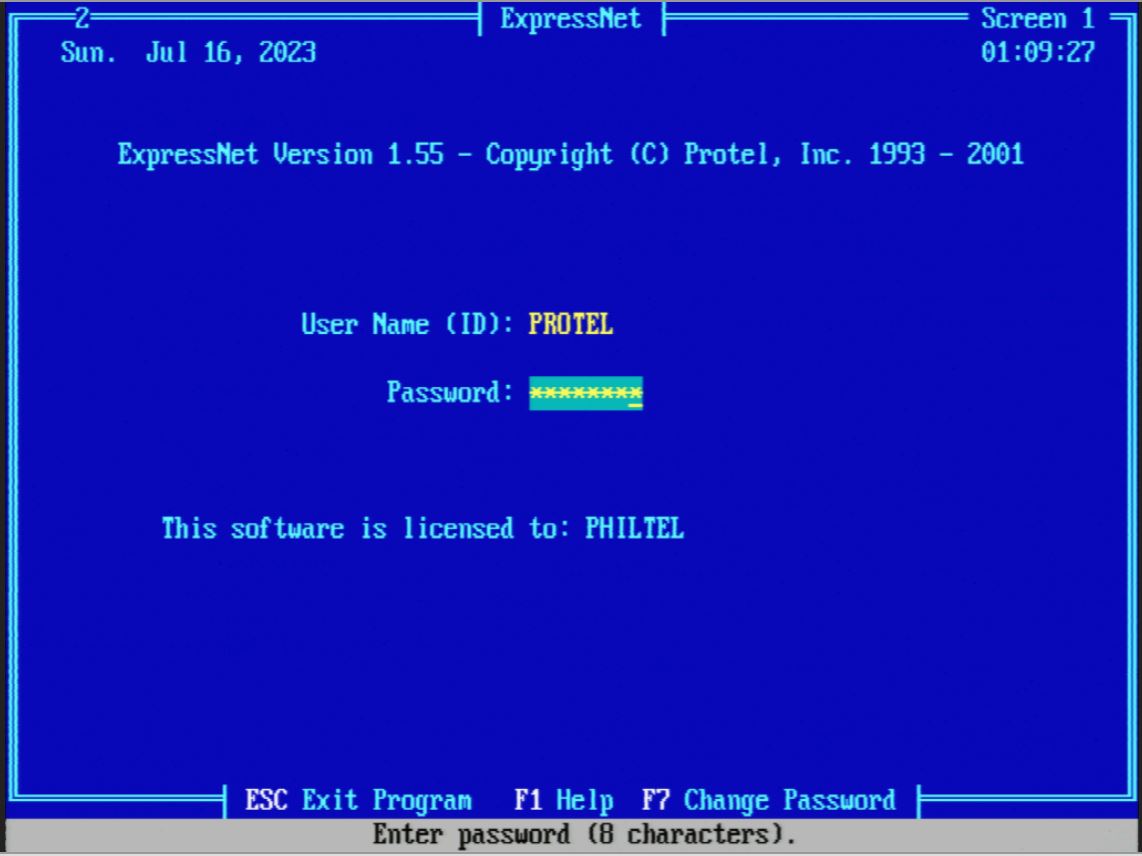
PROTEL and password PROTELX3.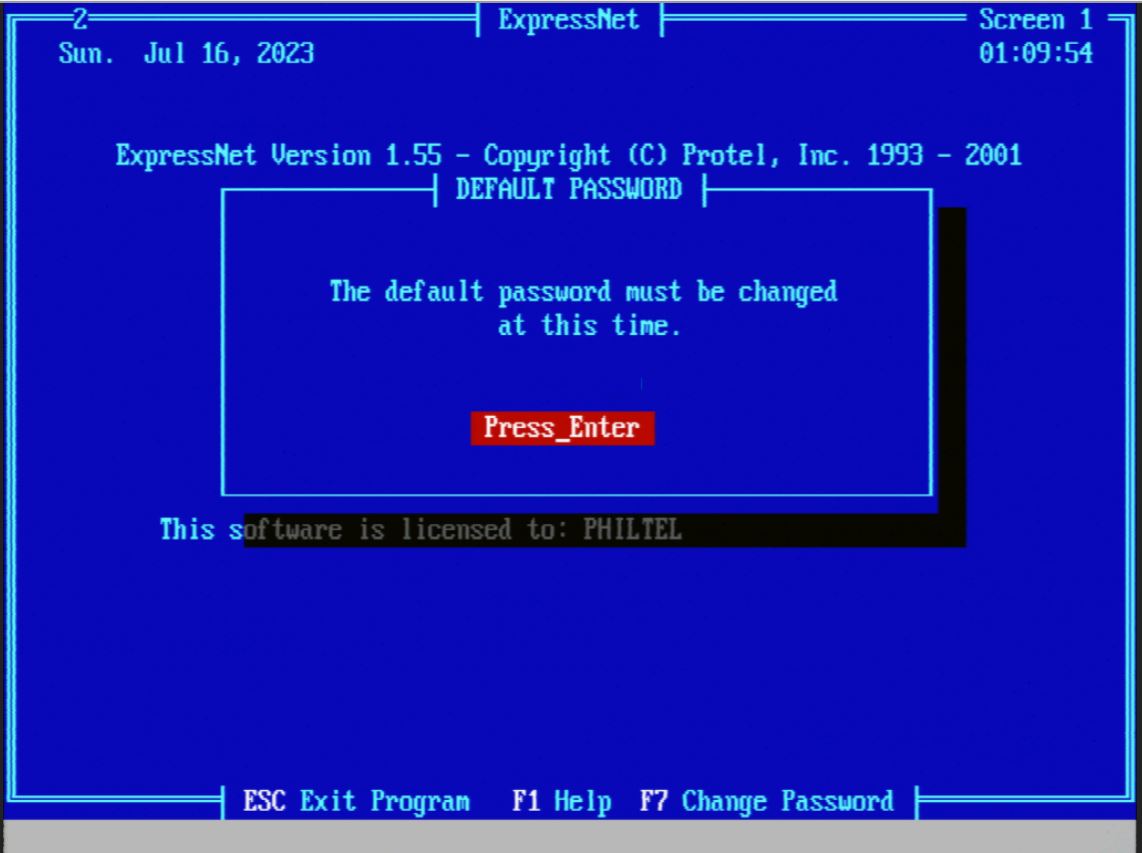
Enter to change the password.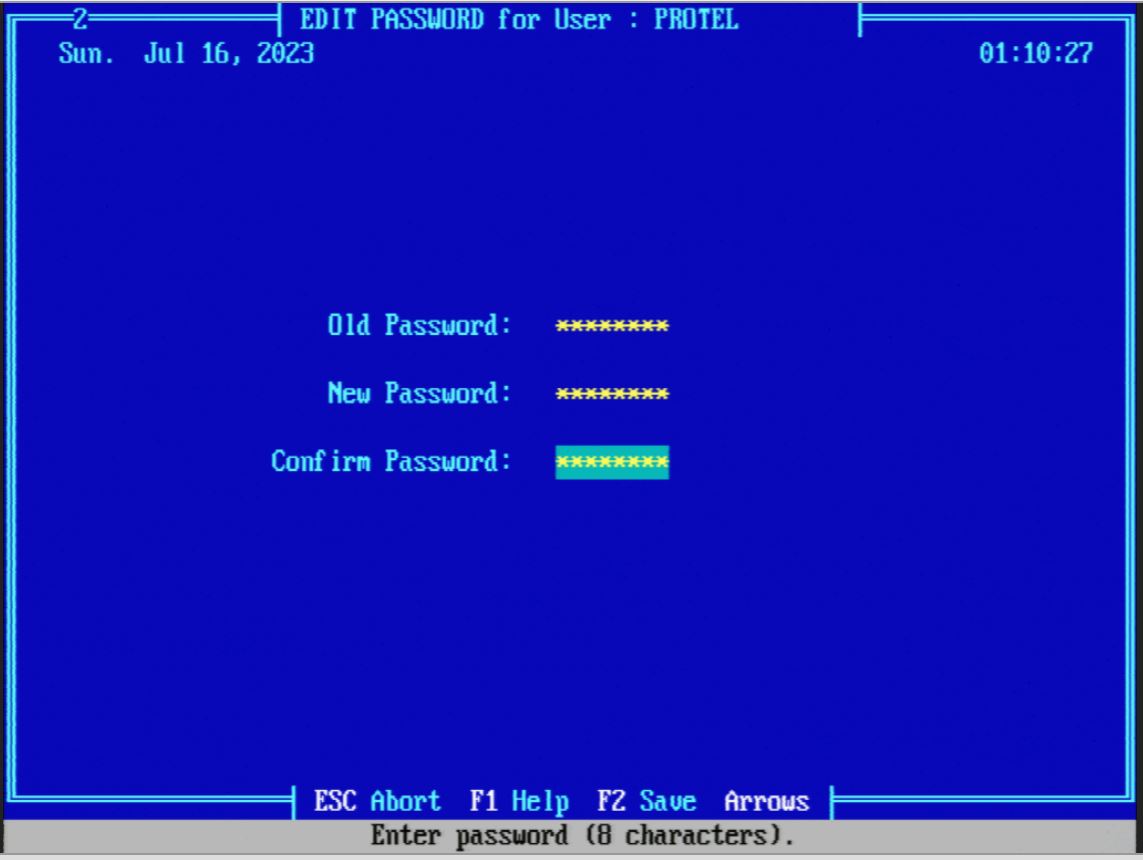
F2 to save.