Fixing a Protel Payphone Part 4: XNet Config
This post is a continuation in a series, “Fixing a Protel Payphone.” To view the previous installment, check out Fixing a Protel Payphone Part 3: Modem Repair
Now that ExpressNet is installed and a modem is in working order, the next step to getting XNet running was actually configuring it.
Much of the below was accomplished with the help of Peter and his great documentation on Protel programming, John Porter who sent me a scanned ExpressNet manual, and Programming Protel Payphones by El Jefe. I originally had a lot of issues trying to create my configurations from scratch, but soon learned a much better idea was to clone the sample configurations and then make minor adjustments. Hopefully that revelation will save others a lot of time and headaches.
Note that the following steps show how to configure ExpressNet to program phones to allow free calling. Rating calls for any amount of money is outside of the scope of this project but the resources linked above should help anyone inclined to make a phone charge for calls. Further, this guide only has ExpressNet reacting to incoming programming requests (originating from the phone) and it is not set up to perform outgoing programming (originating from XNet).
Local System Configuration
Starting up XNet presents us with the familiar main menu.
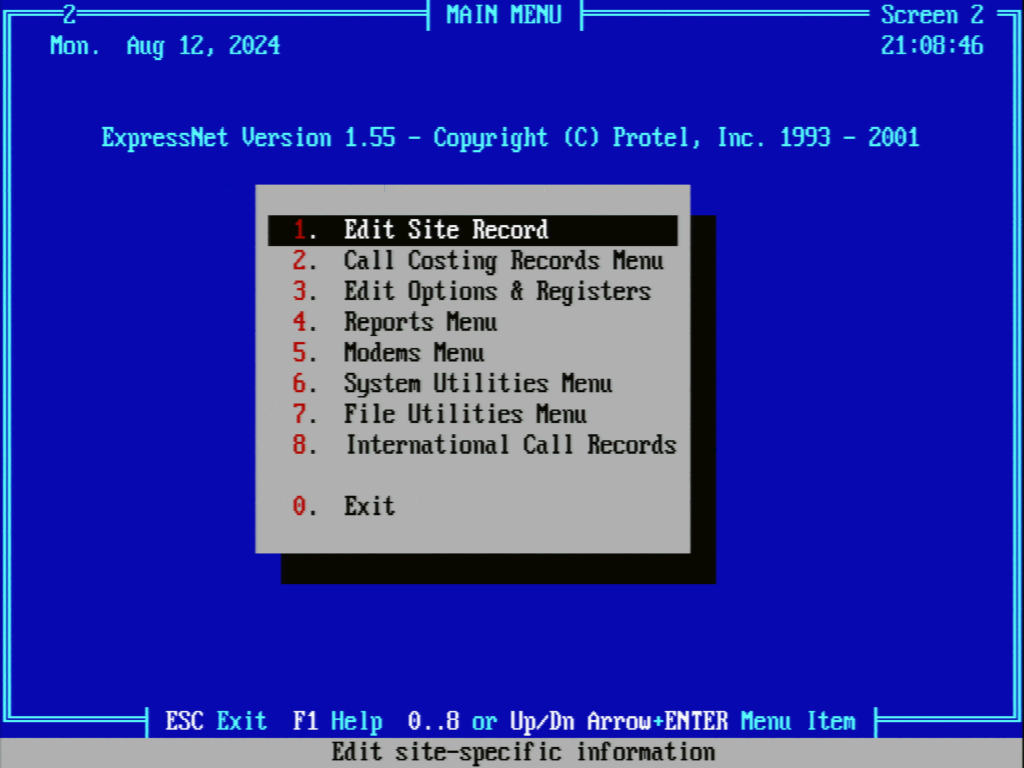
Press 6 to enter the System Utilities Menu:
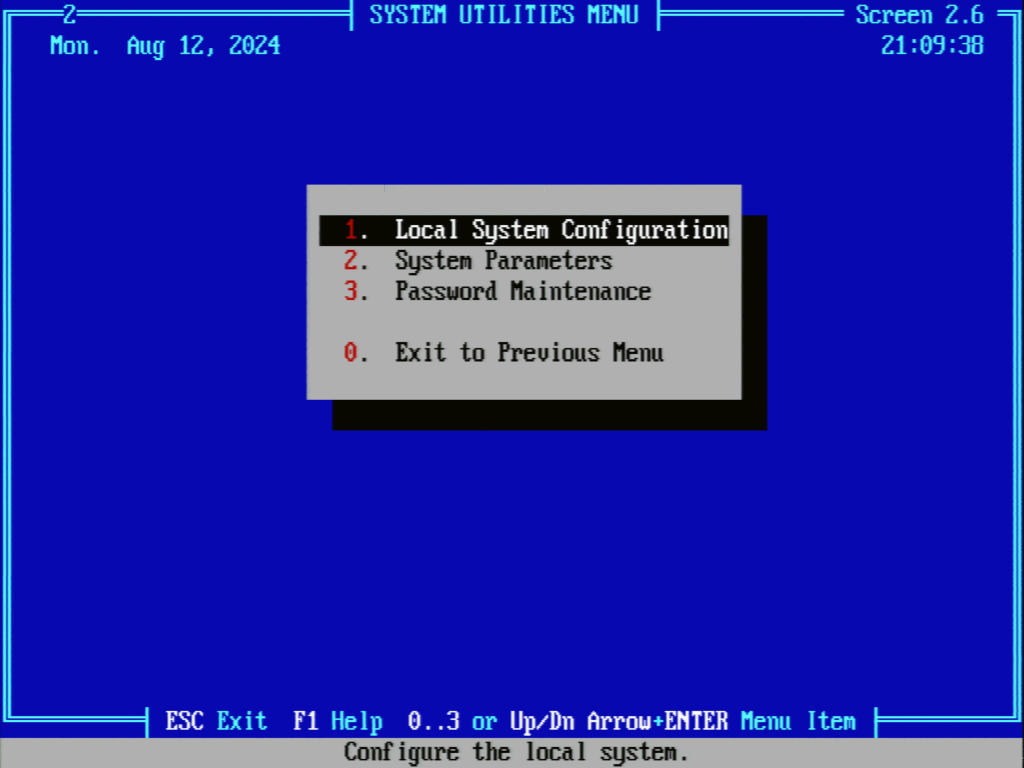
Press 1 to enter the Local System Configuration:
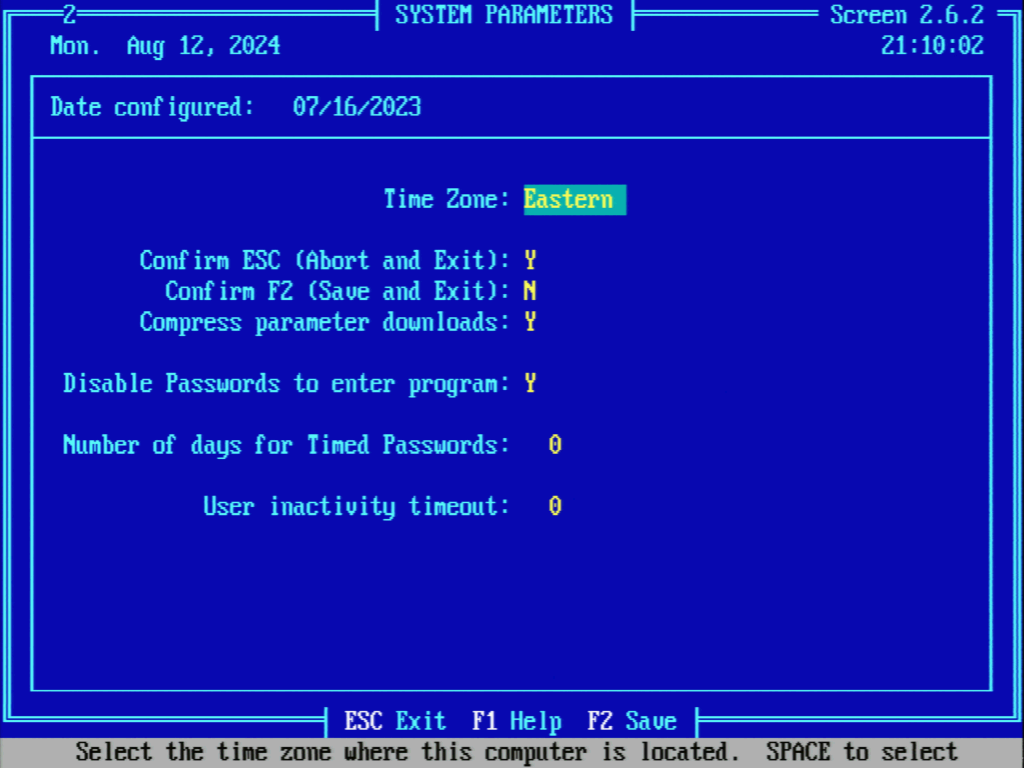
Make sure to set the Time Zone and optionally toggle Disable Passwords to enter Program if we want the program to load without requiring login. Then press F2 to save.
Modem Configuration
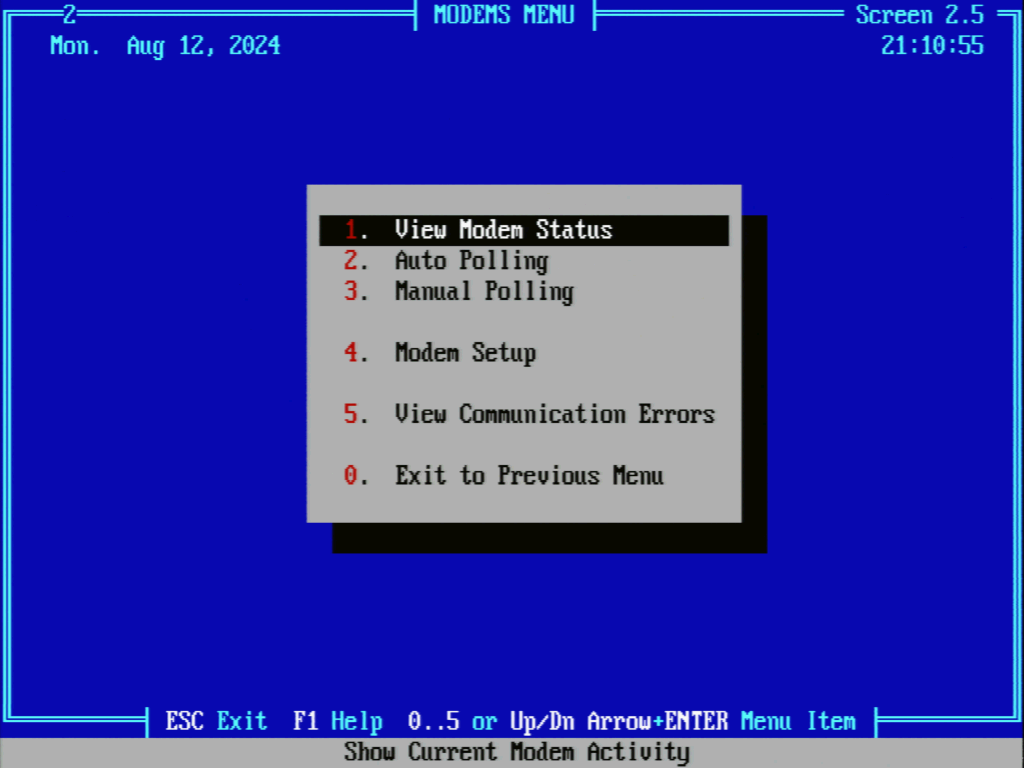
From the main menu press 5 to access Modems Menu:
In the resulting Modems Menu, press 4 to get to Modem Setup:
We will now be prompted to select a modem and will likely have only one option. Press 1 or the number corresponding to our modem if it is something besides 1:

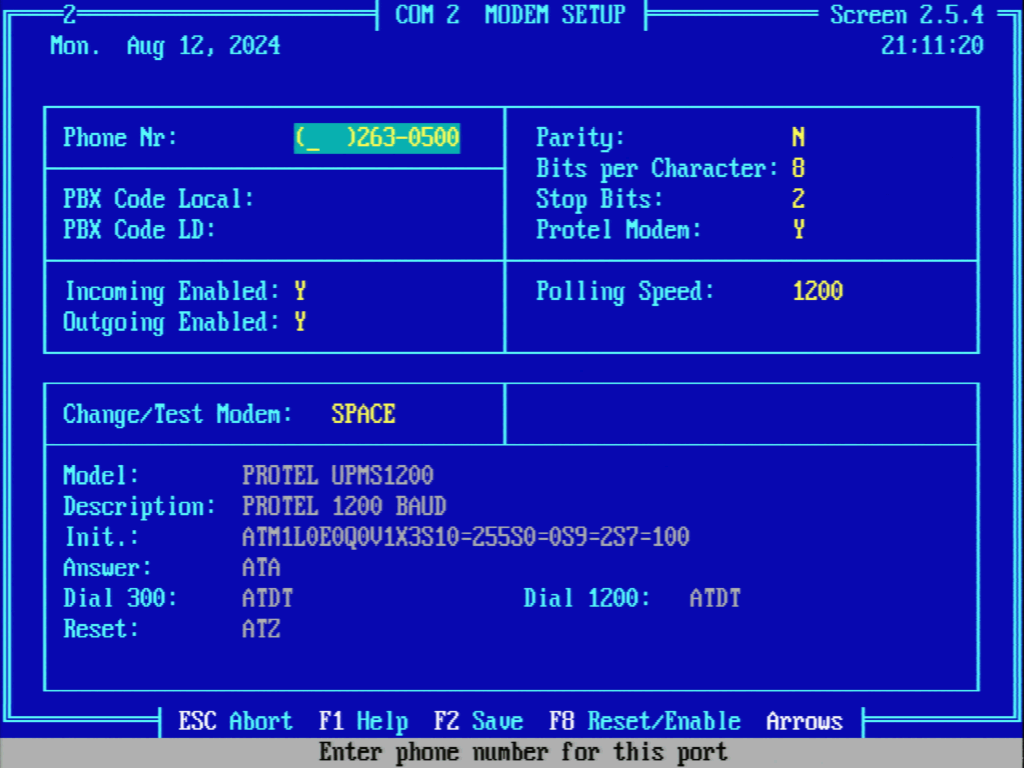
On the Modem Setup page we need to configure a few options. A Phone Nr does not seem to be required but can be entered to help easily identify the line the modem is using. Incoming Enabled should be set to Y while doing the same for Outgoing Enabled is shown here tough we currently do not perform outgoing calls. Parity should be N, Bits per Character should be 8, and Stop Bits should be 2. If we have a Protel modem, make sure Protel Modem is set to Y and Polling Speed is set to 1200. If we do not have a Protel modem, set Protel Modem to N, Polling Speed to 300, and then navigate to Change/Test Modem and press SPACE.
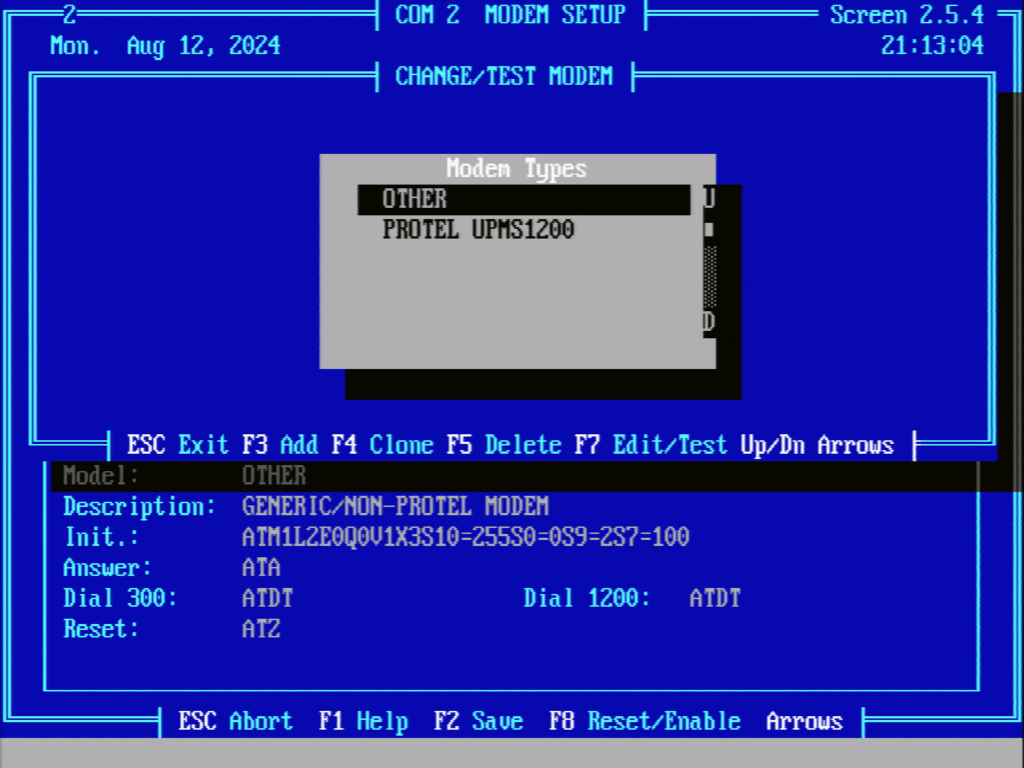
From the resulting Change/Test Modem dialog, select the OTHER option and press F7.
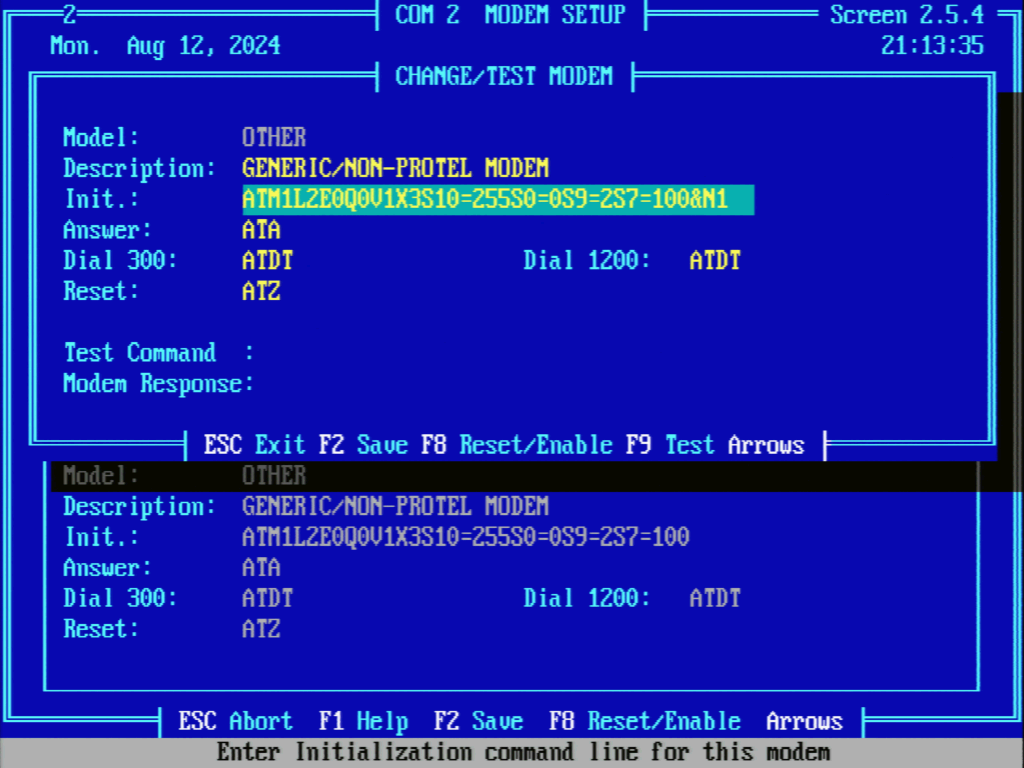
Now we can modify the Init string for a more generic modem. The base of this string is ATM1L2E0Q0V1X3S10=255S0=0S9=2S7=100. For USR modems, we can append speed settings of either &N1 for 300bps or &N2 for 1200bps. Other modems may have different options for specifying speed. For example Conexant may use +MSB103 for Bell300 bps, +MSB212 for Bell 1200bps, +MSV21 and +MSV22 for ITU 300bps / 1200bps respectively. (Thanks again to Peter for these parameters)
In our configuration we will be proceeding with &N1 appended:
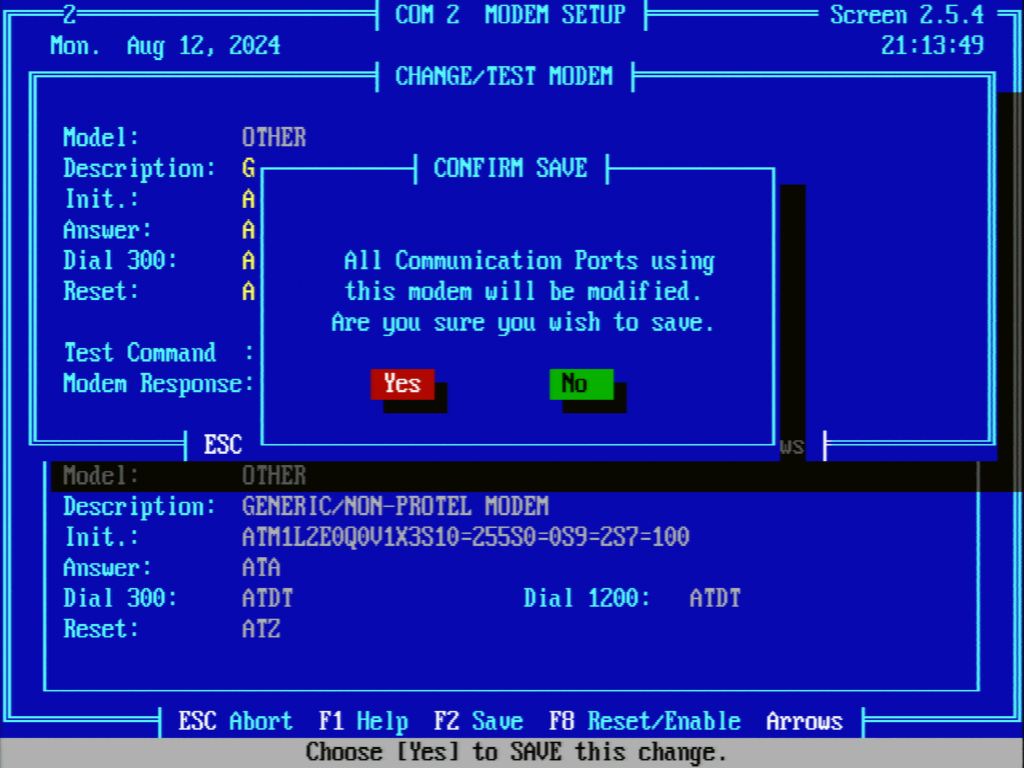
When done, press F8 to save and select Yes to confirm:
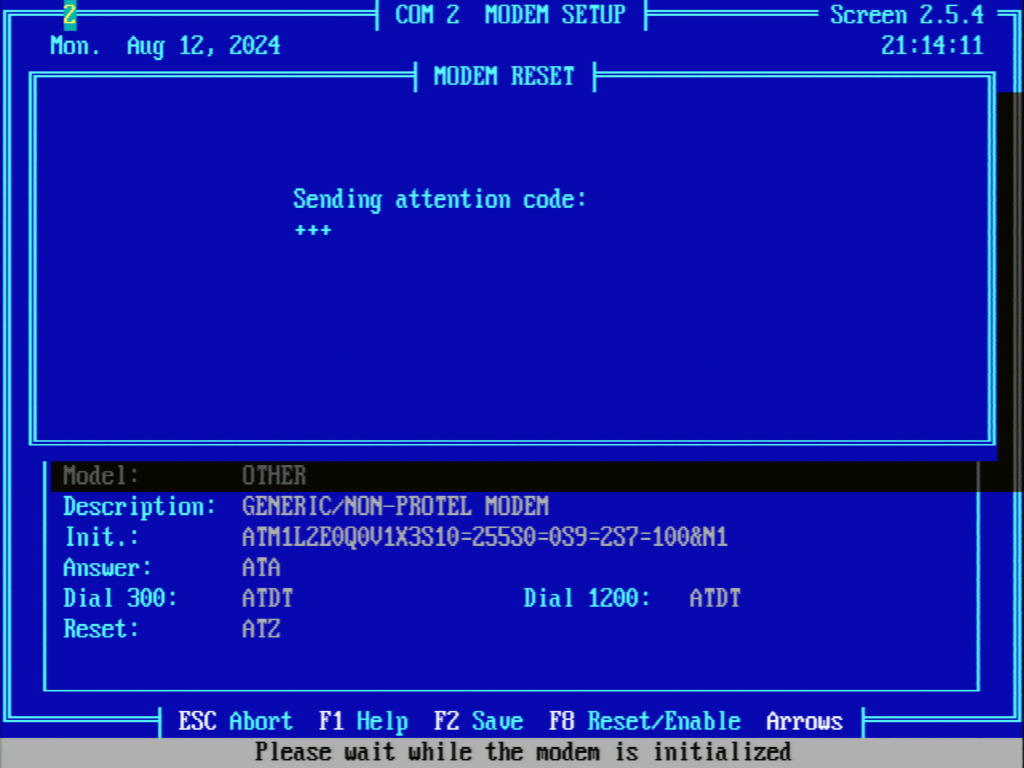
Confirm that the modem setup now looks complete and press F2 to save:

The modem will now reset:
Options & Registers
From the main menu press 3 to access Edit Options & Registers:
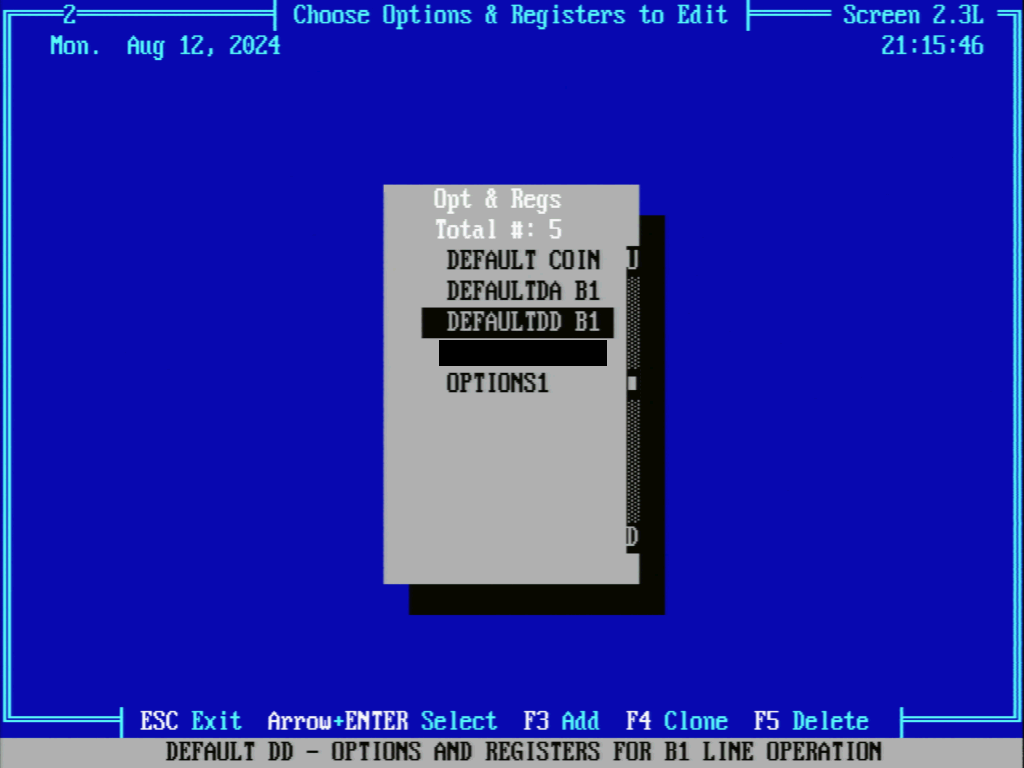
From the resulting Choose Options & Registers to Edit screen, highlight DEFAULTDD B1 and press F4 to clone this record:
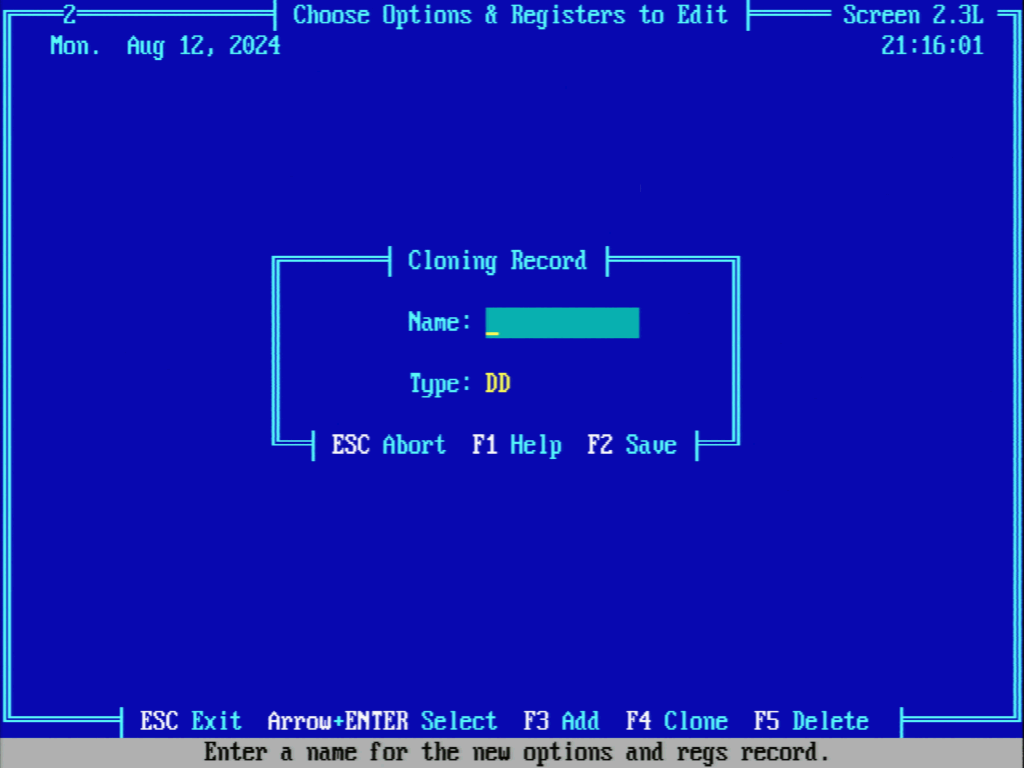
On the Cloning Record screen enter a name into the Name field. We will be using OPTIONS1. Then press F2 to save:
The Edit Options & Registers page has many different configurable parts but we are only concerned with a few. We will change Delay for Central Office Dial Tone to 1.5, Central Office Dial Tone Timeout to 8, Enable Coin Tones to Yes, and Set Modem Speed to 1200 or 300 Baud to 300 if we are not using a Protel modem. When done press F2 to save.

Call Costing Records
From the main menu press 2 to access Call Costing Records Menu:
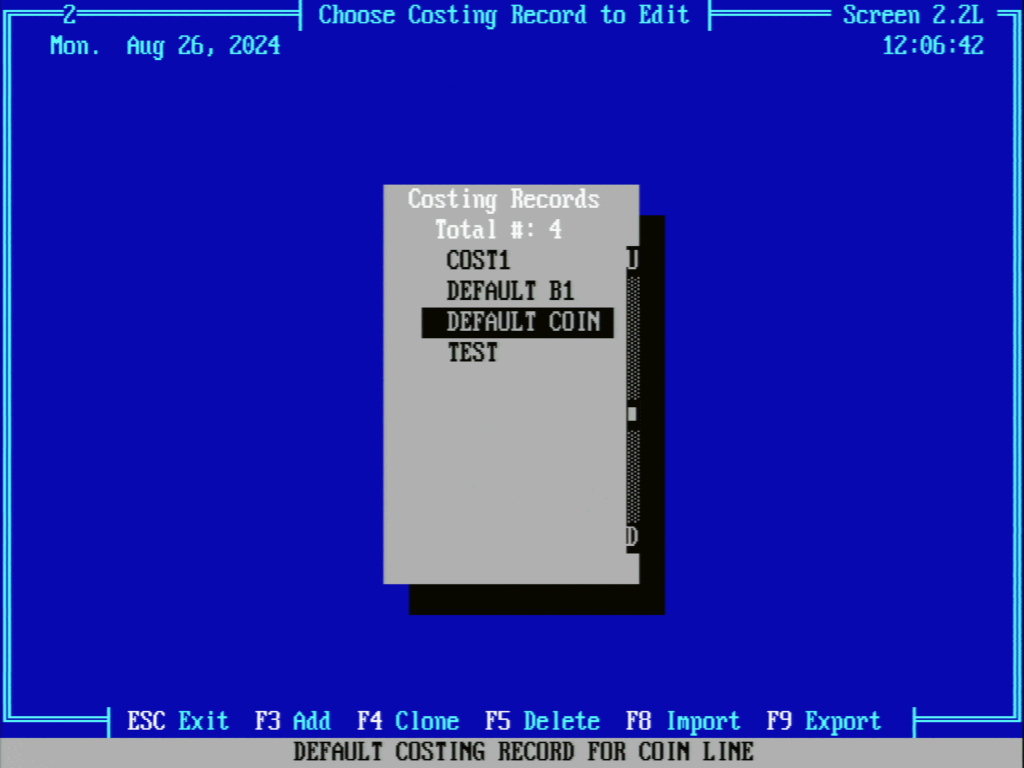
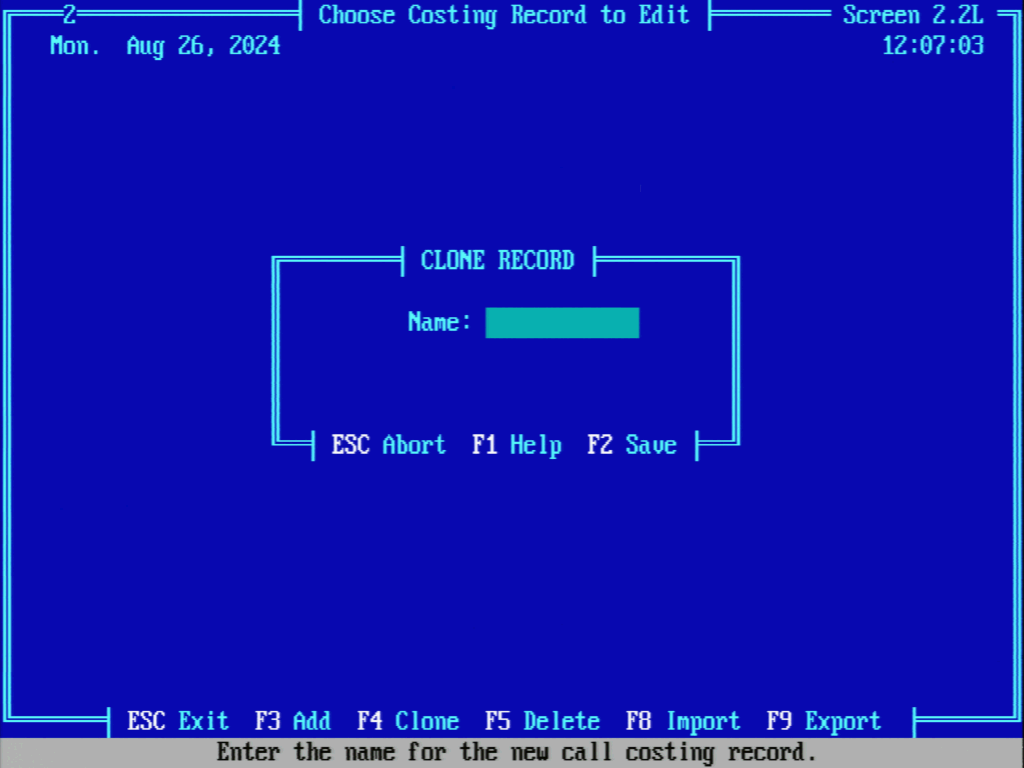
On the resulting Choose Costing Record to Edit screen, highlight Default B1 and press F4 to clone this entry:
On the Cloning Costing Record screen enter a name into the Name field. We will be using COST1. Then press F2 to save:
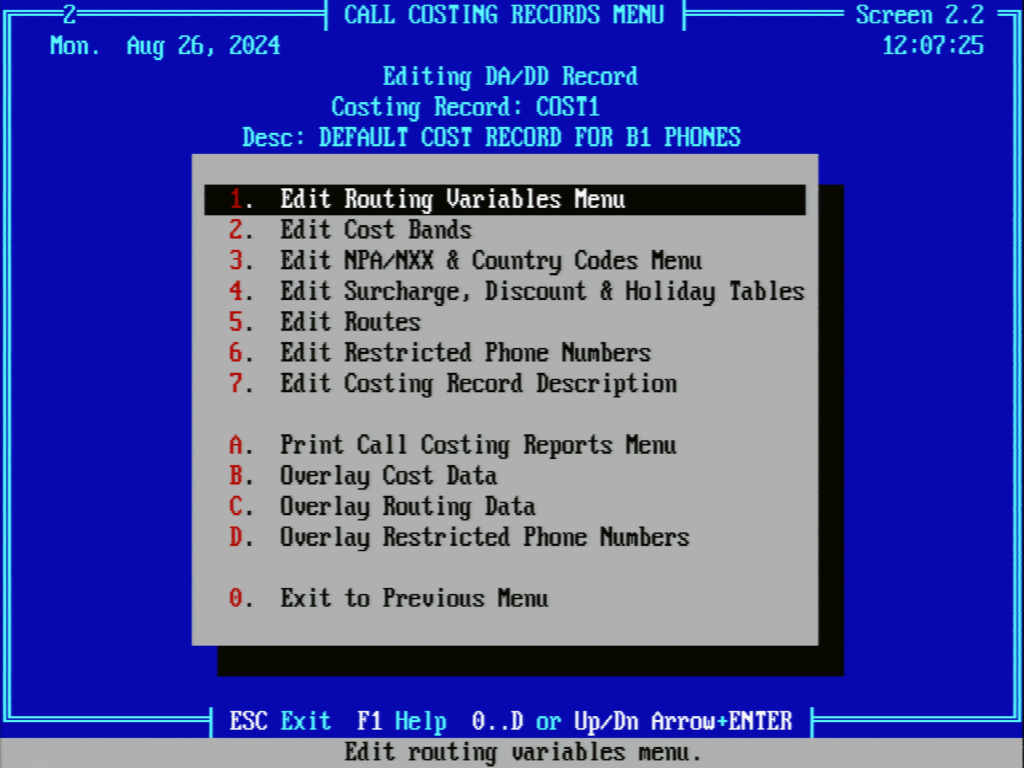
On the resulting Call Costing Records Menu, press 2 to Edit Cost Bands:
Because we want our phone to be free-to-use, we will edit band 64 which is currently set up for toll-free calls. Ensure that this band has Int Rate and Ovt Rate set to 0.00 so there is no initial cost and no overtime cost. Set Int Time to 255 for unlimited and Ovt Time to 1. Set Frd Det to Disable to disable fraud protection and Keypad to 8 to allow the keypad to be used at all times.
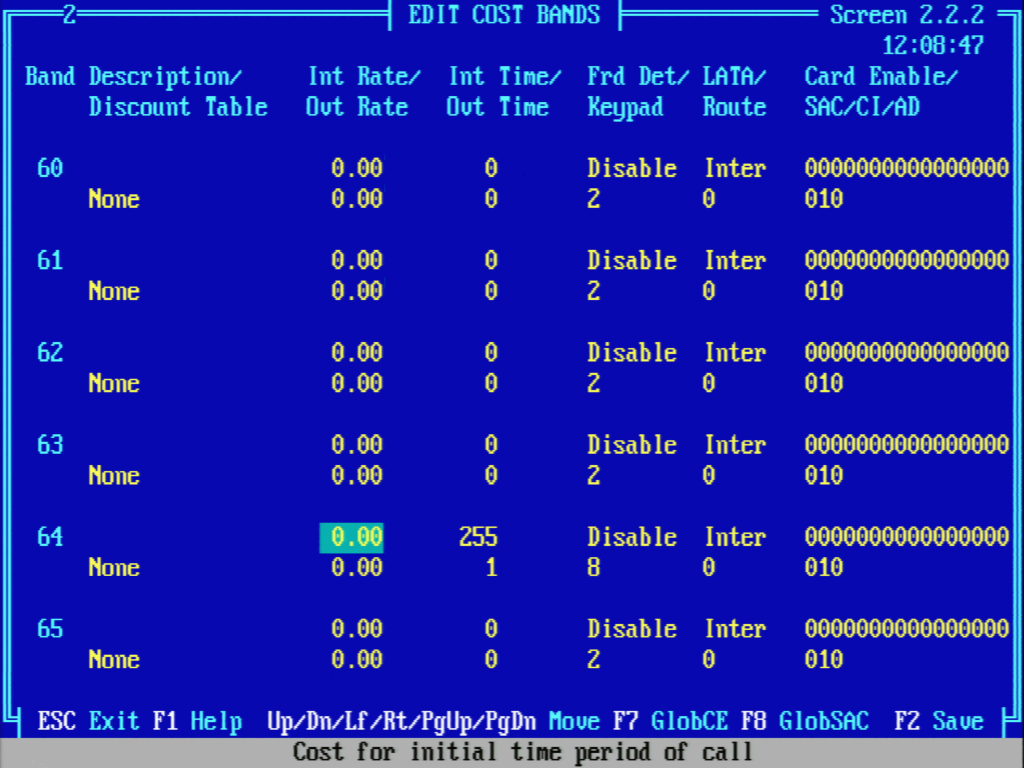
When done press F2 to save.
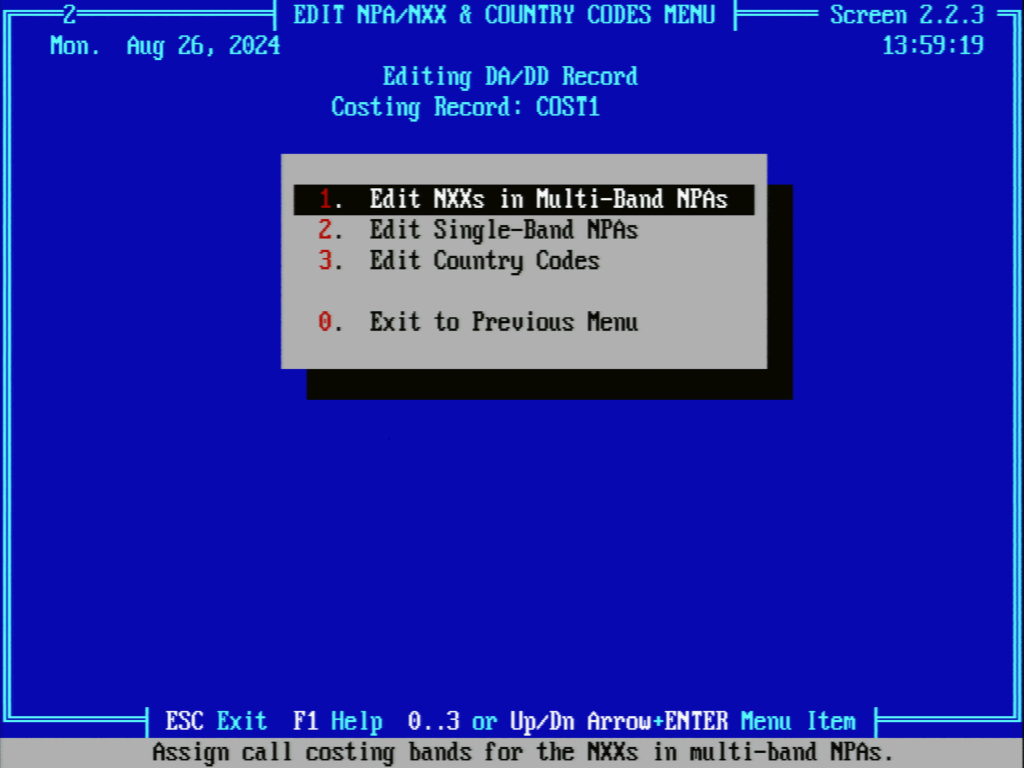
Back at the Call Costings Records Menu, press 3 to Edit NPA/NXX & Country Codes Menu:
On the resulting screen, press 2 to Edit Single-Band NPAs:
On the Edit Single-Band NPAs screen, modify each entry to be 64 to make use our toll-free band in all cases.

When done press F2 to save.
Site Records
From the main menu press 1 to access Edit Site Record:
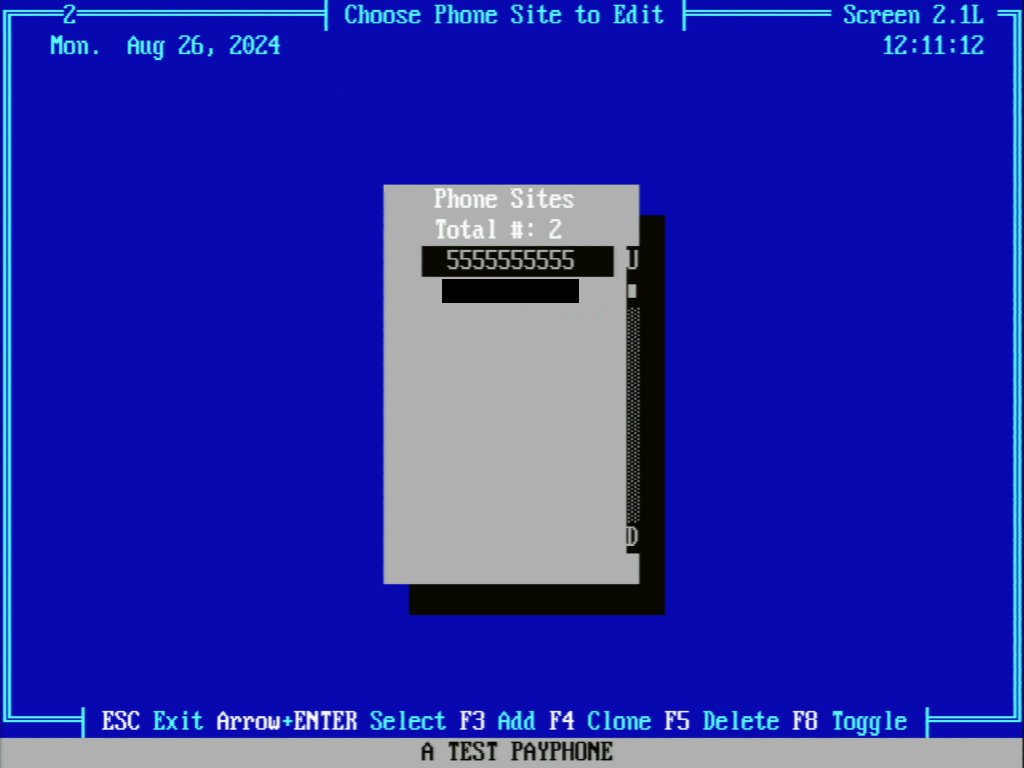
On the resulting Choose Phone Site to Edit screen, press F3 to add a new entry:
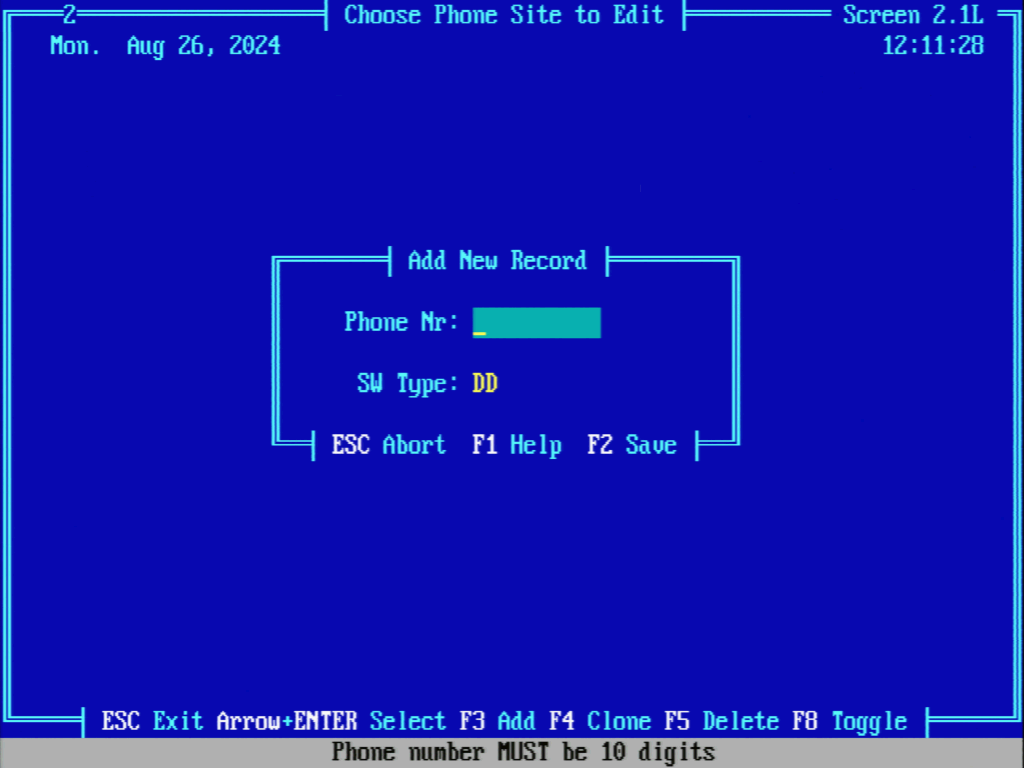
On the Add New Record screen. enter a telephone number in the Phone Nr field. Since we do not originate calls from XNet, this number is really only used as an identifier for a phone to retrieve proper programming. Multiple phones can be set up with the same number, and this number has no impact on the phone’s operation. We will be using 5555555555. Then press F2 to save:
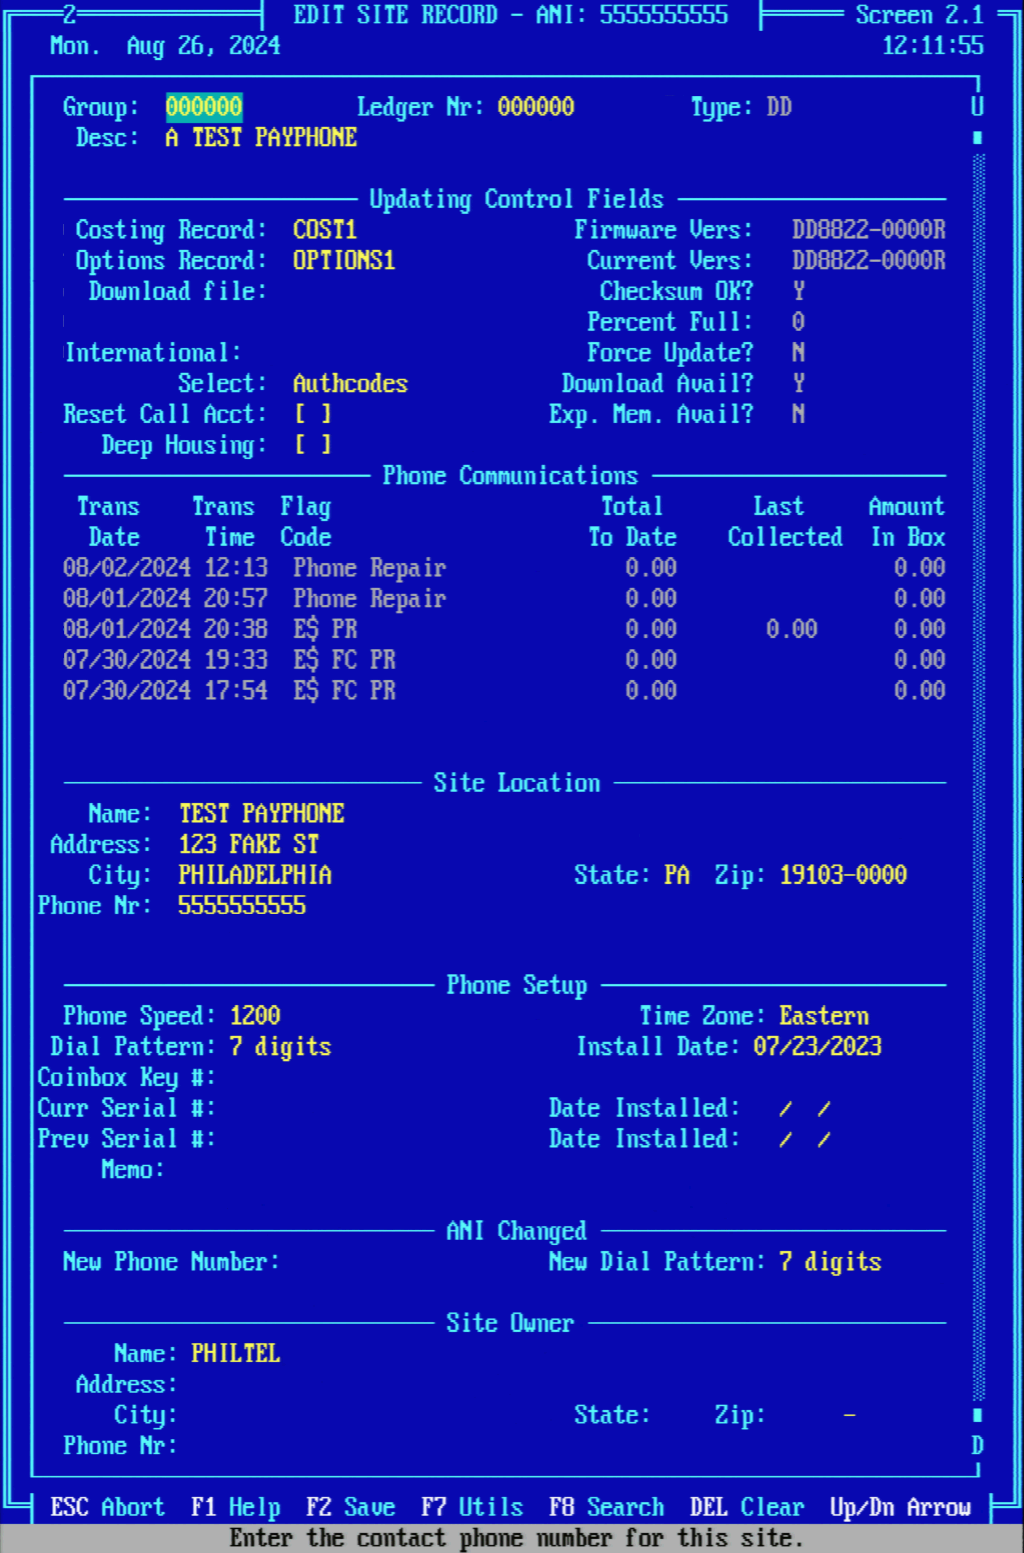
On the resulting Edit Site Record screen, make sure that Costing Record is set to COST1 and Options Record is set to OPTIONS1 which are the records we created earlier. Note that the Phone Setup section of this record has configuration for Phone Speed and Dial Pattern but these only need to be set for outgoing calls from XNet (which we are not using). Other fields in here can be updated as needed but are not required for programming. When done we can press F2 to save.
Modem Status
From the main menu press 5 to access Modems Menu:
In the Modems Menu, press 1 to get to View Modem Status:
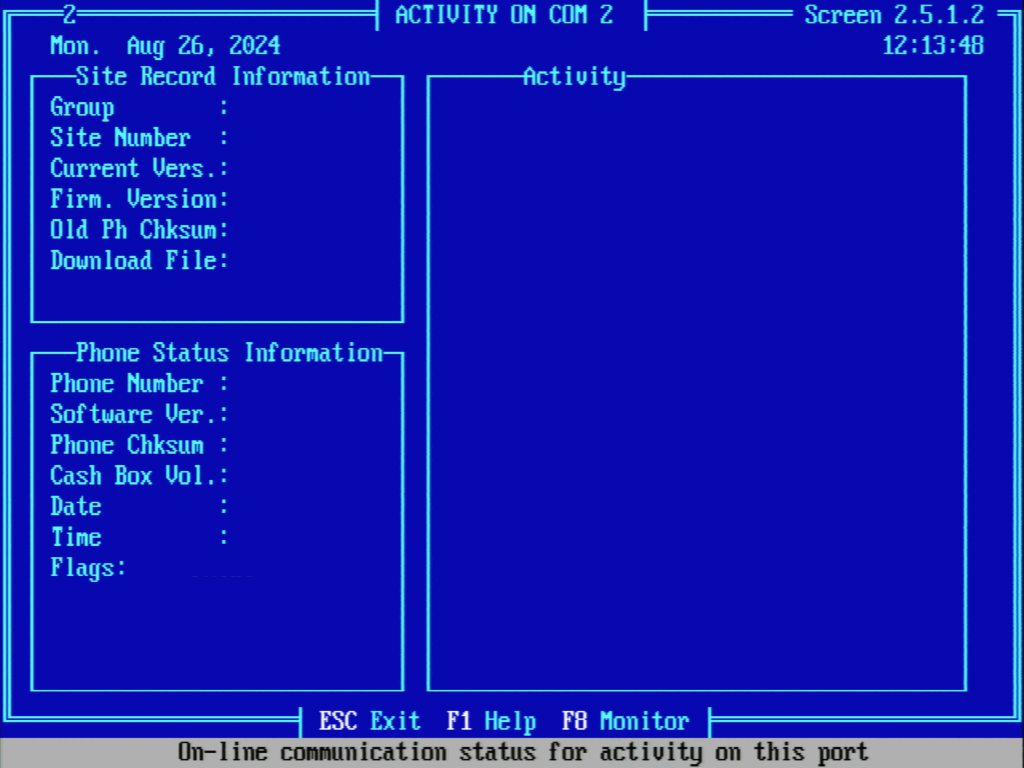
On the View Modem Status page we can see a live view of modem activity:

From here, press SPACE to go to the Activity screen. This screen is useful to keep up in XNet to monitor incoming calls and view programming status.
Conclusion
This is a basic way to set up ExpressNet for Protel phone programming, and it wasn’t nearly as daunting as I thought it was going to be on the surface.
Our current configuration files for ExpressNet are available here.
In the next installment of this series, we will be tackling how to actually program a phone via XNet and all the required infrastructure needed to do so!